How to Train a Z-Image Turbo LoRA Using the Ostris AI Toolkit
Want fast, low-VRAM LoRA training without a complex setup? In this guide, you'll deploy the Ostris AI Toolkit on RunPod, build a dataset, and configure Z-Image Turbo to train a concept in about an hour. You'll learn how to preview progress, export checkpoints, and plug your new LoRA into your favorite workflow.
What You'll Learn
This guide shows you how to train a Z-Image Turbo LoRA using the Ostris AI Toolkit, from launching a RunPod GPU to configuring datasets, prompts, and the Z-Image Turbo training adapter. It covers creating a job, using sample previews, and completing a 3,000-step run on an RTX 5090 in about an hour. Finally, you'll review outputs, download checkpoints, and load the LoRA into your workflow, with notes on testing a v2 adapter for potential gains.
How to Train a Z-Image Turbo LoRA Using the Ostris AI Toolkit
Z-Image Turbo is an exciting new image model from Alibaba that's generating buzz in the AI community.
What makes it particularly appealing is its ability to run efficiently on lower-power GPUs while still producing impressive results.
While the open-source community is eagerly awaiting the base model release—which will likely unlock even better results for training LoRAs and checkpoints—you don't have to wait to start experimenting.
Here's how you can train a LoRA with the distilled model today.
Prefer to watch? Check out the full video tutorial on YouTube for a step-by-step walkthrough.
Setting Up Your Environment on RunPod
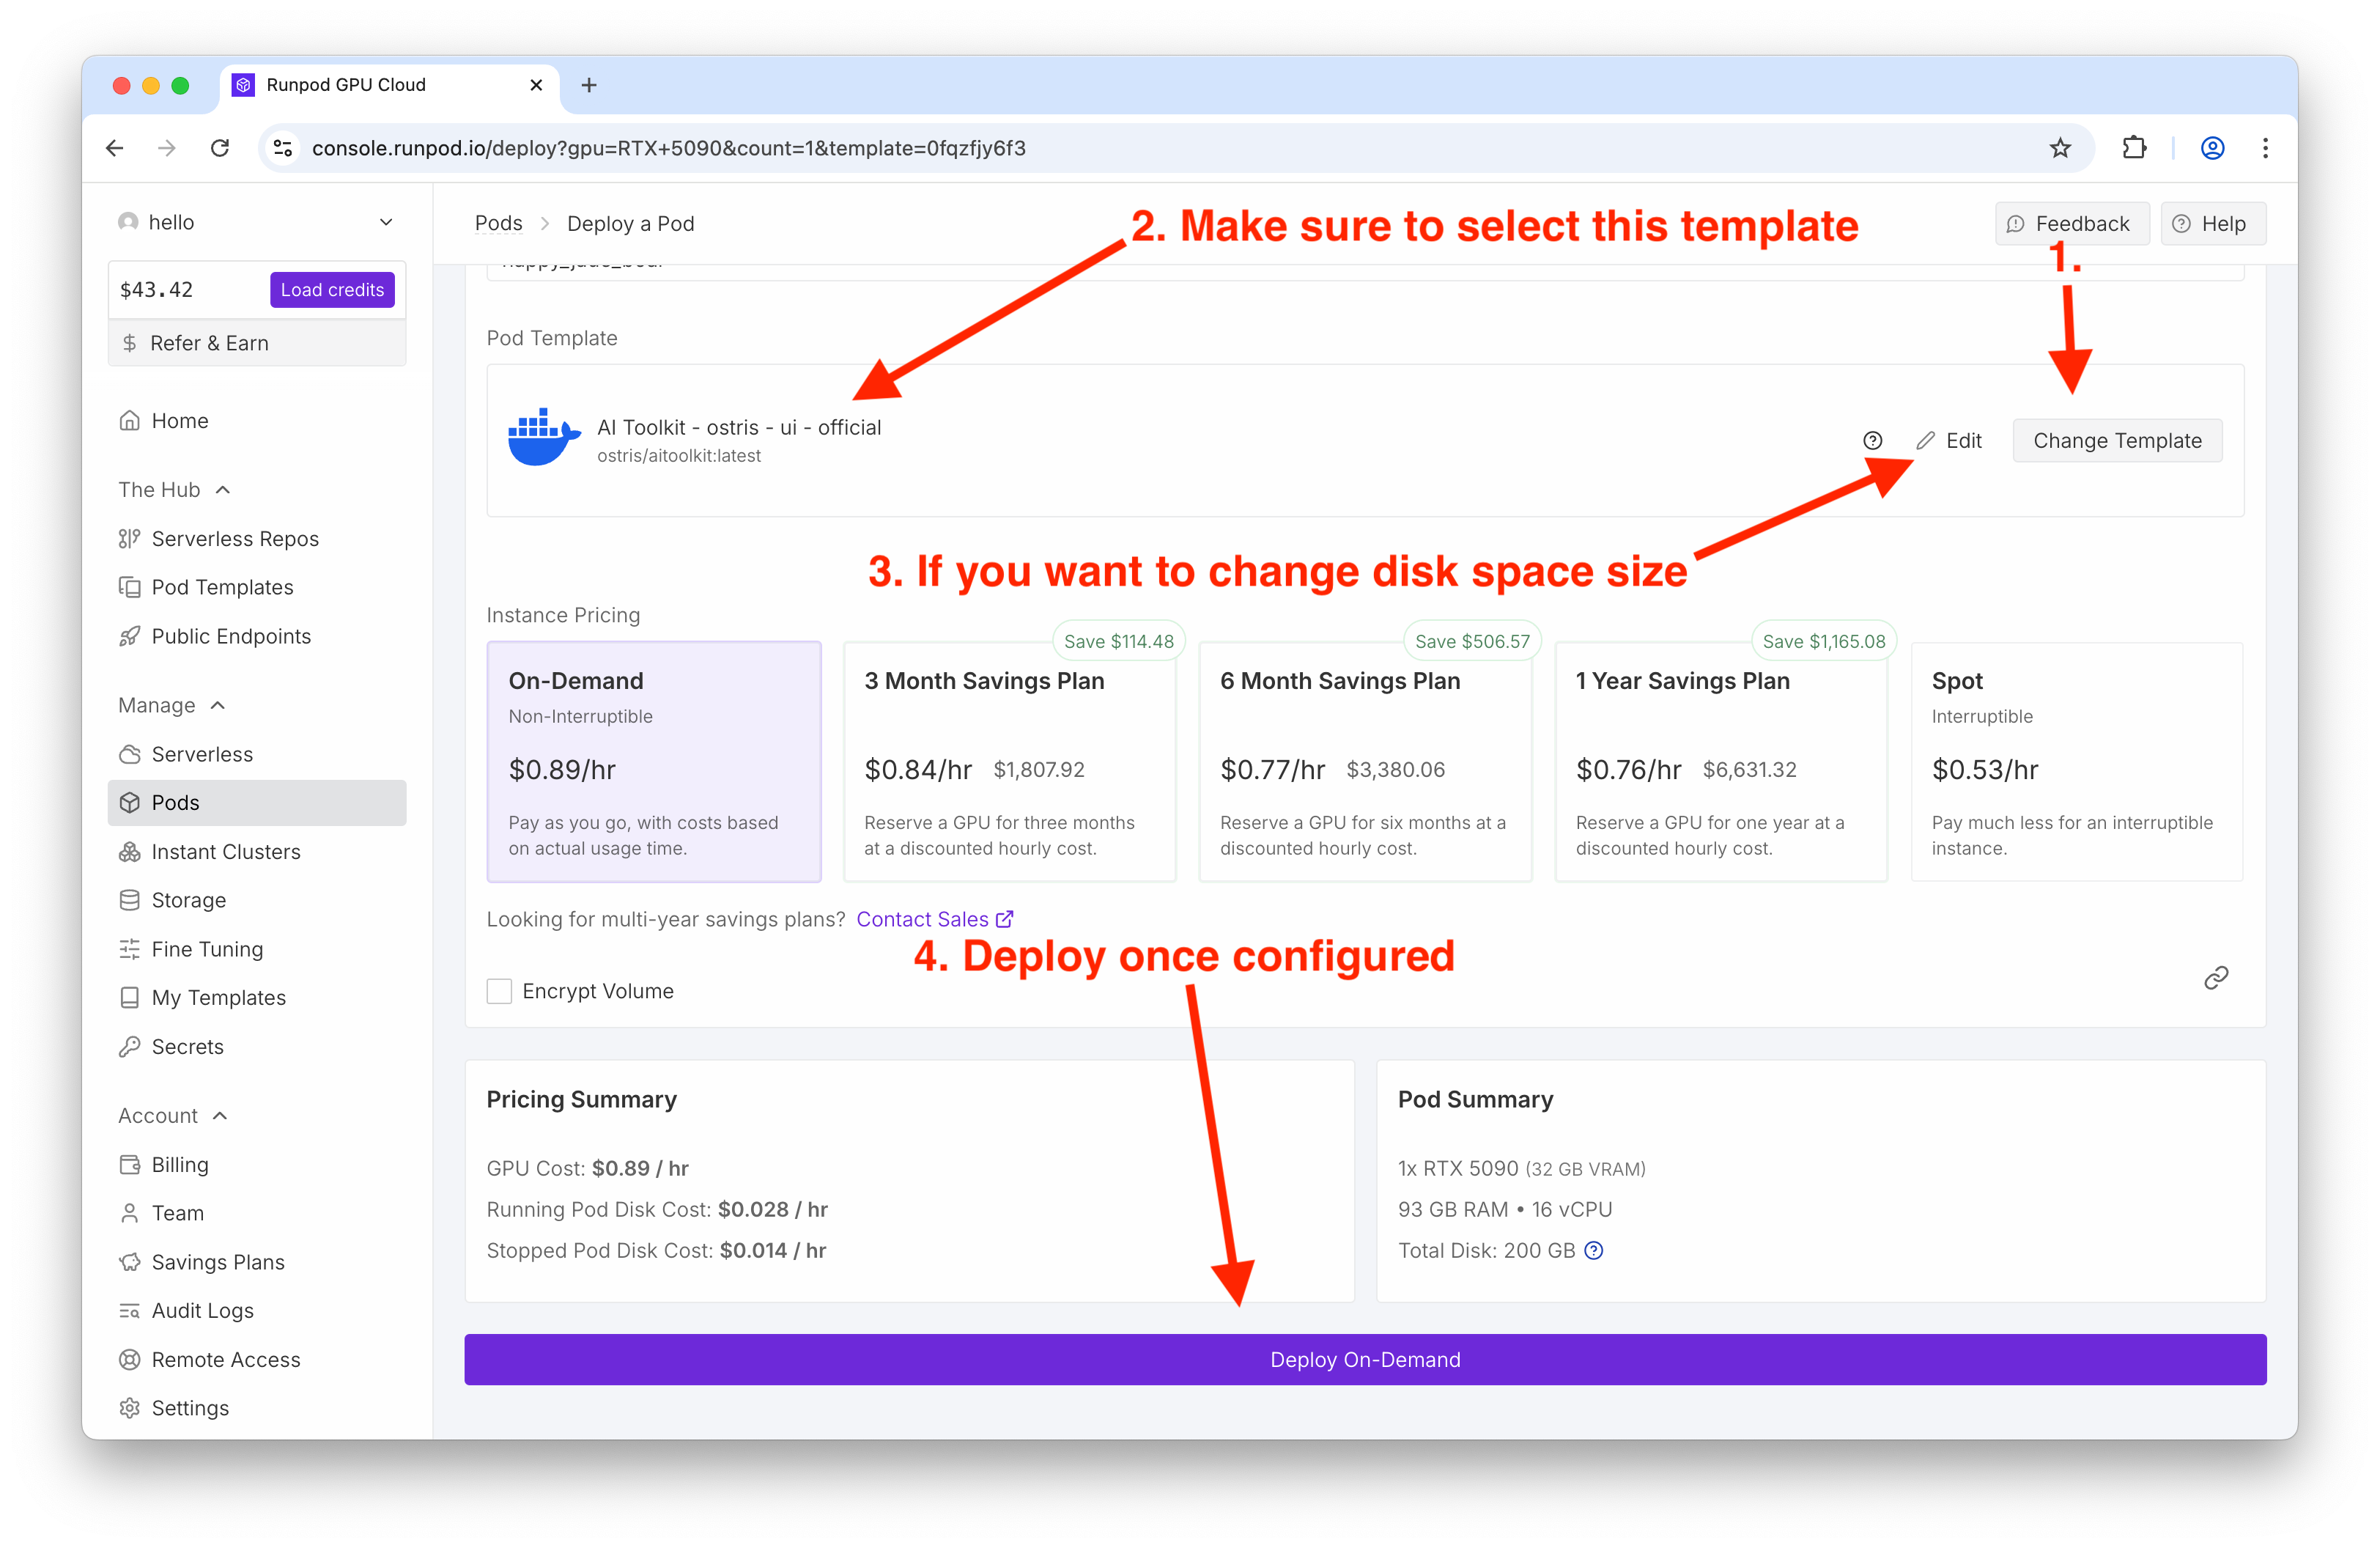
To get started, head over to RunPod and deploy a GPU instance. For this tutorial, I'm using an RTX 5090, which provides sufficient power for training this model.
The key step here is selecting the right template. Search for "Ostris" in the template search bar and select the Ostris AI Toolkit (latest version).
Make sure you have adequate disk space allocated—the default settings should work fine for most use cases.
Once everything looks good, click Deploy on Demand.
Creating Your Dataset
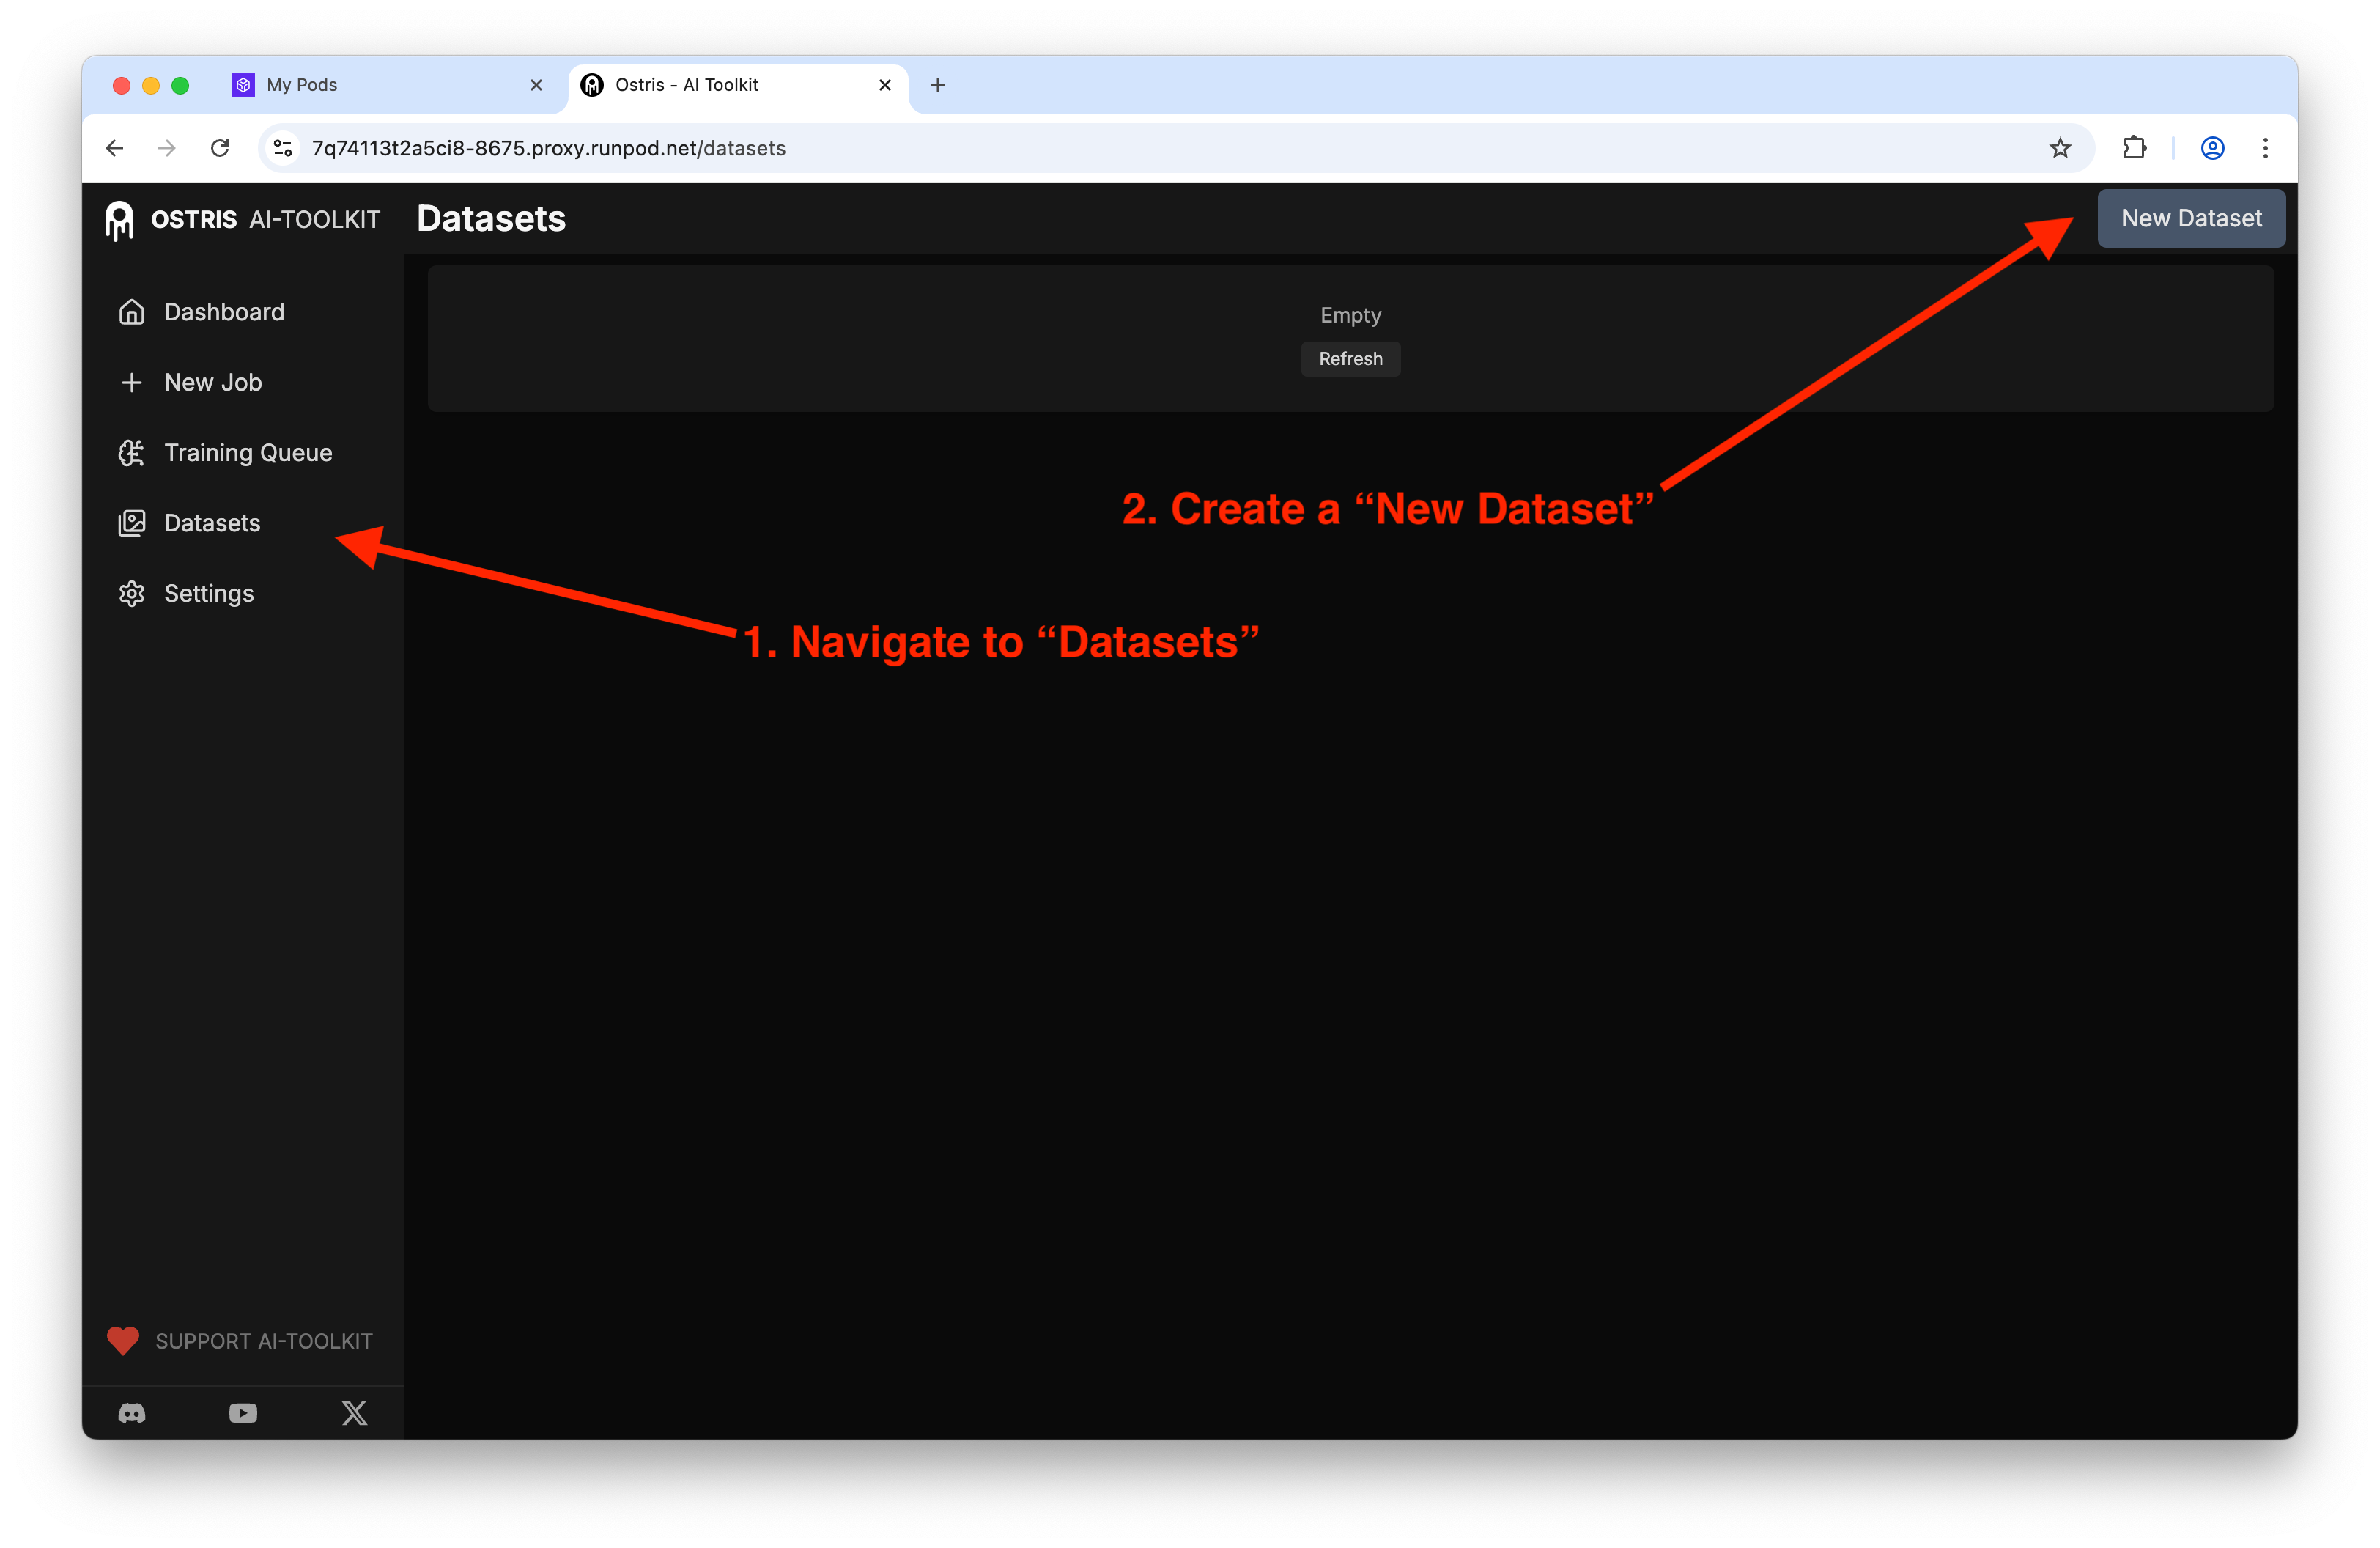
Once the Ostris AI Toolkit loads, navigate to Datasets and click New Dataset.
Give your dataset a descriptive name—for this example, I named mine "Teacher" (with a "3" as the second-to-last character for my own organization). This helps train the model on a new concept.
Next, upload your training images. I'm reusing nine images that I previously used to train a Flux LoRA.

You have the option to add captions to your dataset, but for this tutorial, I'm skipping that step.
Configuring Your Training Job
Now it's time to create a new training job. Set your training name and trigger word—these will be important for invoking your LoRA later.
For the model architecture, select Z-Image Turbo with the training adapter.
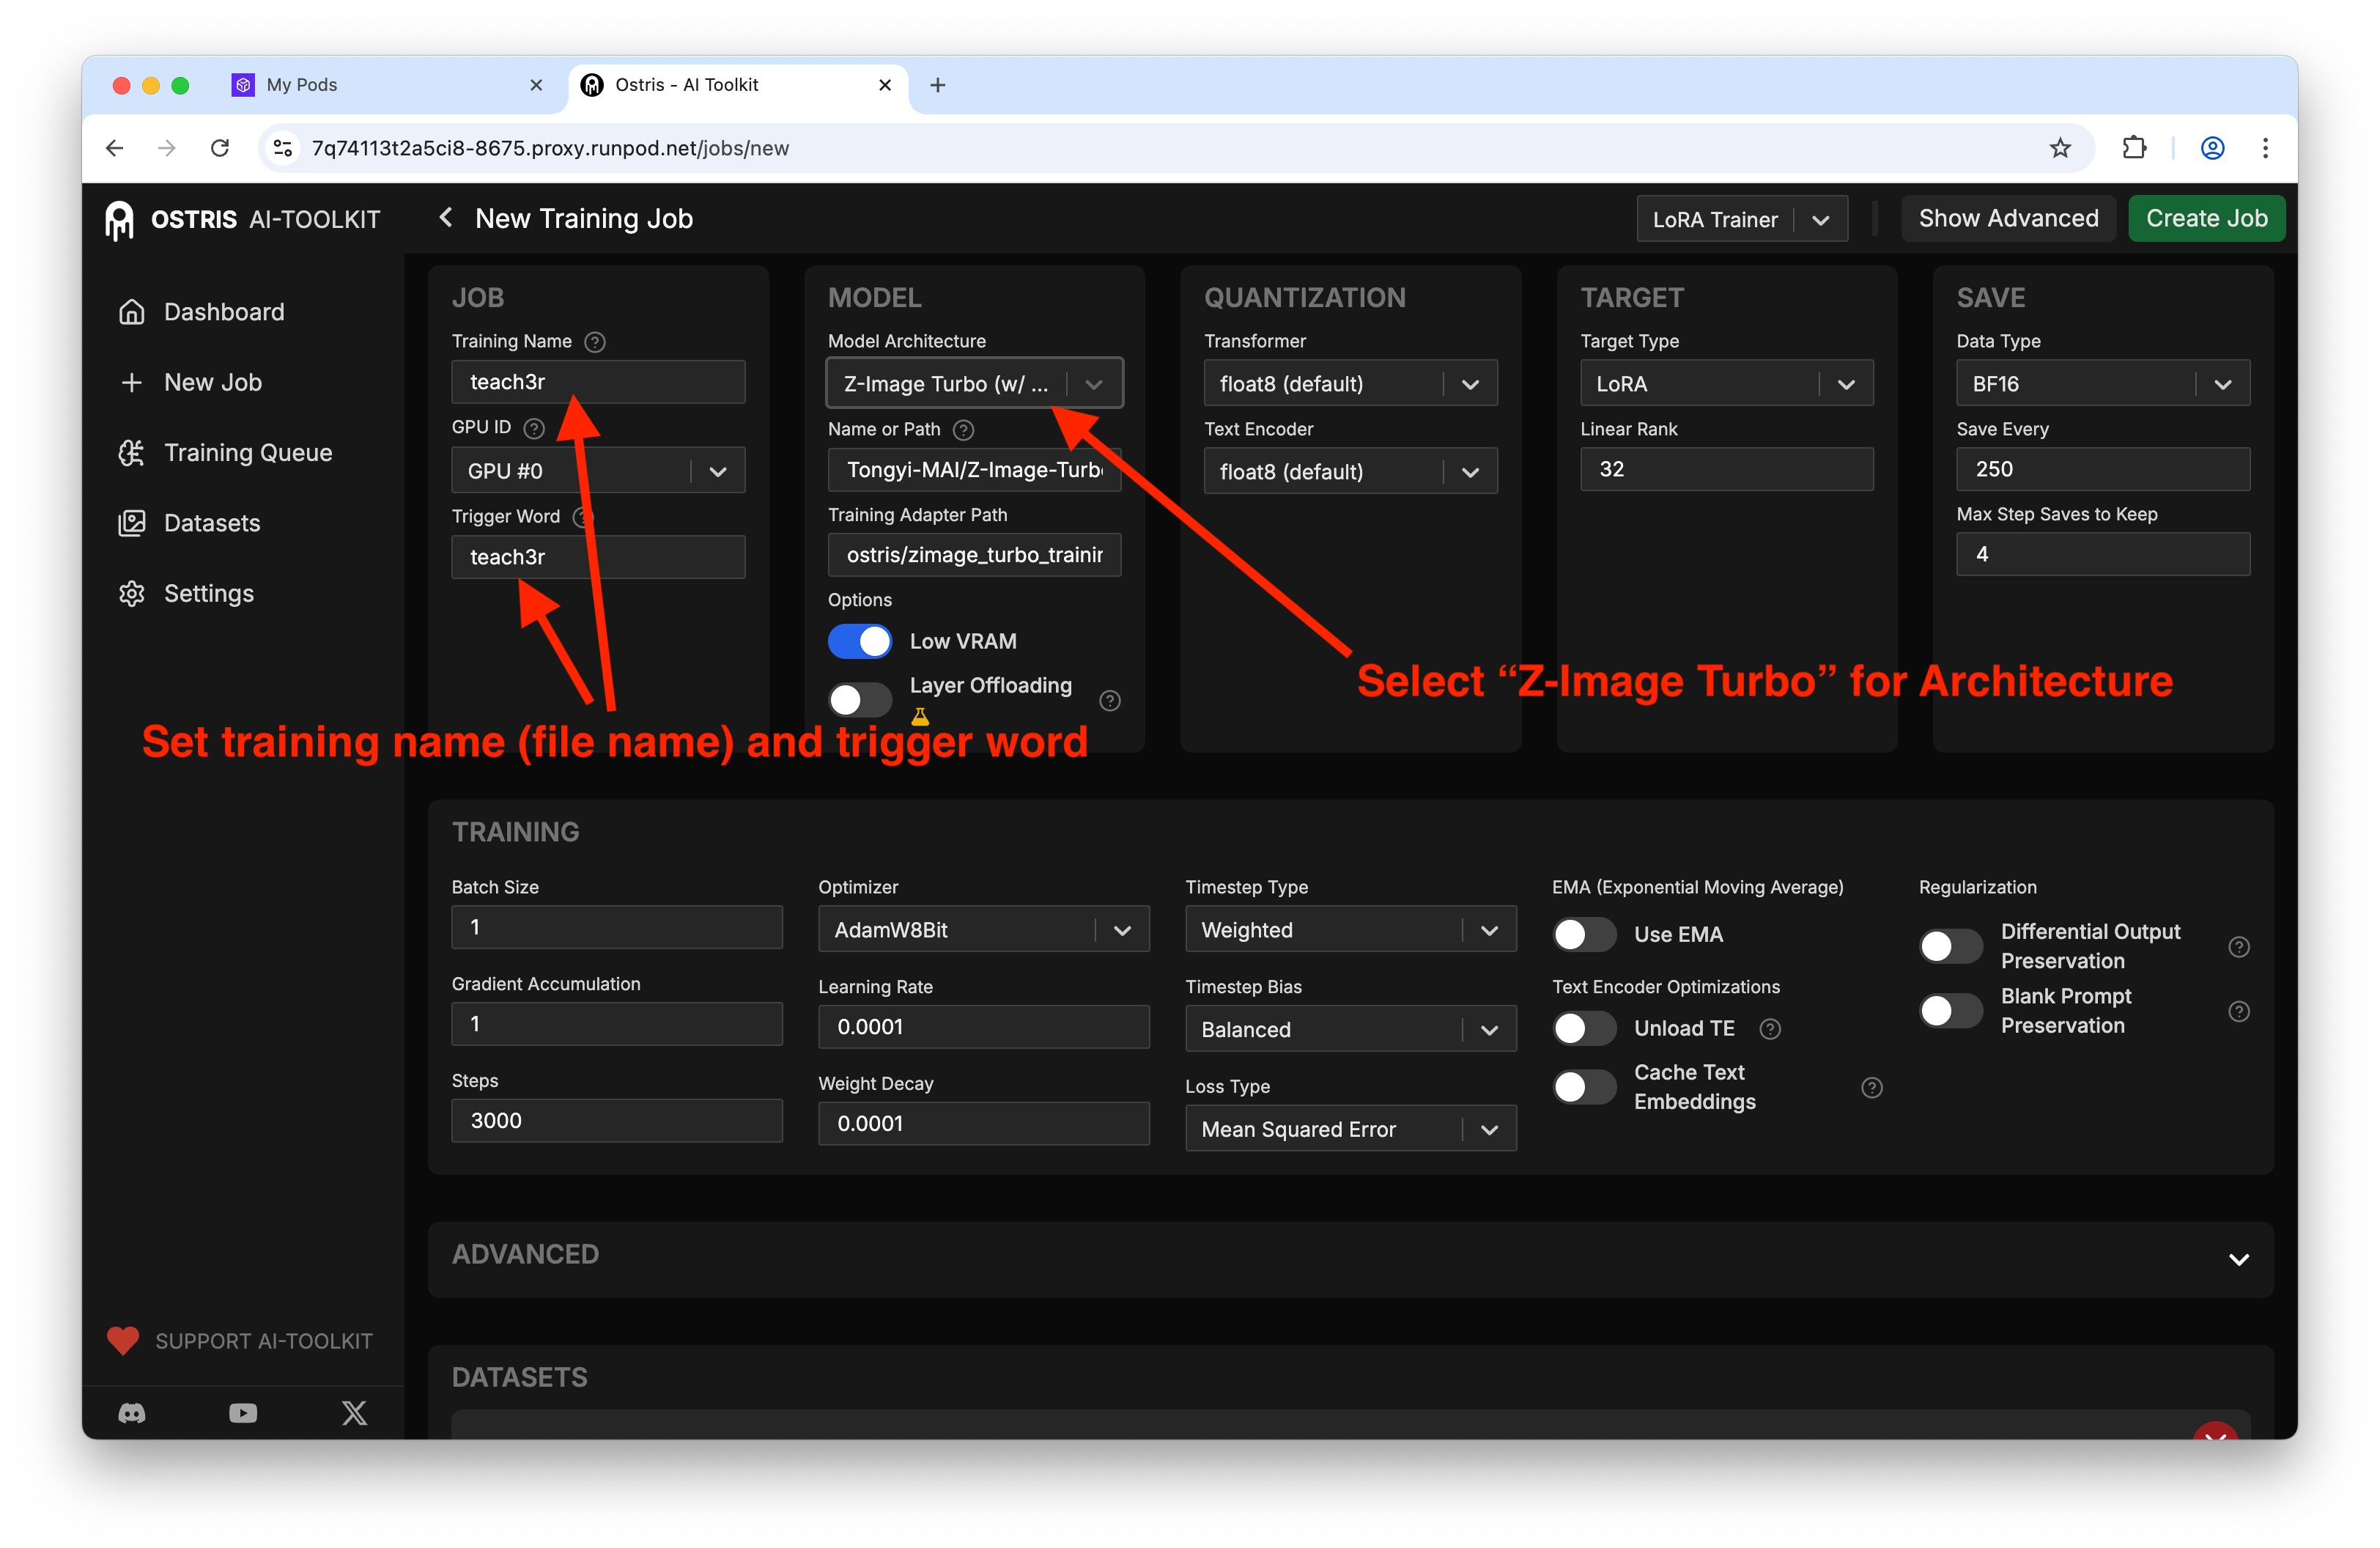
You'll notice the training adapter path displayed.
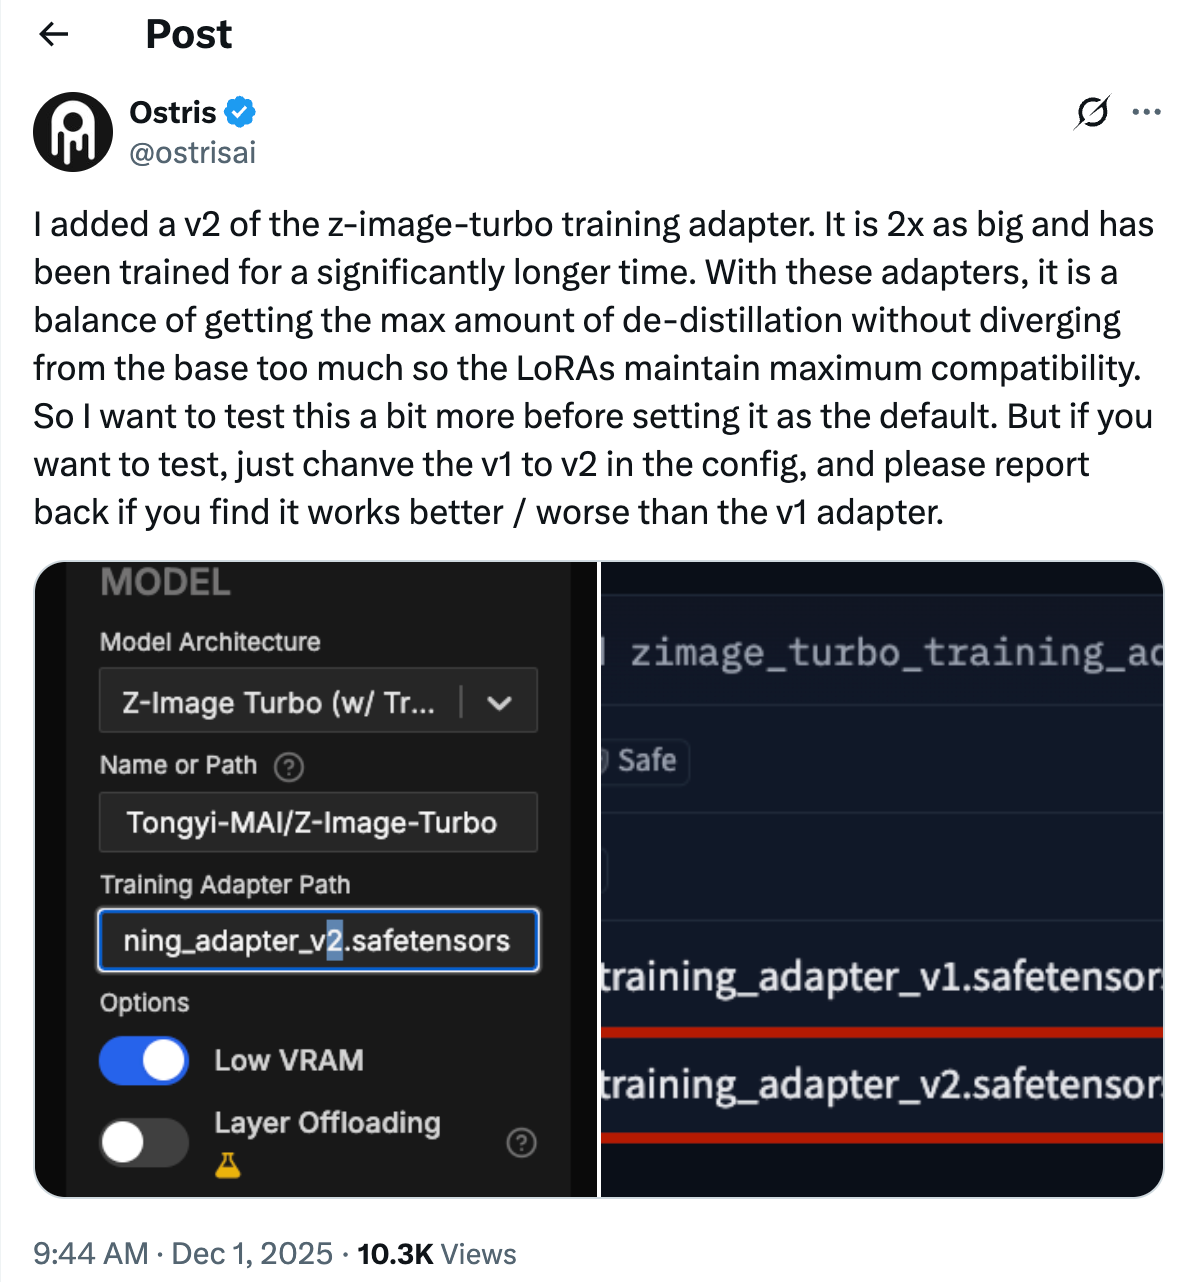
Worth noting: the creator of this application mentioned they're testing a new training adapter. If you want to experiment with it in the coming weeks, simply change the path from "V1" to "V2."
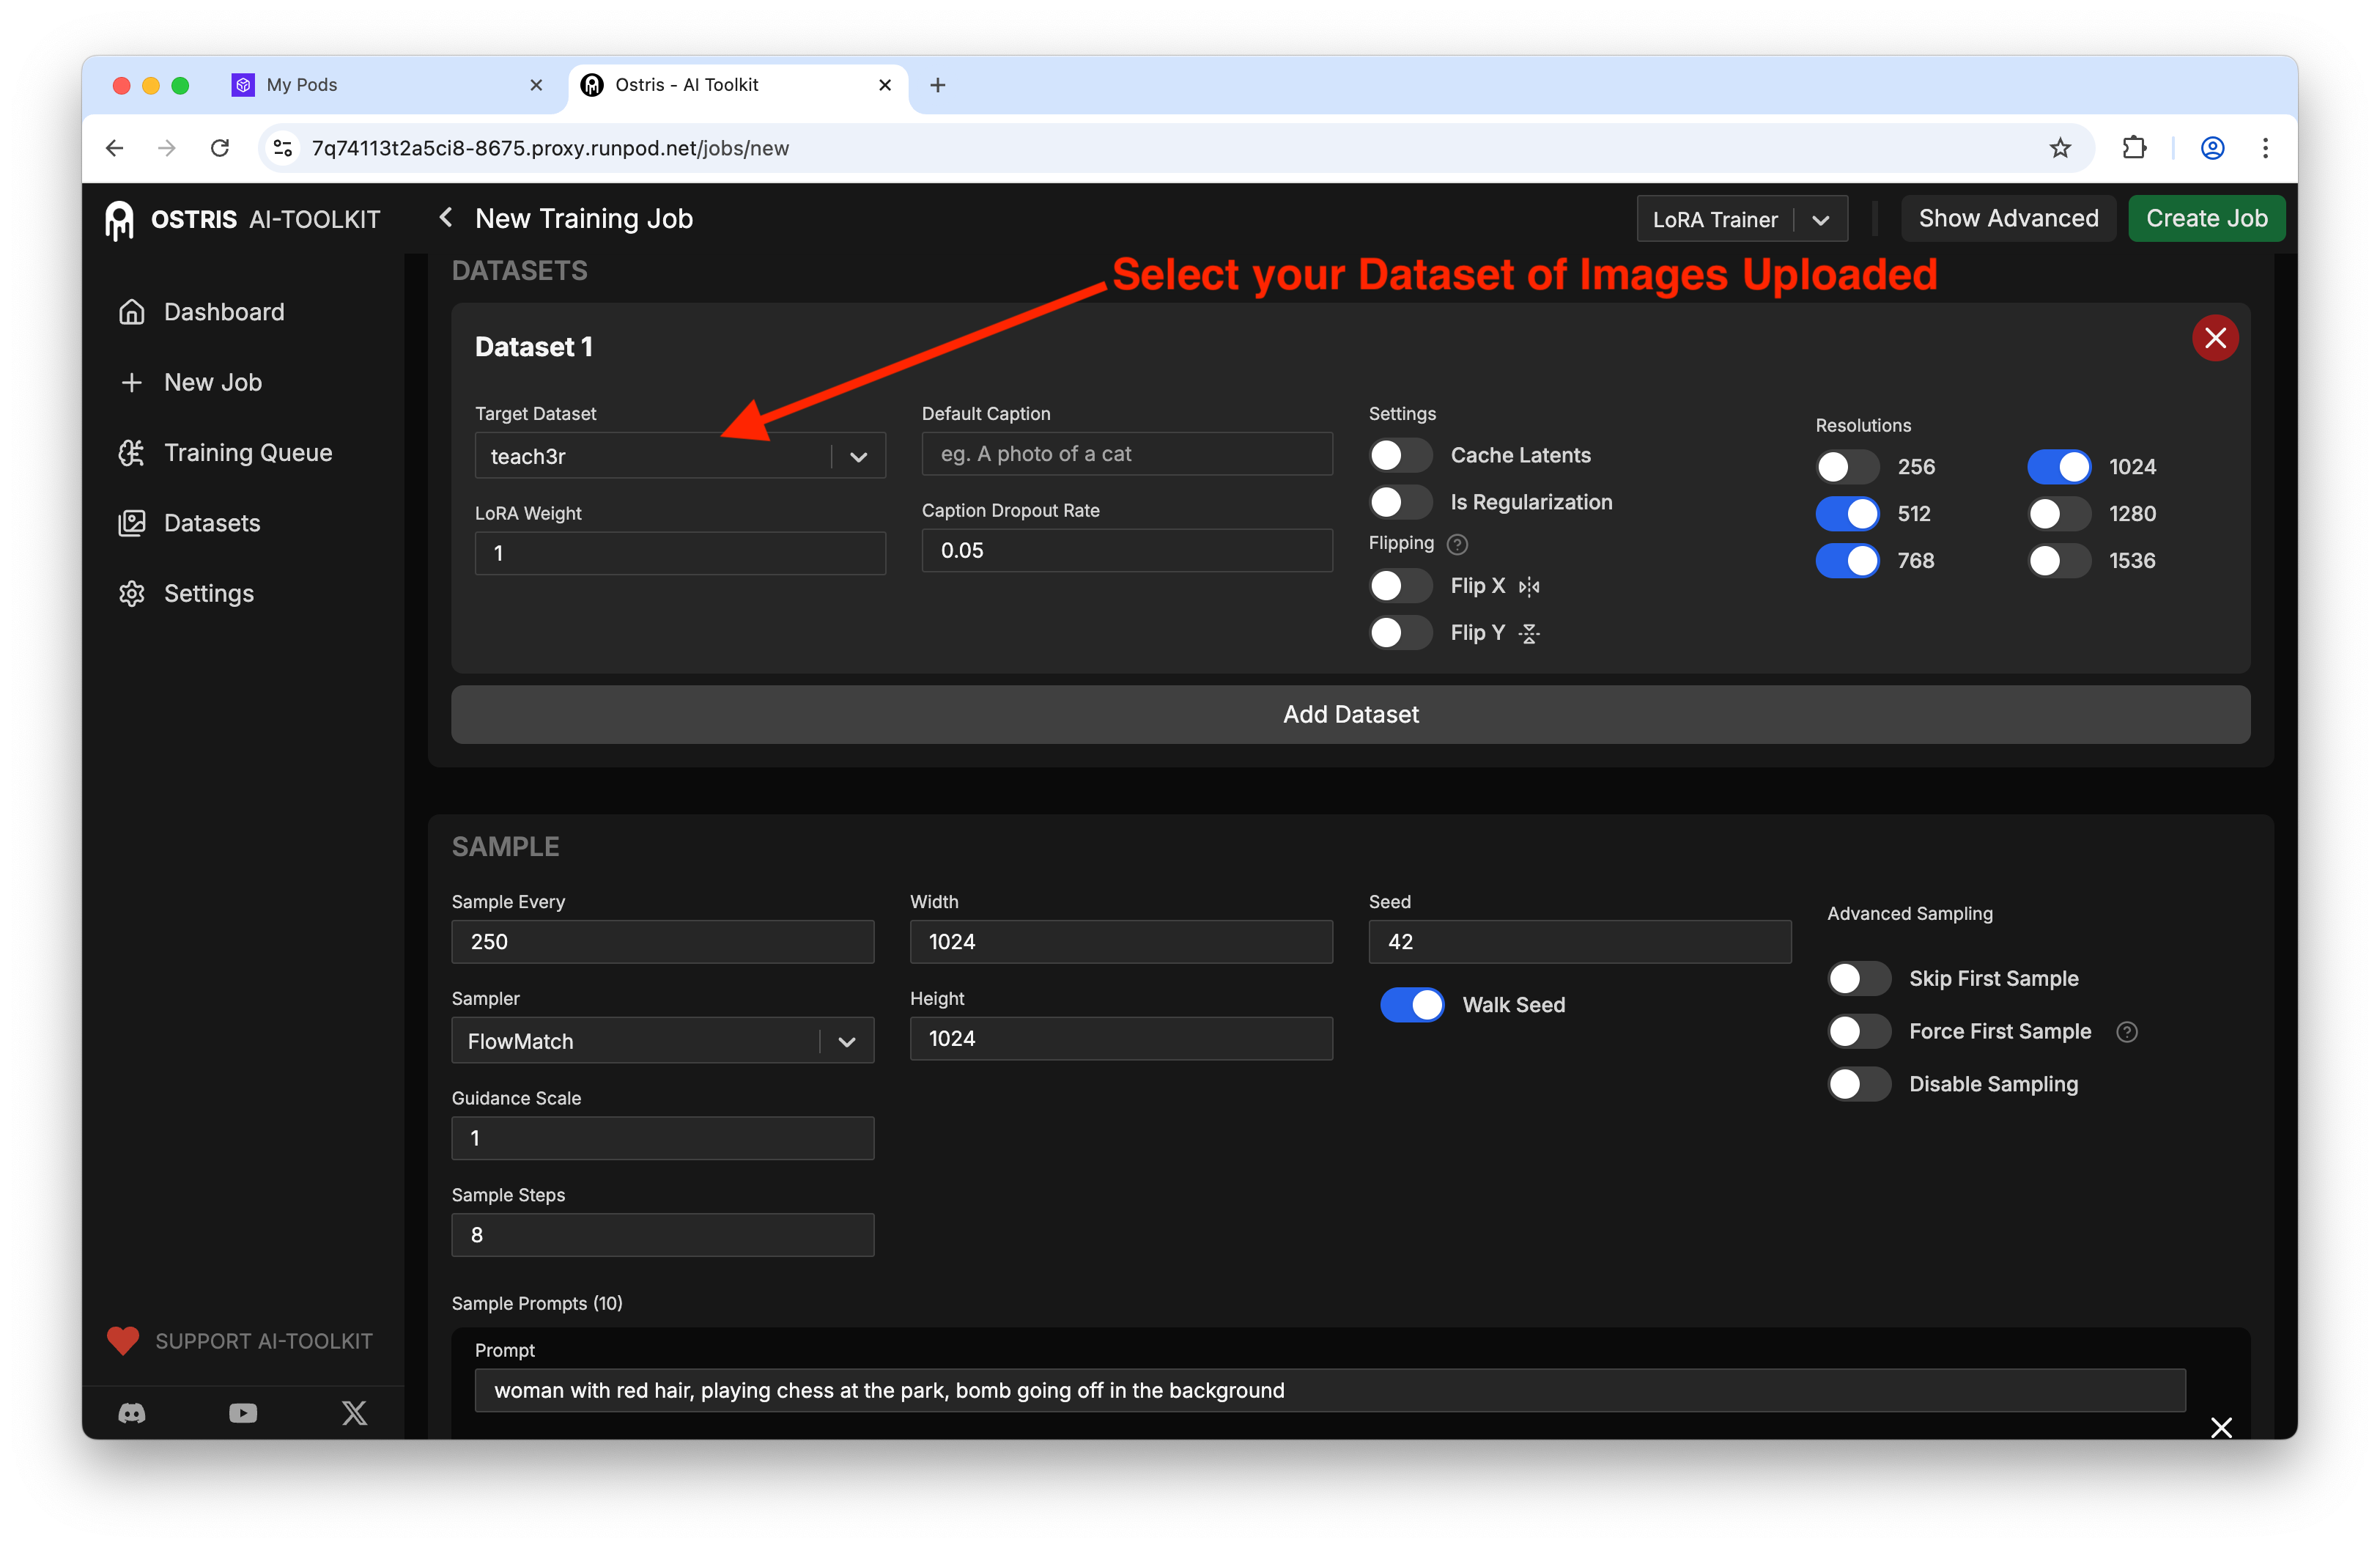
Under datasets, select the target dataset you just created:
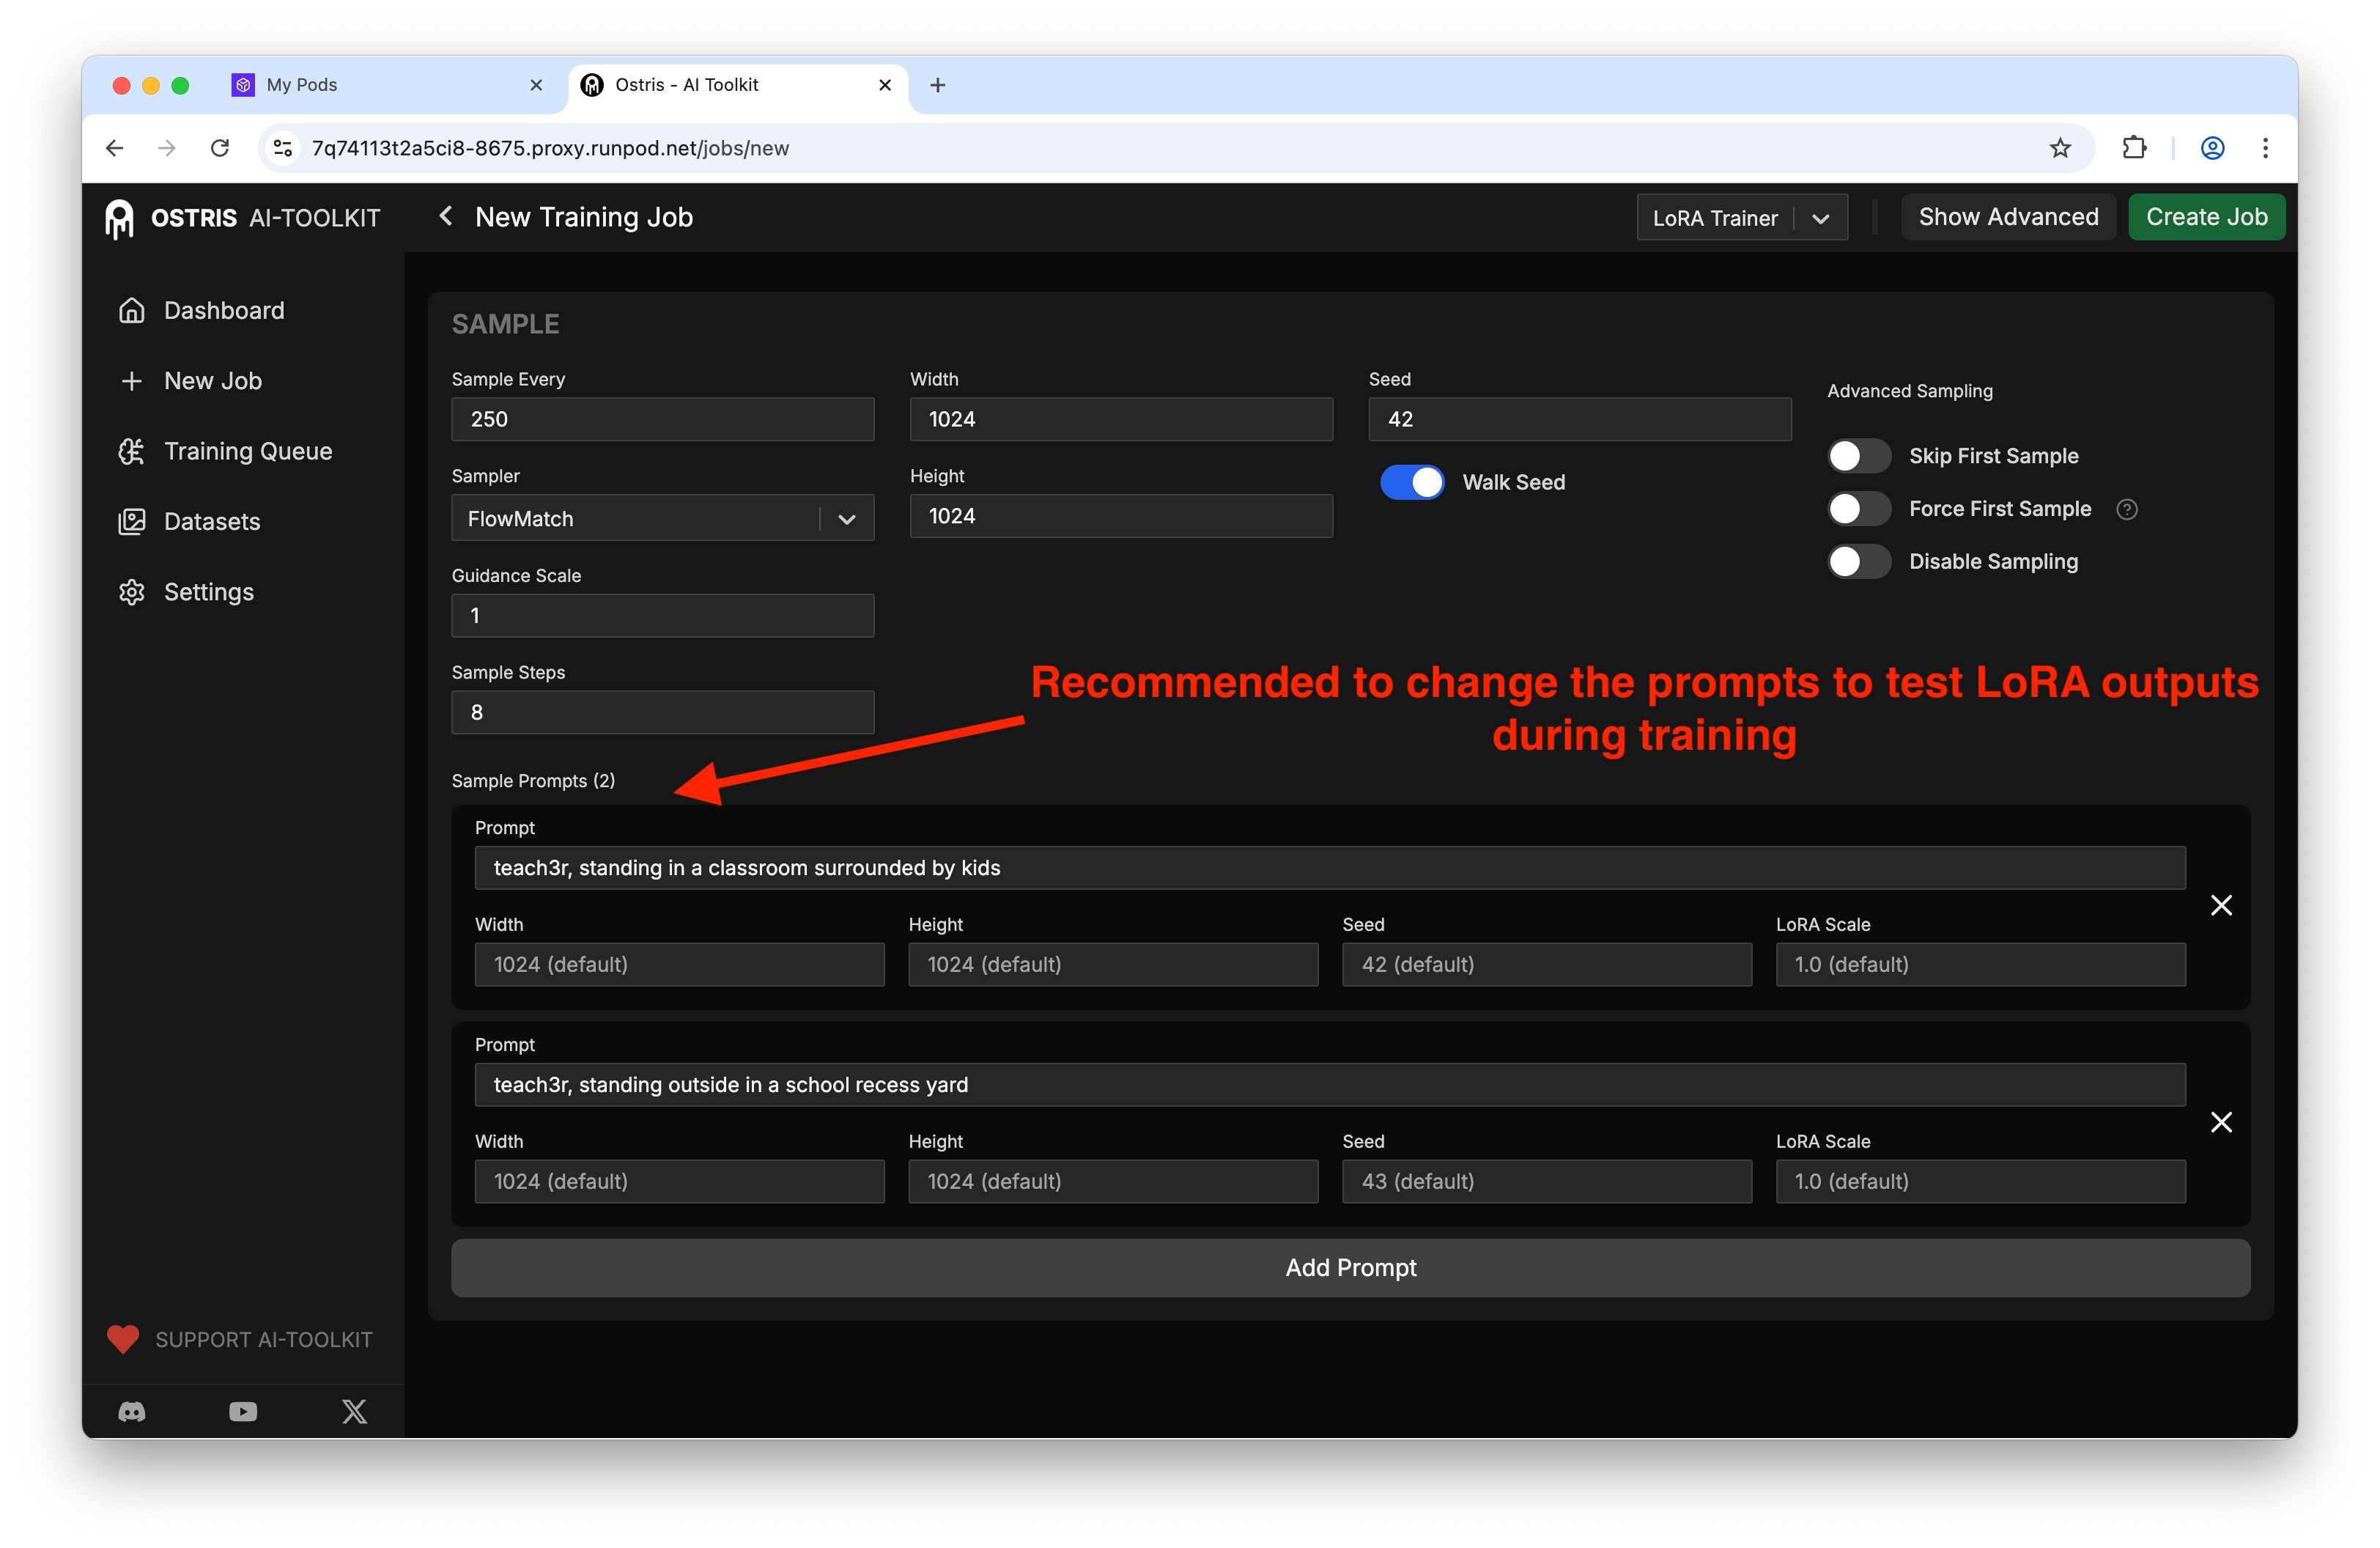
You can also configure sample prompts that will generate preview images during training so you can monitor progress:
Starting the Training Process
With everything configured, click Create Job. Navigate to the Training Queue to see your job listed. Press Play, then click Start to begin the training process.
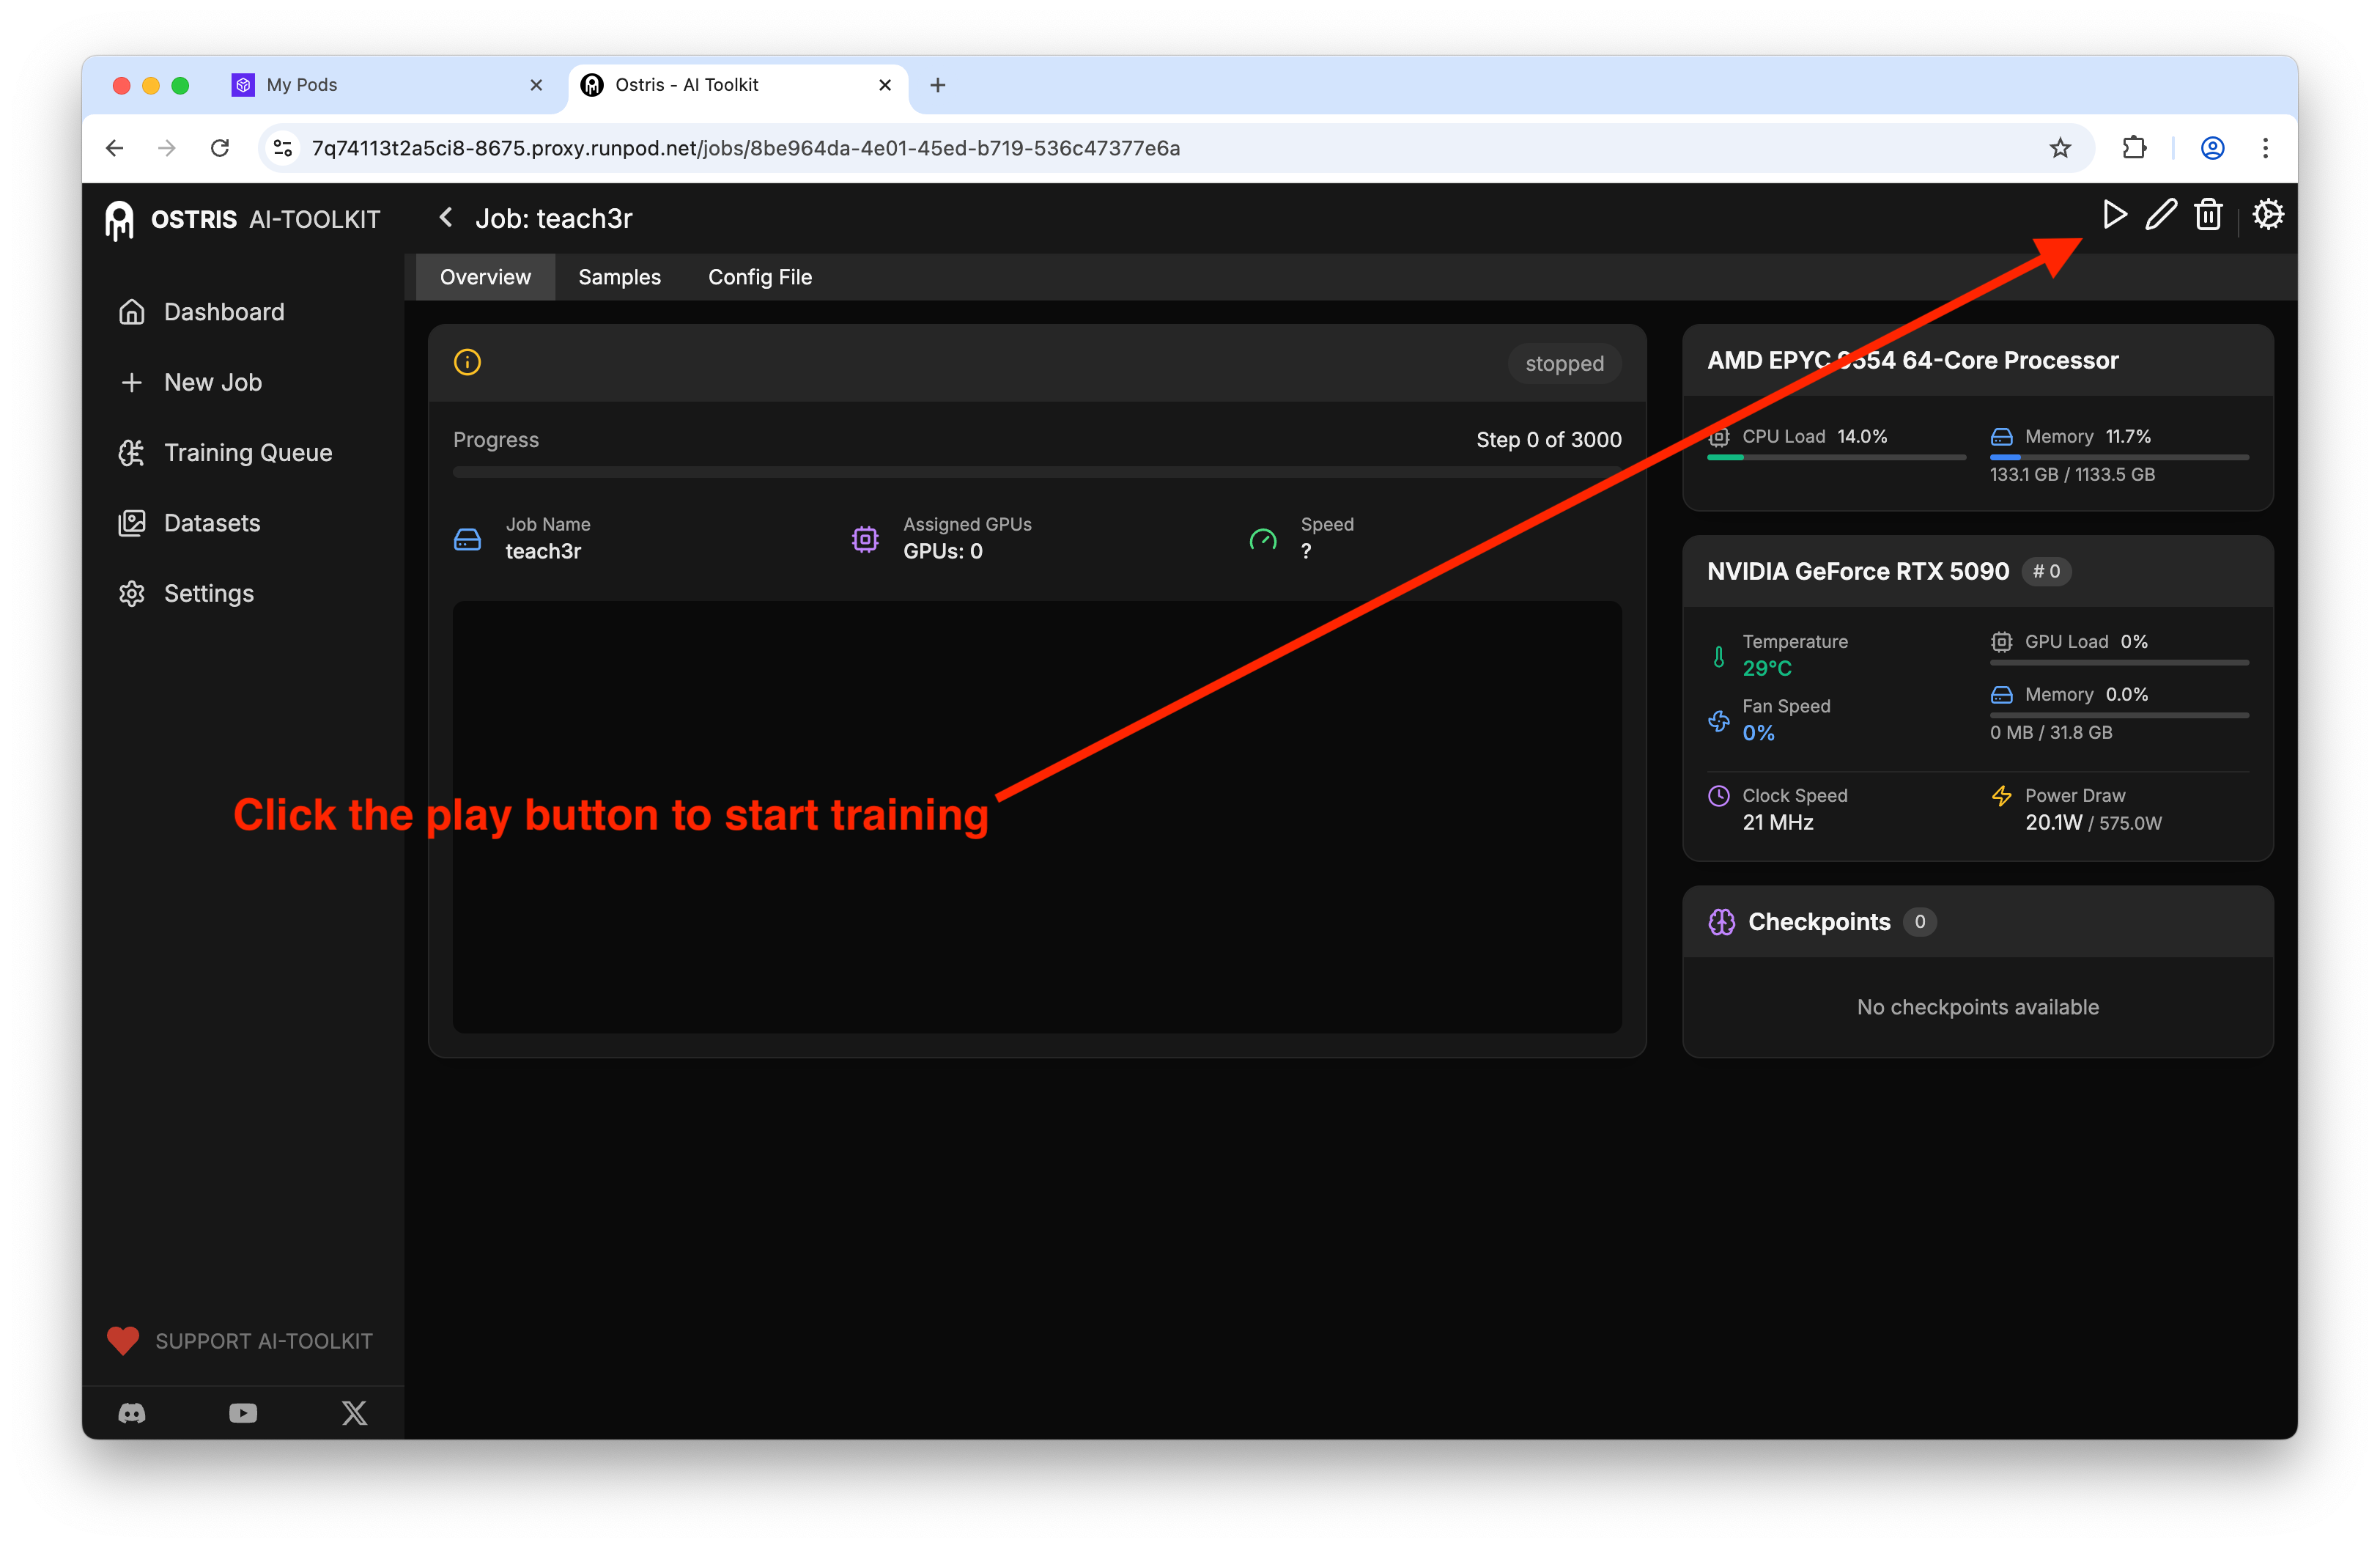
With an RTX 5090, expect roughly an hour to generate a LoRA at 3,000 steps using the default settings.
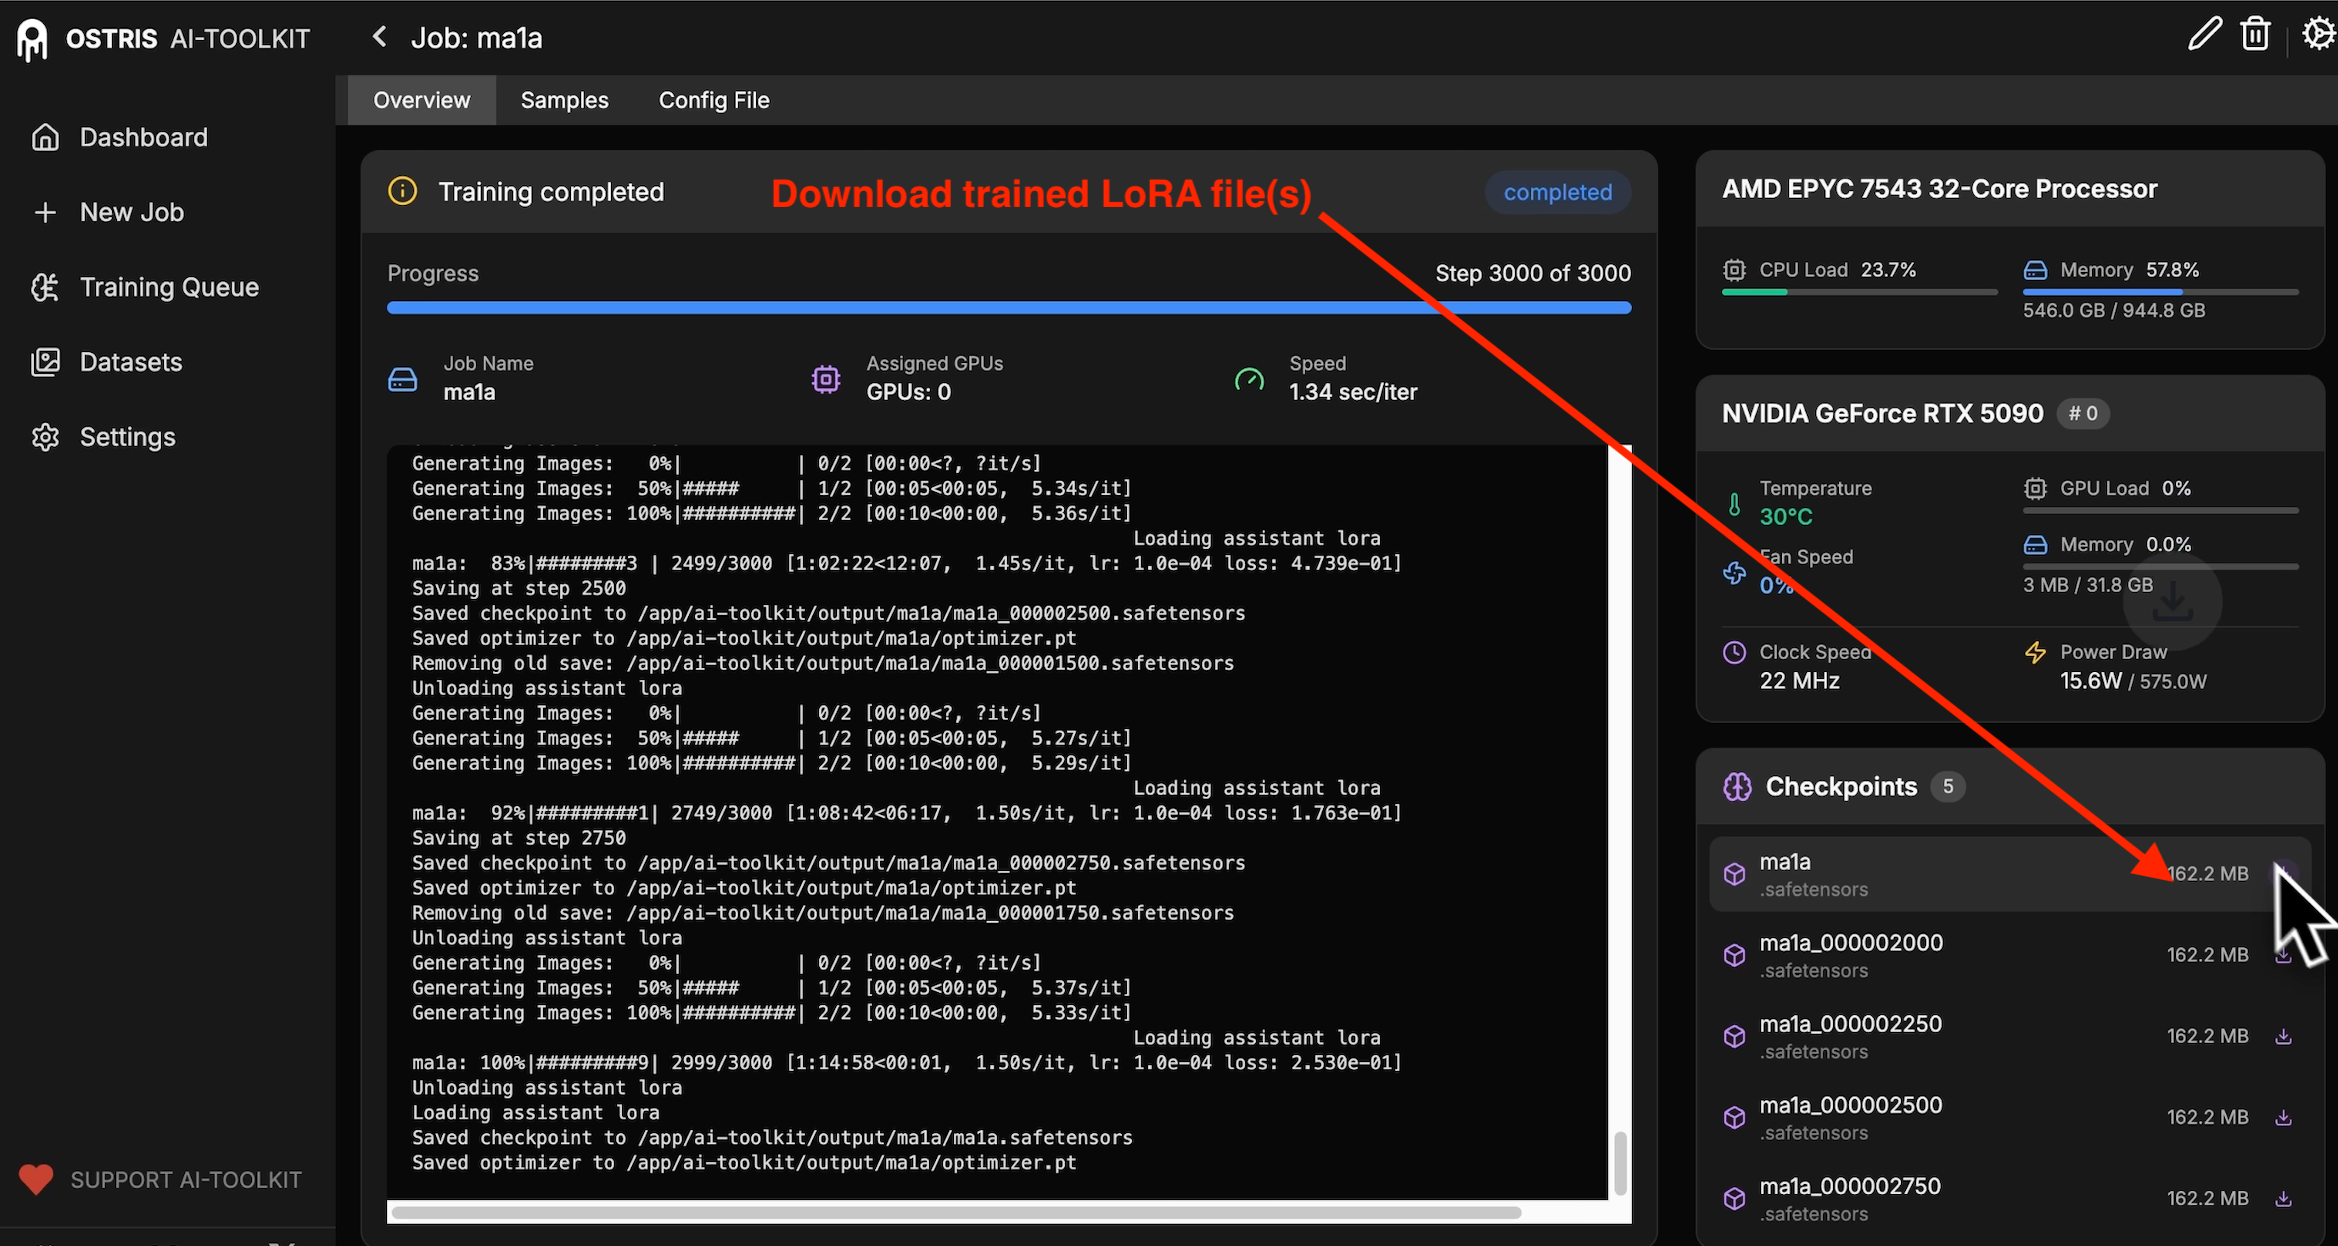
Reviewing Your Results
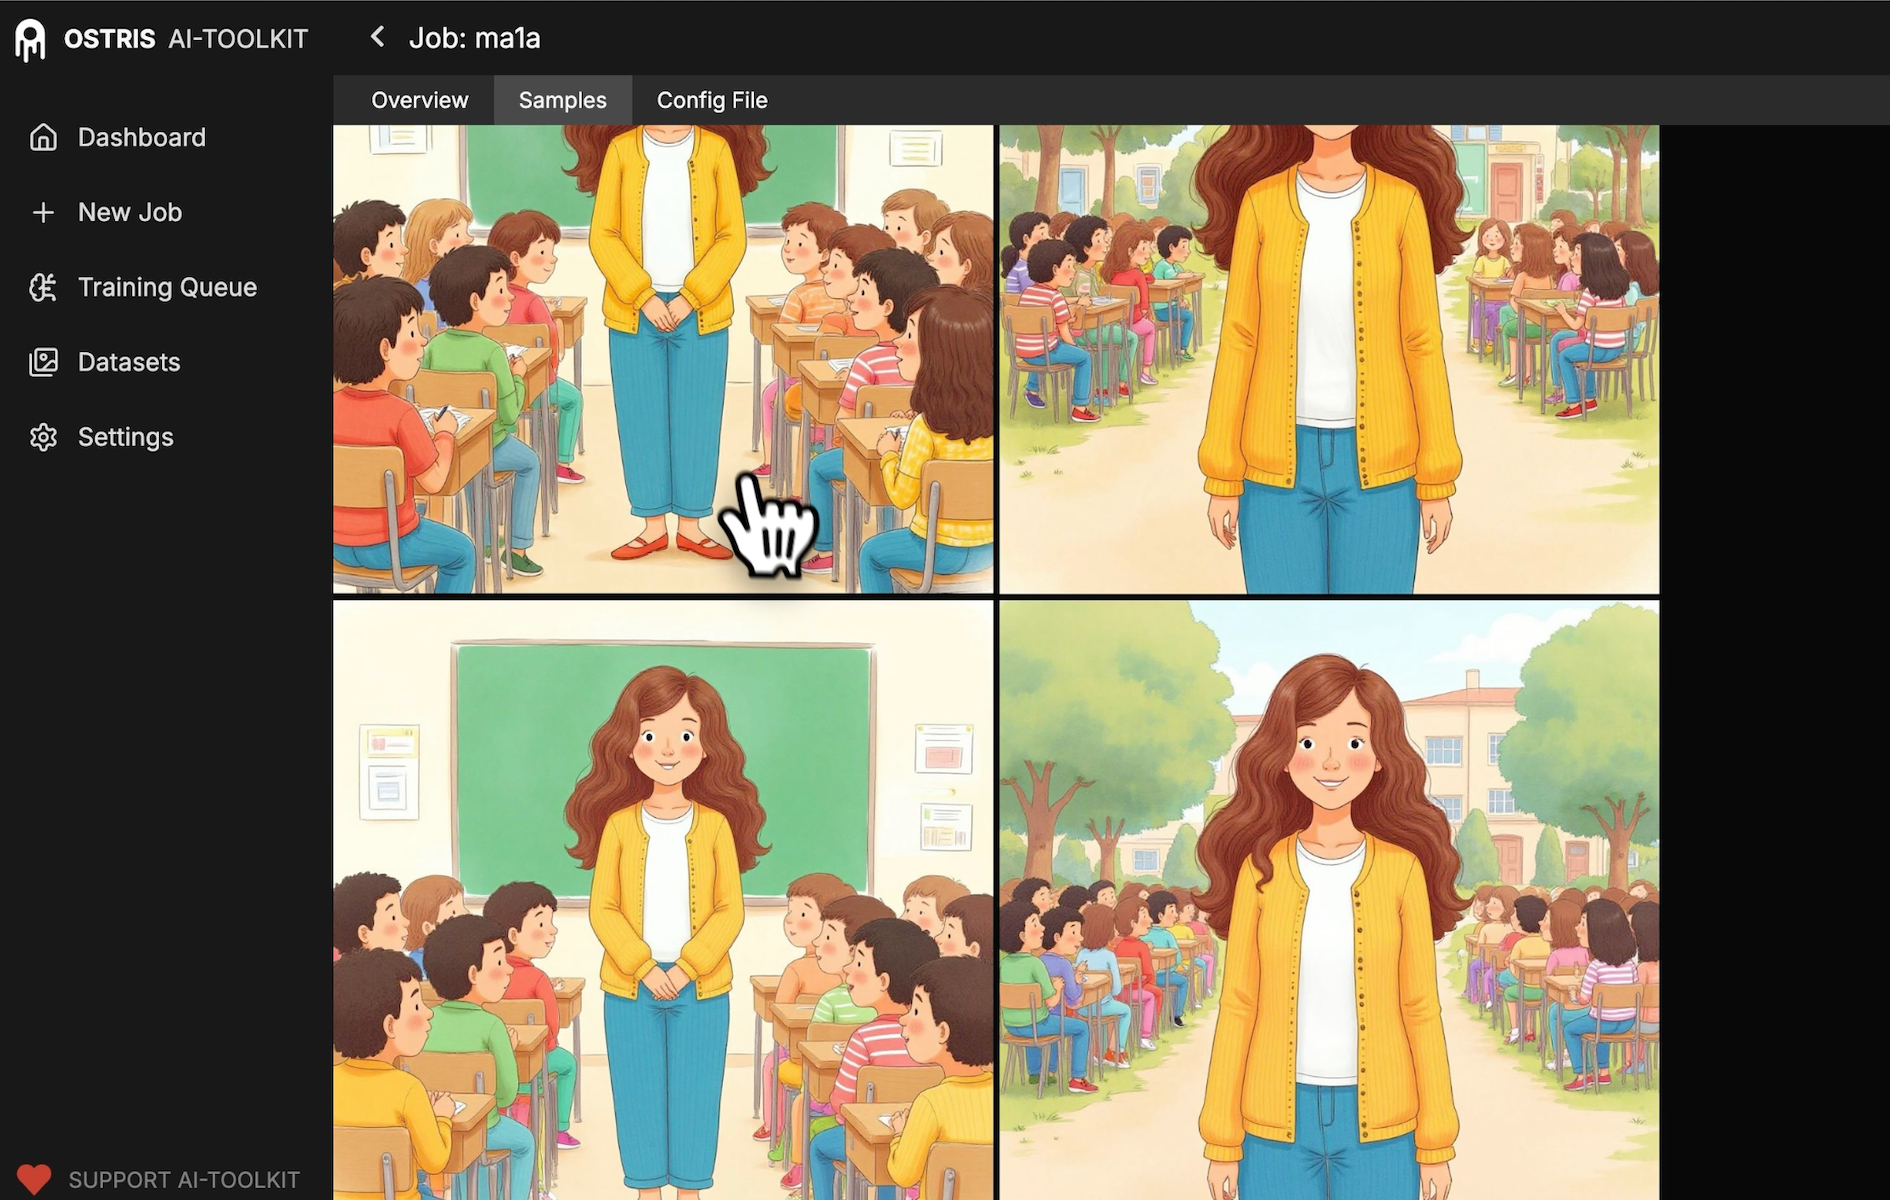
Once training completes, click on Samples to see how the model learned your concept over time. You'll see the progression from the original prompts—where the LoRA hasn't taken effect yet—to later samples where the character gradually morphs into your trained subject.
To download your trained LoRA, go to Overview, then navigate to Checkpoints. Download the latest checkpoint file to use in your workflows.
Using Your Trained LoRA
Once downloaded, you can load the LoRA into your preferred workflow. In my testing, I used a prompt like "a schoolteacher shooting a basketball and smiling" with the trained LoRA, and the output looked great (still a few oddities like the door in the background - nothing a little inpainting can't fix).
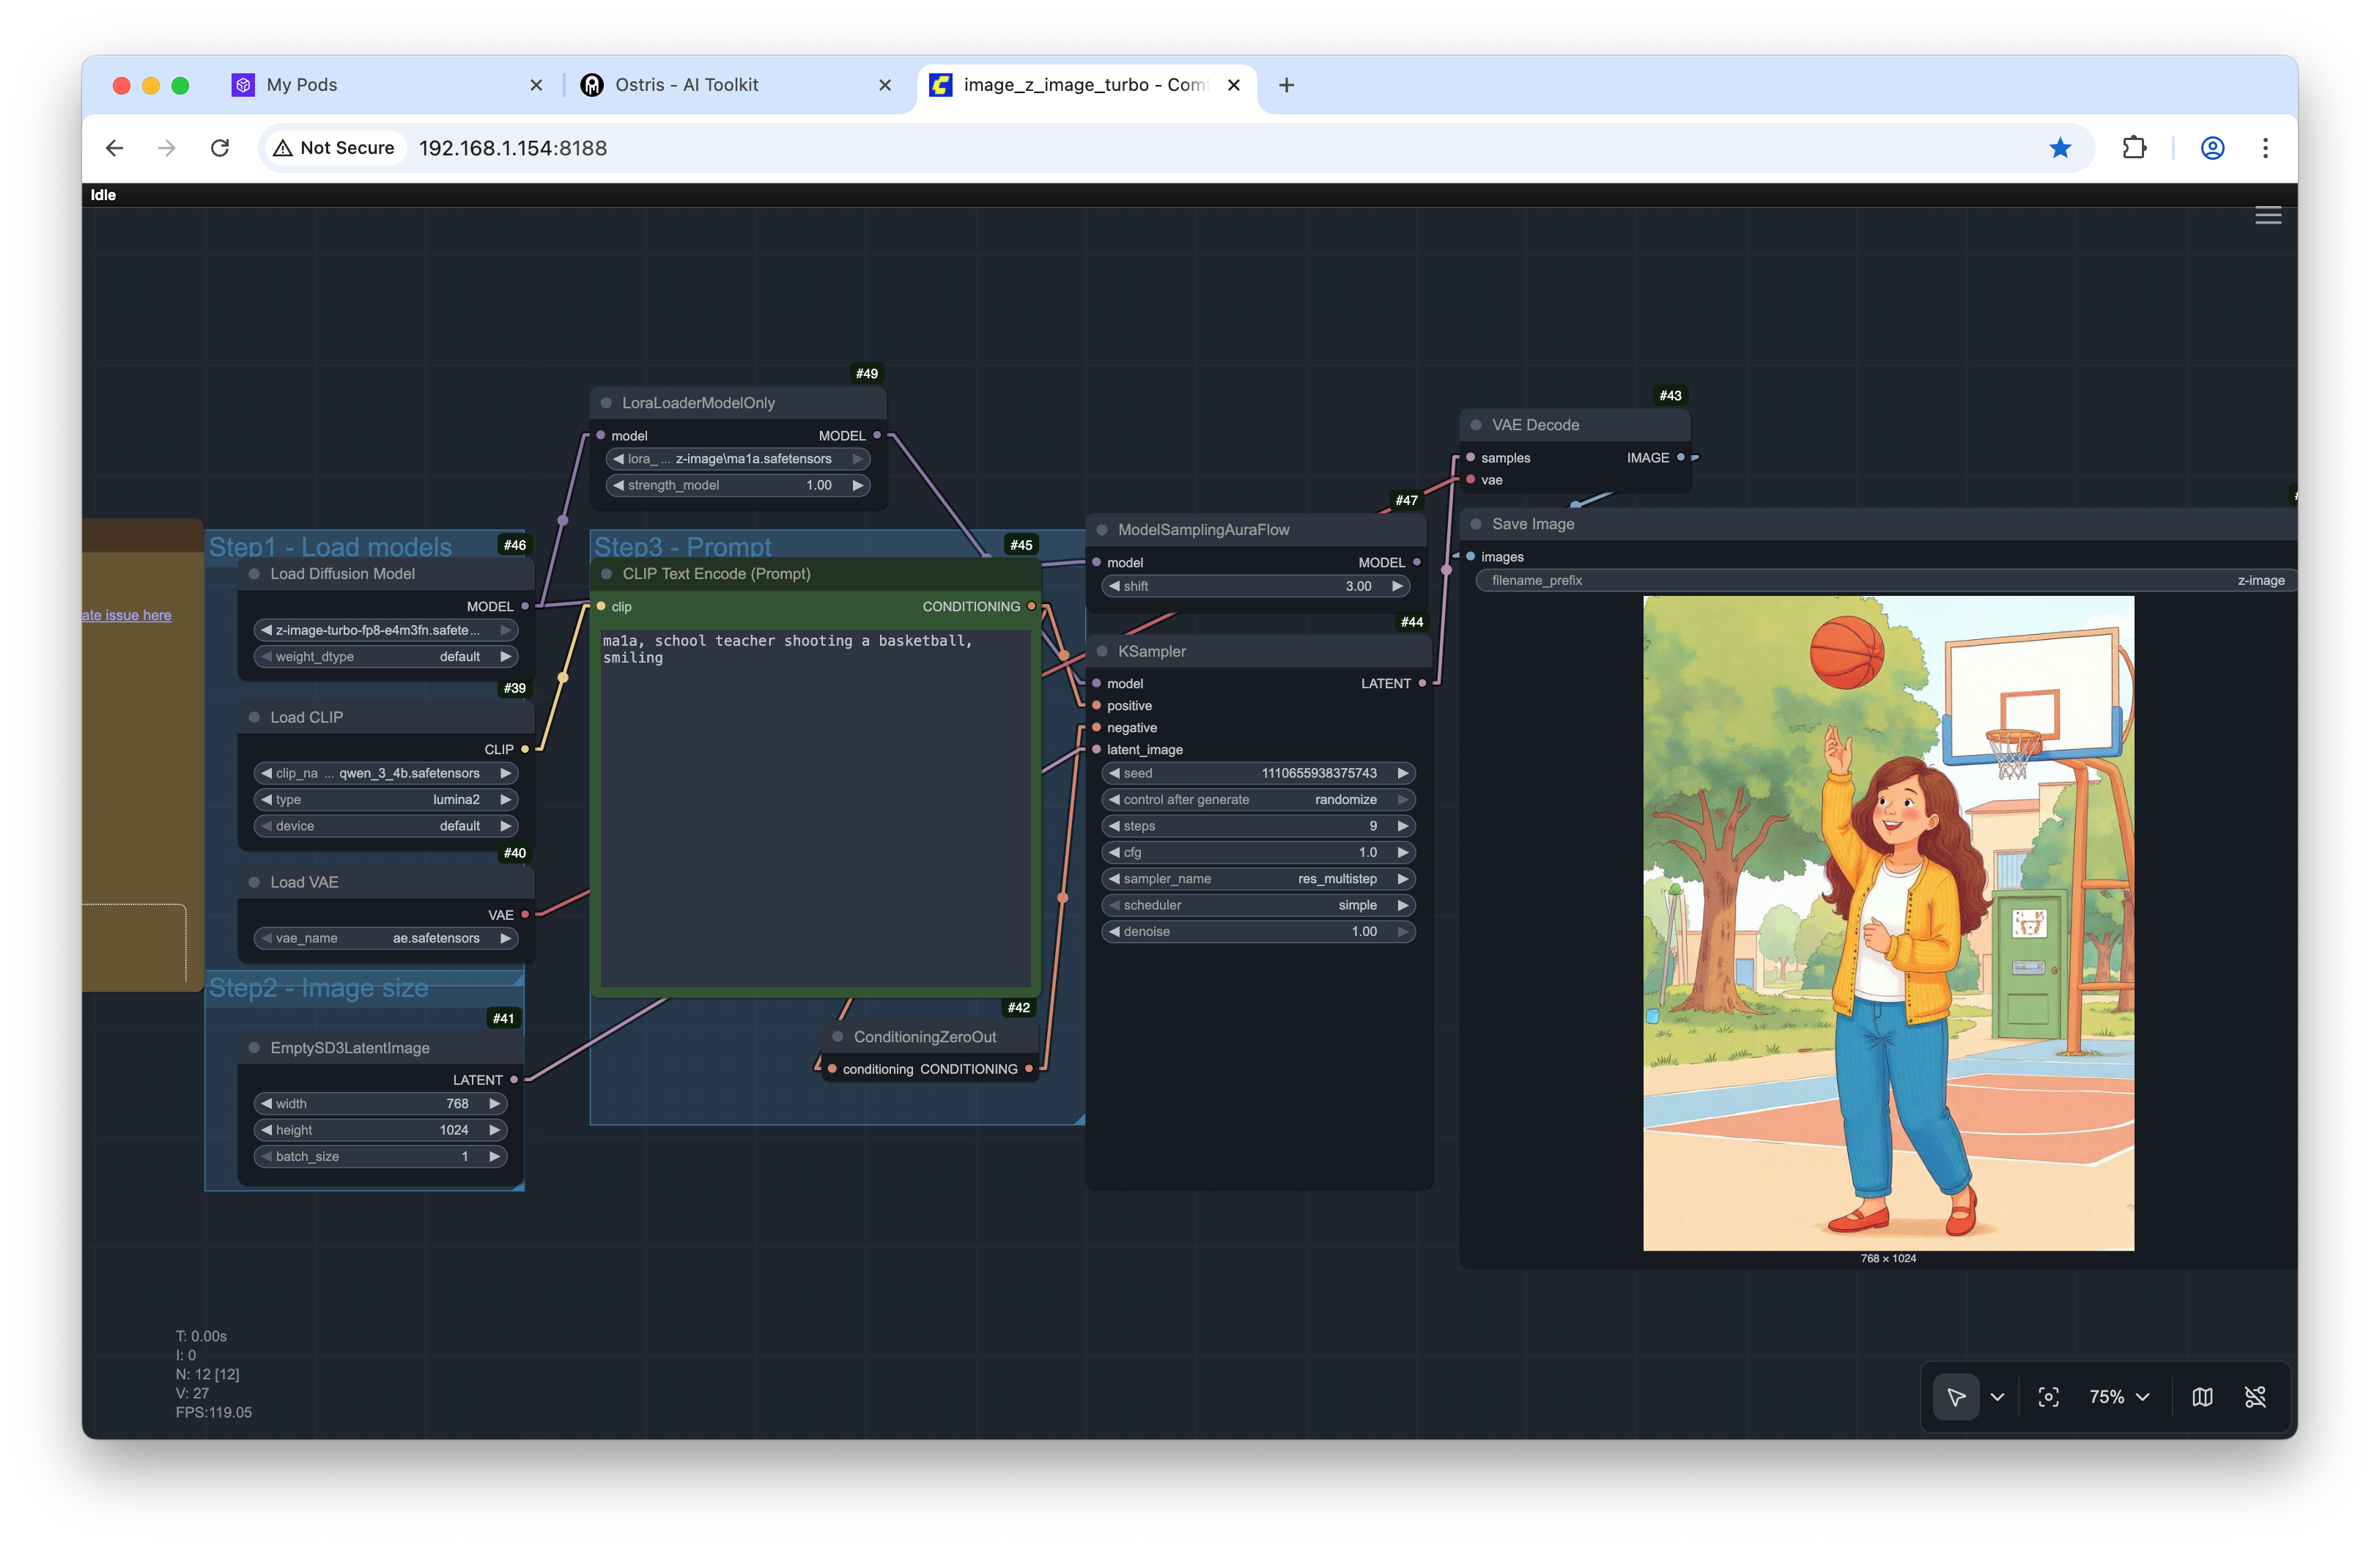
Final output image:

Wrapping Up
That's all there is to training a Z-Image Turbo LoRA!
The process is straightforward once you have the Ostris AI Toolkit set up, and the results are impressive even with this distilled model. Once the base model releases, expect even more flexibility for custom training.
Want More AI Image Tutorials?
Get the best AI image tutorials and tool reviews—no spam, just 1 or 2 helpful emails a month.
Continue Learning
More Basics Tutorials
Explore additional tutorials in the Basics category.
View All Tutorials