What You'll Learn
Learn how to extend AI-generated images beyond their original borders using Automatic1111's built-in outpainting scripts, plus how to fix common issues like blurry edges and harsh lines.
Video Walkthrough
Prefer watching to reading? Follow along with a step-by-step video guide.
How to Outpaint with Stable Diffusion: Stretching the Canvas of Creativity
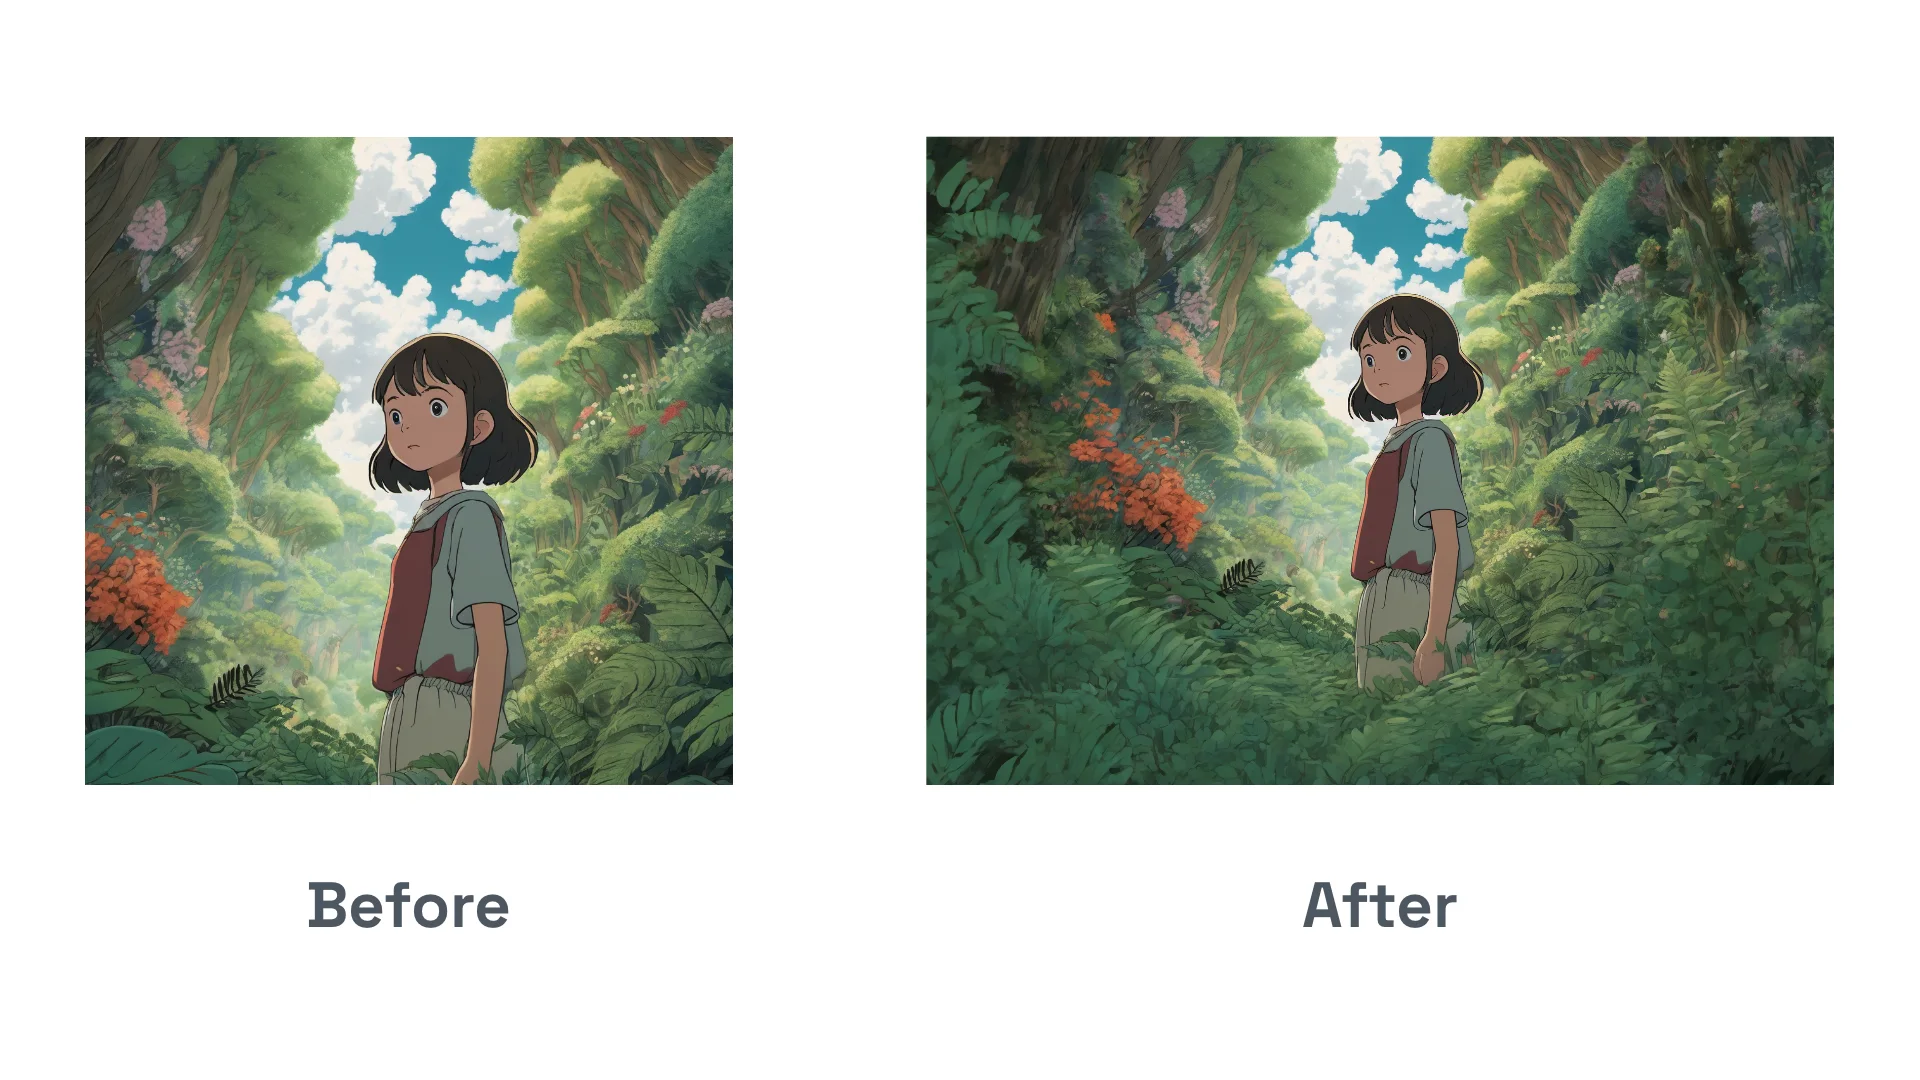
Outpainting is a method to extend the edges of an image using generative AI. This can be extremely useful for creating larger panoramic views from a smaller frame or adding more context to a scene without starting from scratch:
 We’ll show you how to outpaint with Automatic 1111’s WebUI, specifically going over the Poor Man’s Outpainting and Outpainting mk2 scripts. Additionally, we’ll share how to fix common issues that might arise when outpainting, such as blurry edges and faint lines.
Want to see outpainting in action? Watch our video that walks you through the step-by-step process.
Outpainting Scripts
Both the Poor Man’s Outpainting and Outpainting mk2 scripts are built into Automatic 1111’s WebUI.
These scripts function similarly; however, mk2 has more parameters to tweak, including Fall-off Exponent and Color Variation.
Comparison
Here’s a quick comparison of the same rough composition using Poor Man’s Outpainting versus Outpainting mk2:
 The results are not cherry-picked. We did several expansions to the left and right and two expansions downward using both scripts at the identical dimensions.
The quality of the results produced with Outpainting mk2 at default settings tends to be much better than with Poor Man’s Outpainting.
How to Outpaint
For this demonstration, we’ll be using Poor Man’s Outpainting.
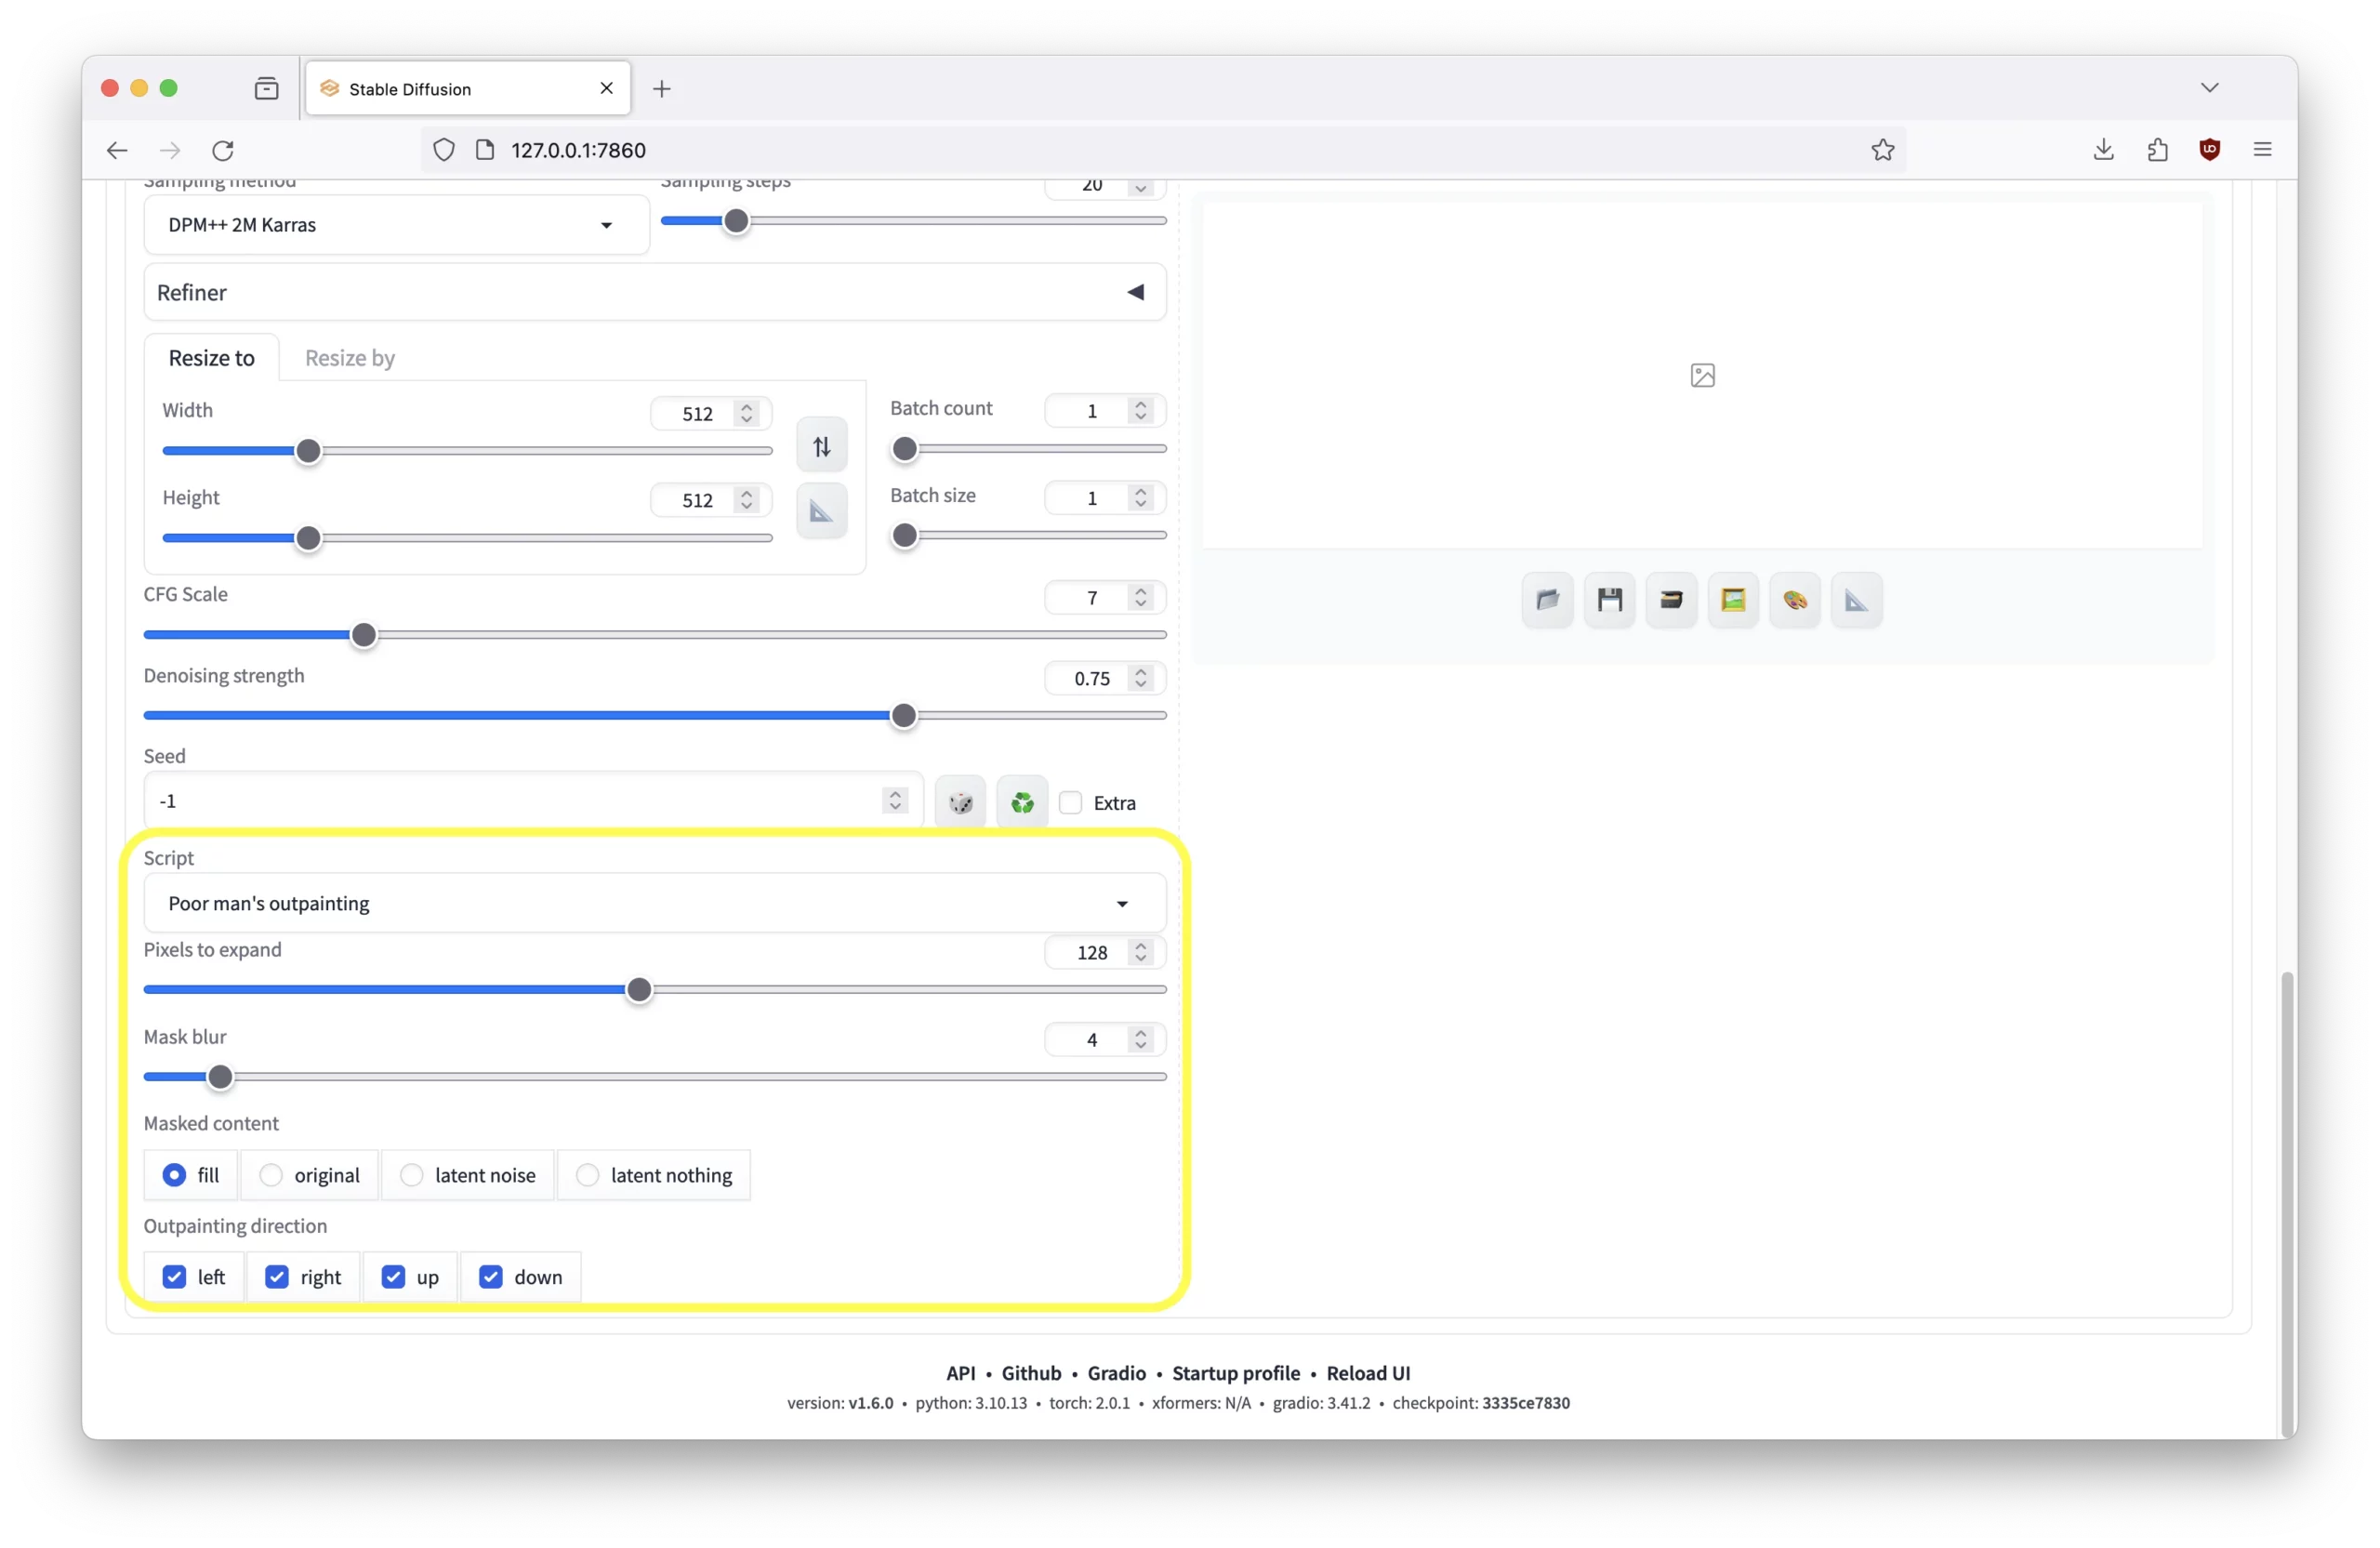
You can find this and the outpainting mk2 script under the img2img tab of Automatic 1111’s WebUI, at the bottom under the scripts label:
 Before outpainting, you’ll need to add an image to the img2img area. There are a few ways to do this:
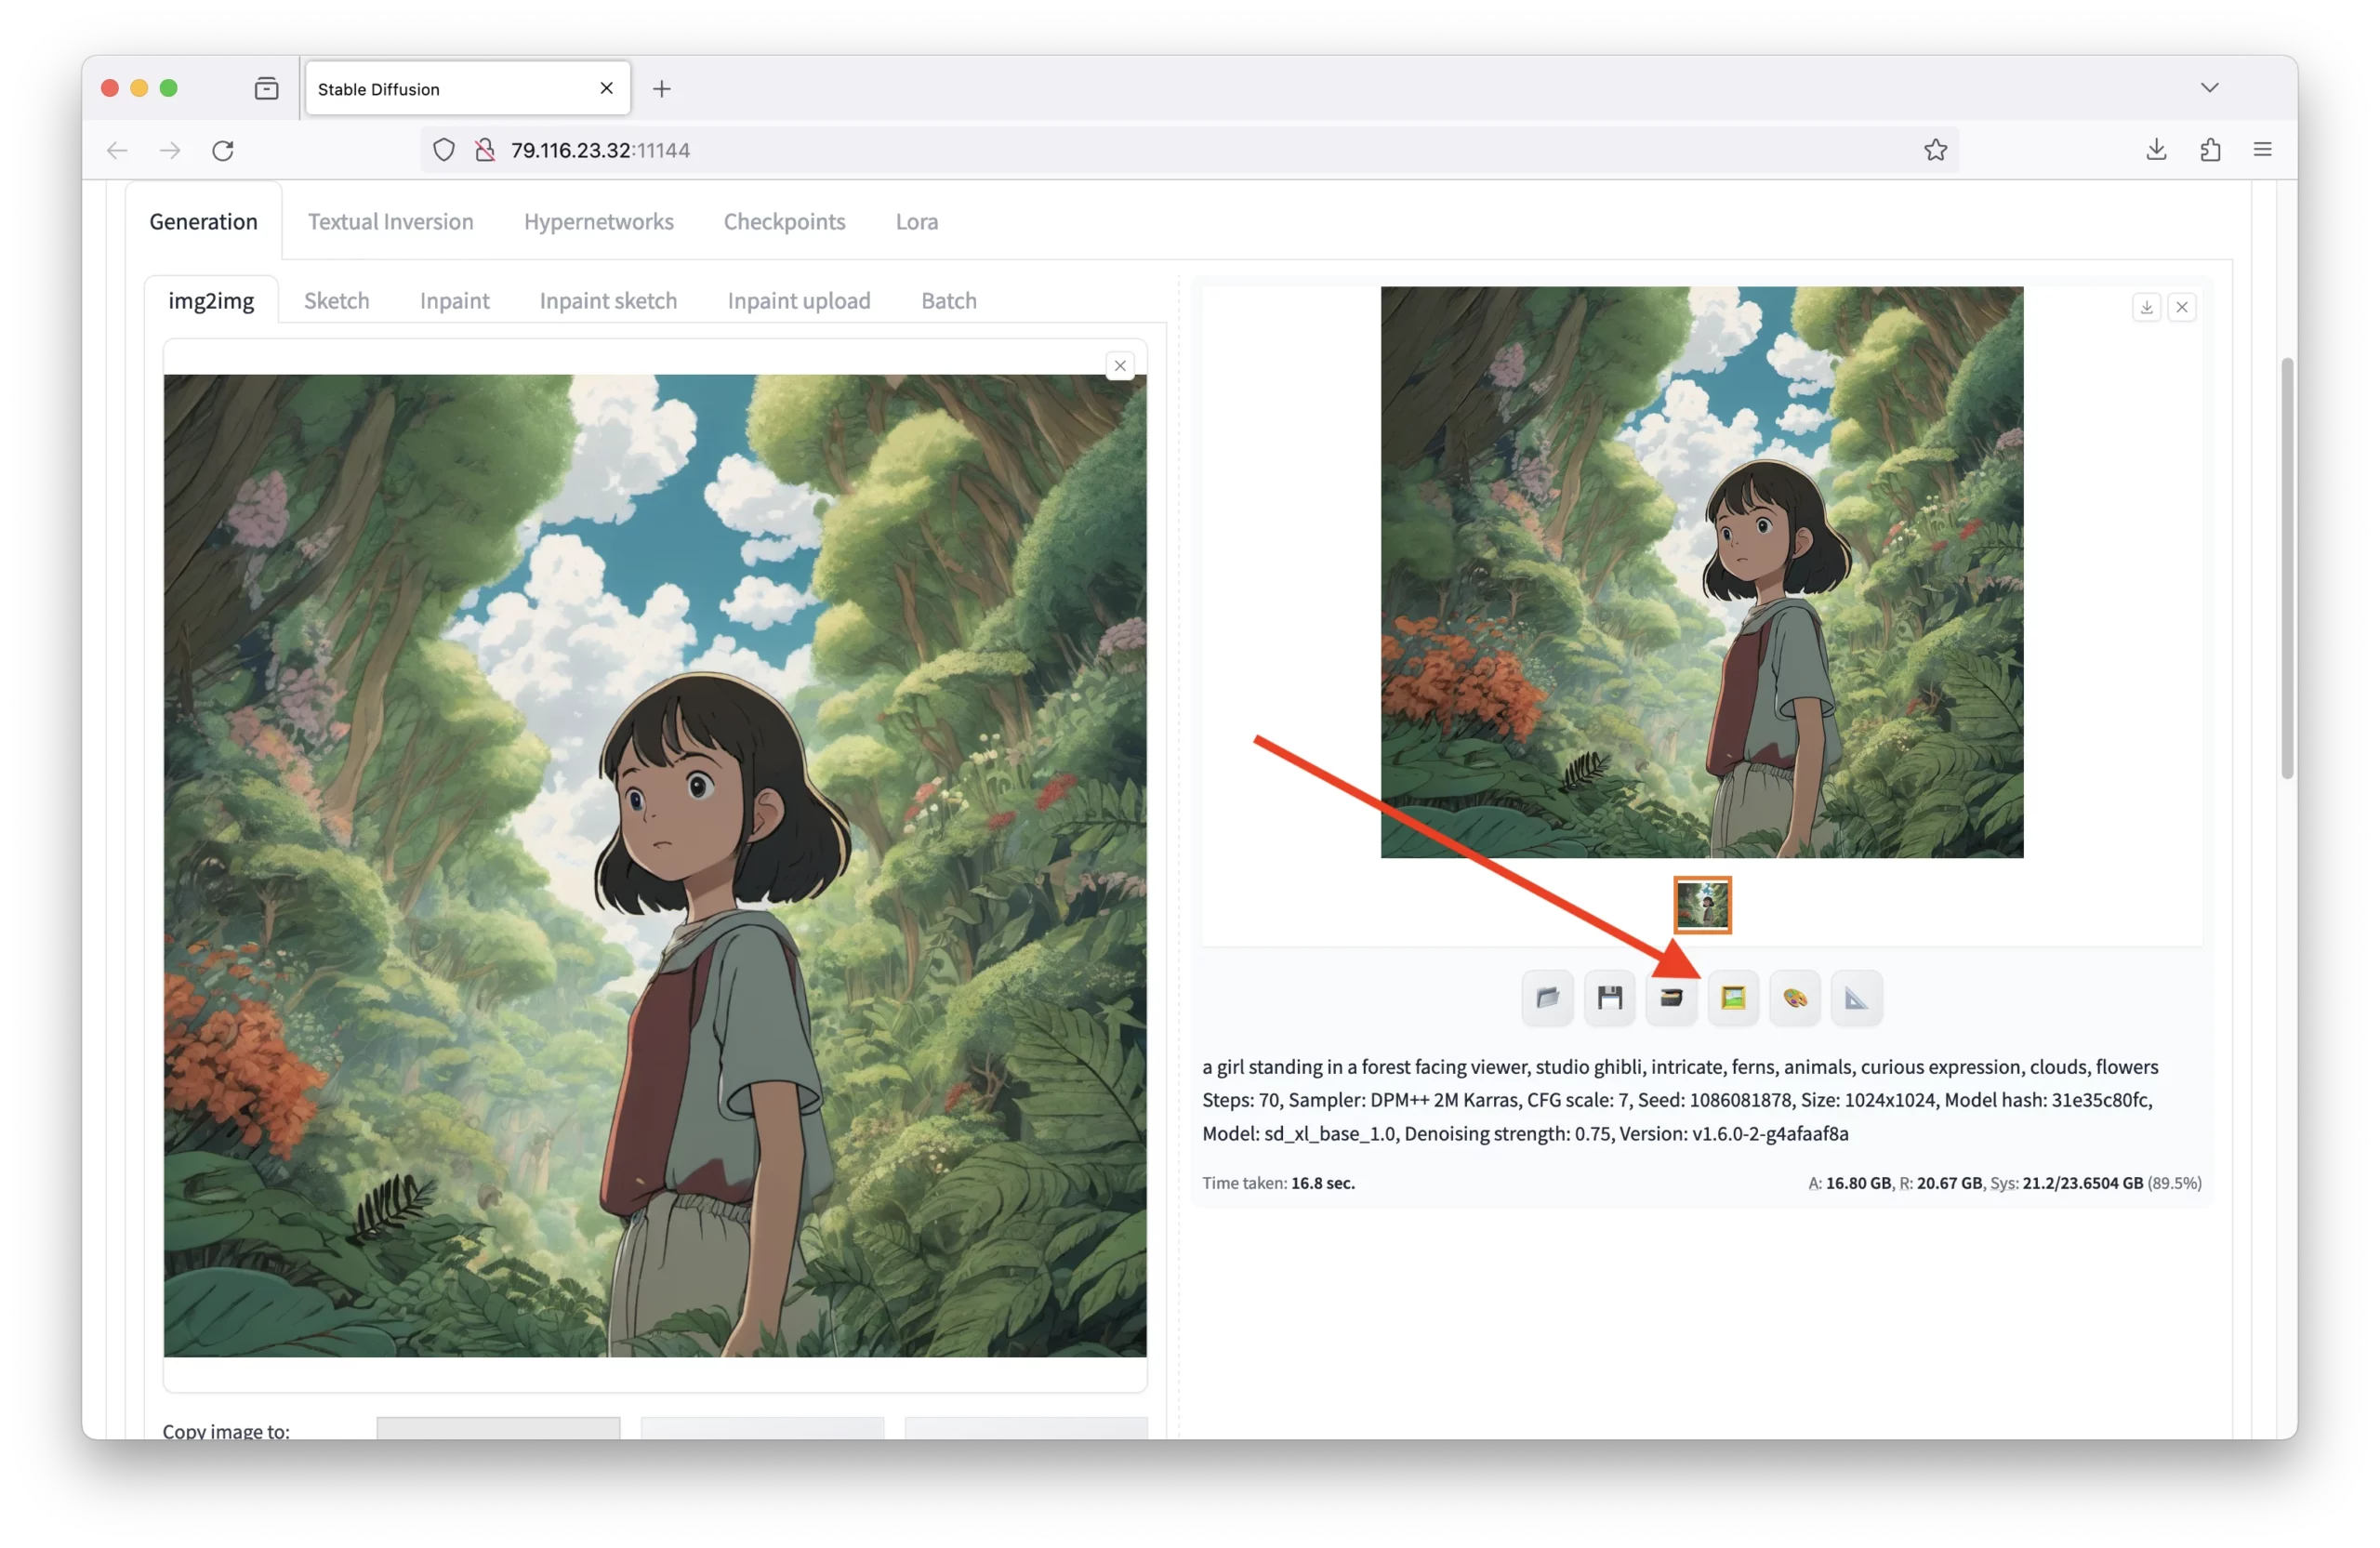
- Send your txt2img along with all its parameters to the img2img tab by pressing the 🖼️ icon beneath the output image:
 2. If you want to outpaint an existing image, use the PNG Info tab to upload an image from your computer and then click the ‘Send to img2img’ button:
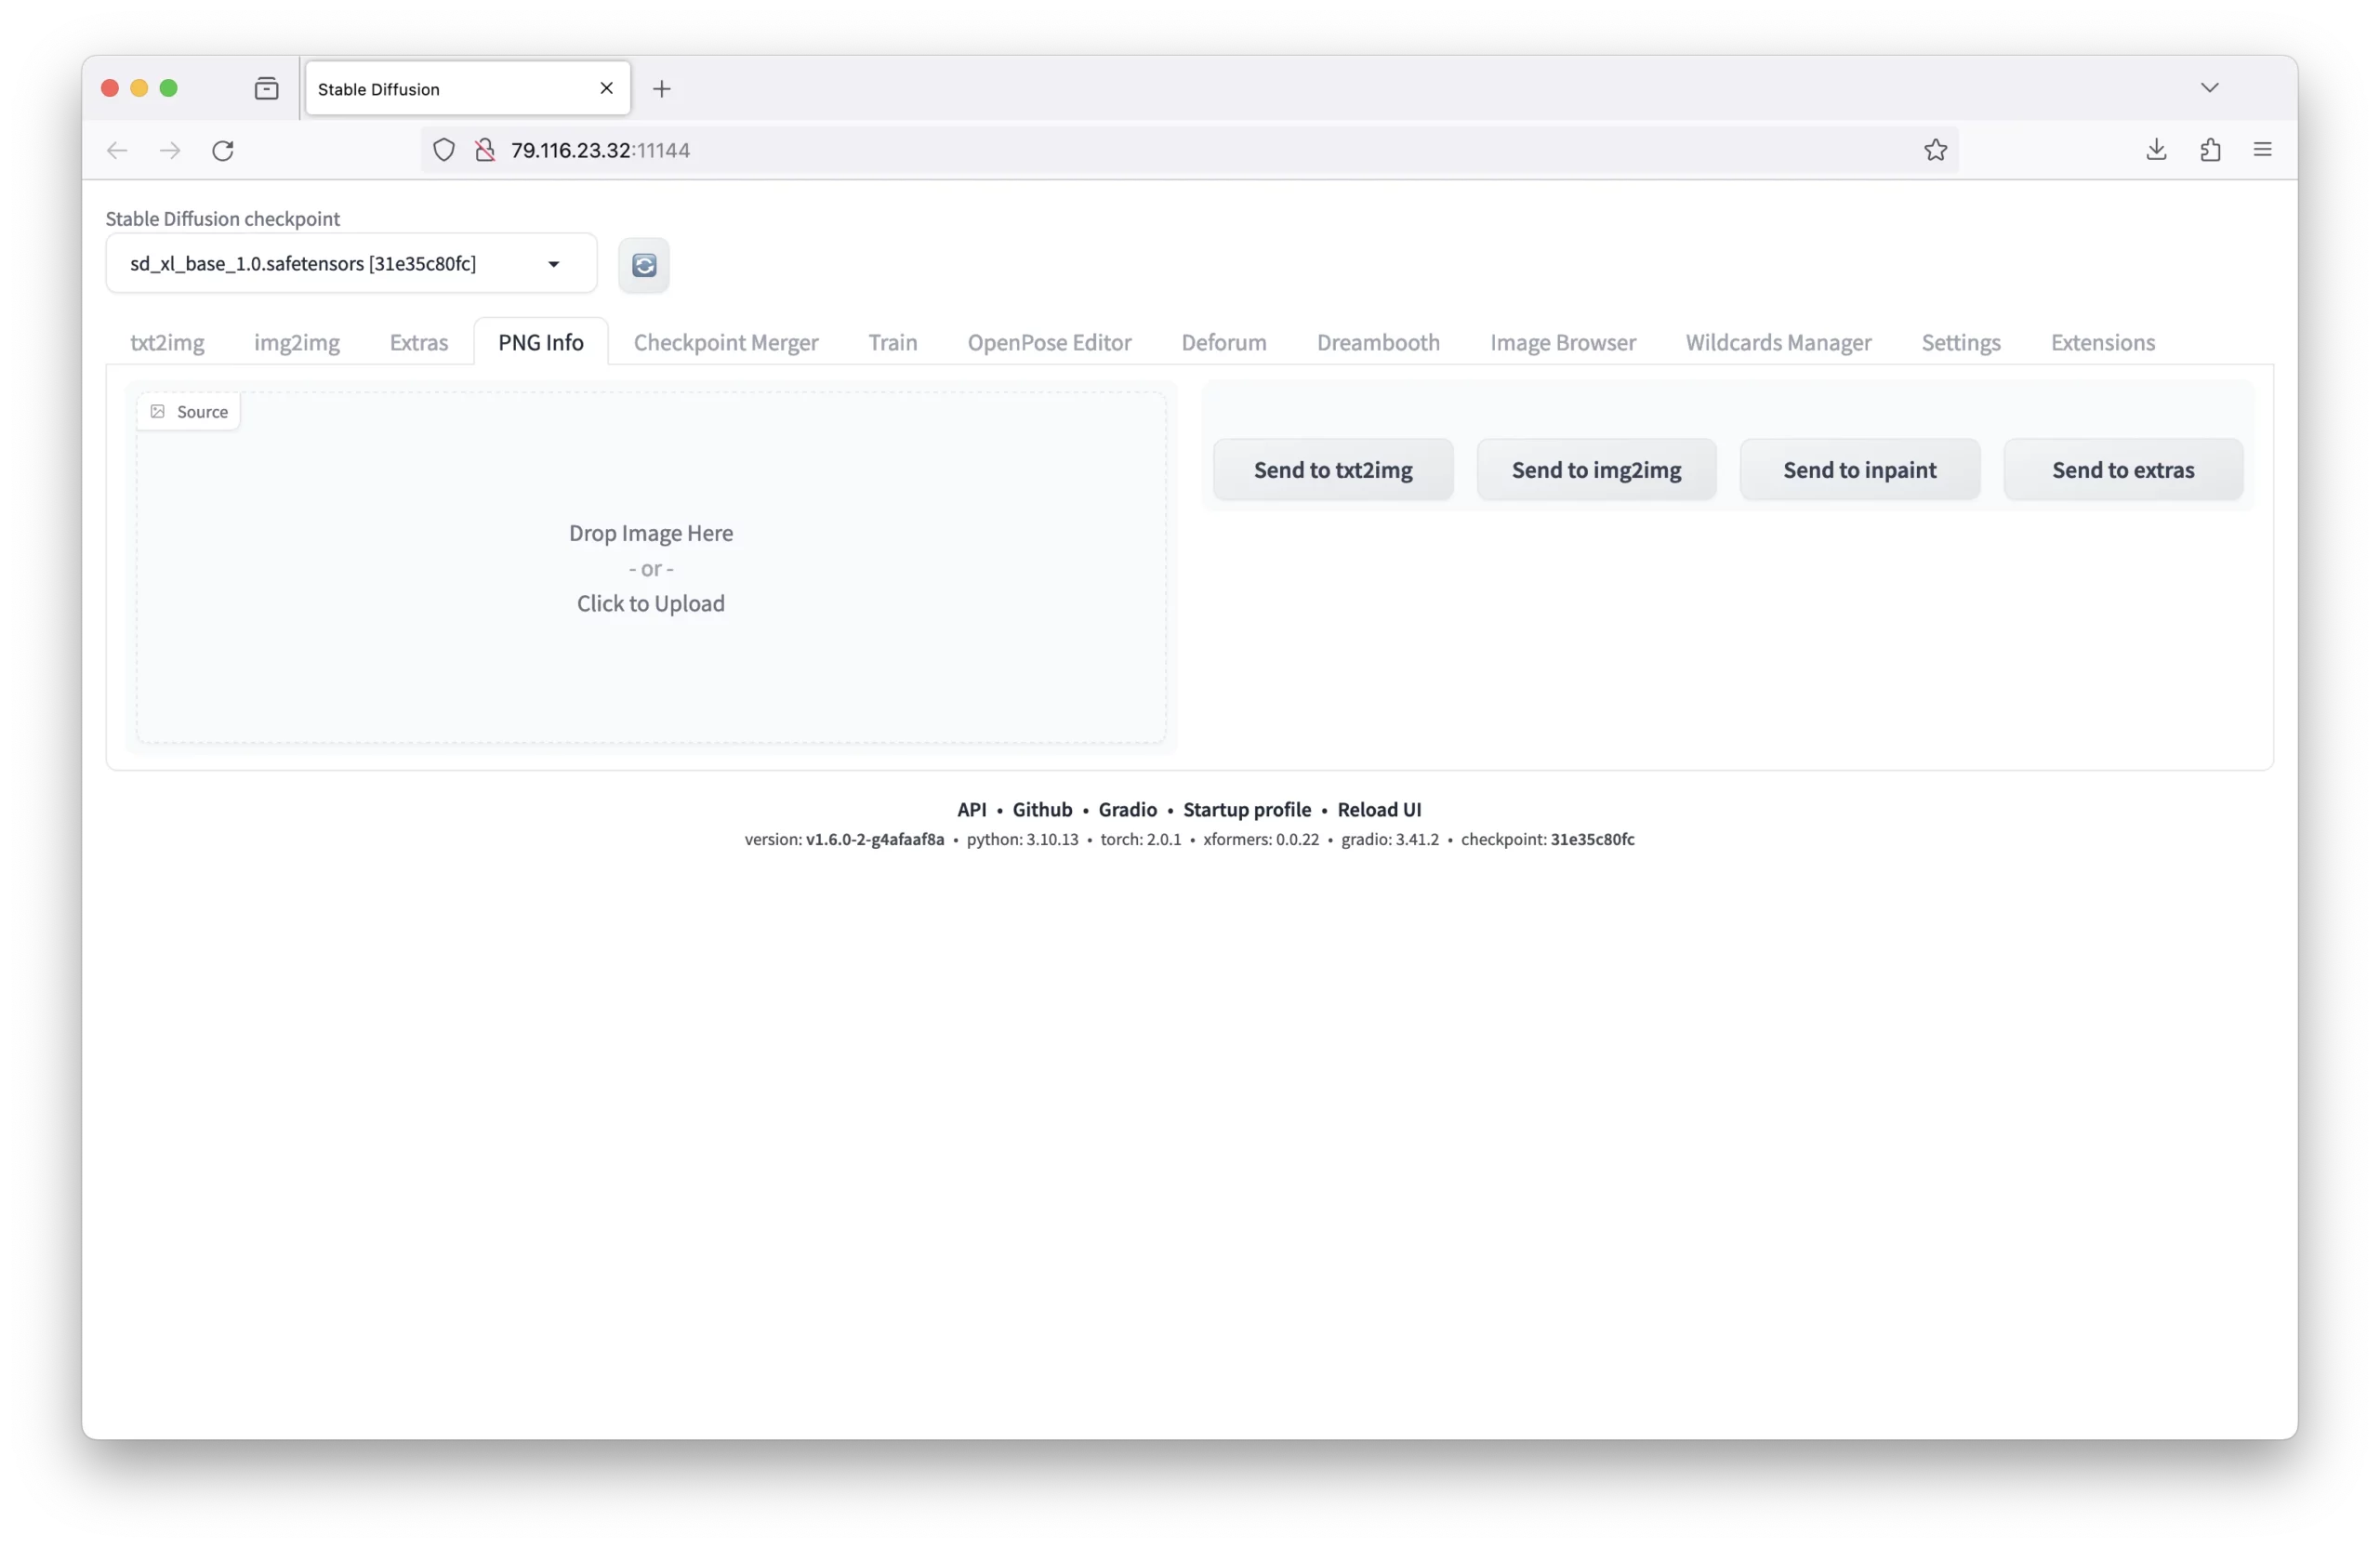 Note: Automatic 1111 adds all the generation data in the image itself (EXIF data). Using the PNG Info tab is quicker than using the img2img tab to upload an image and then manually inputting all the parameters (prompt, dimensions, seed, etc.).
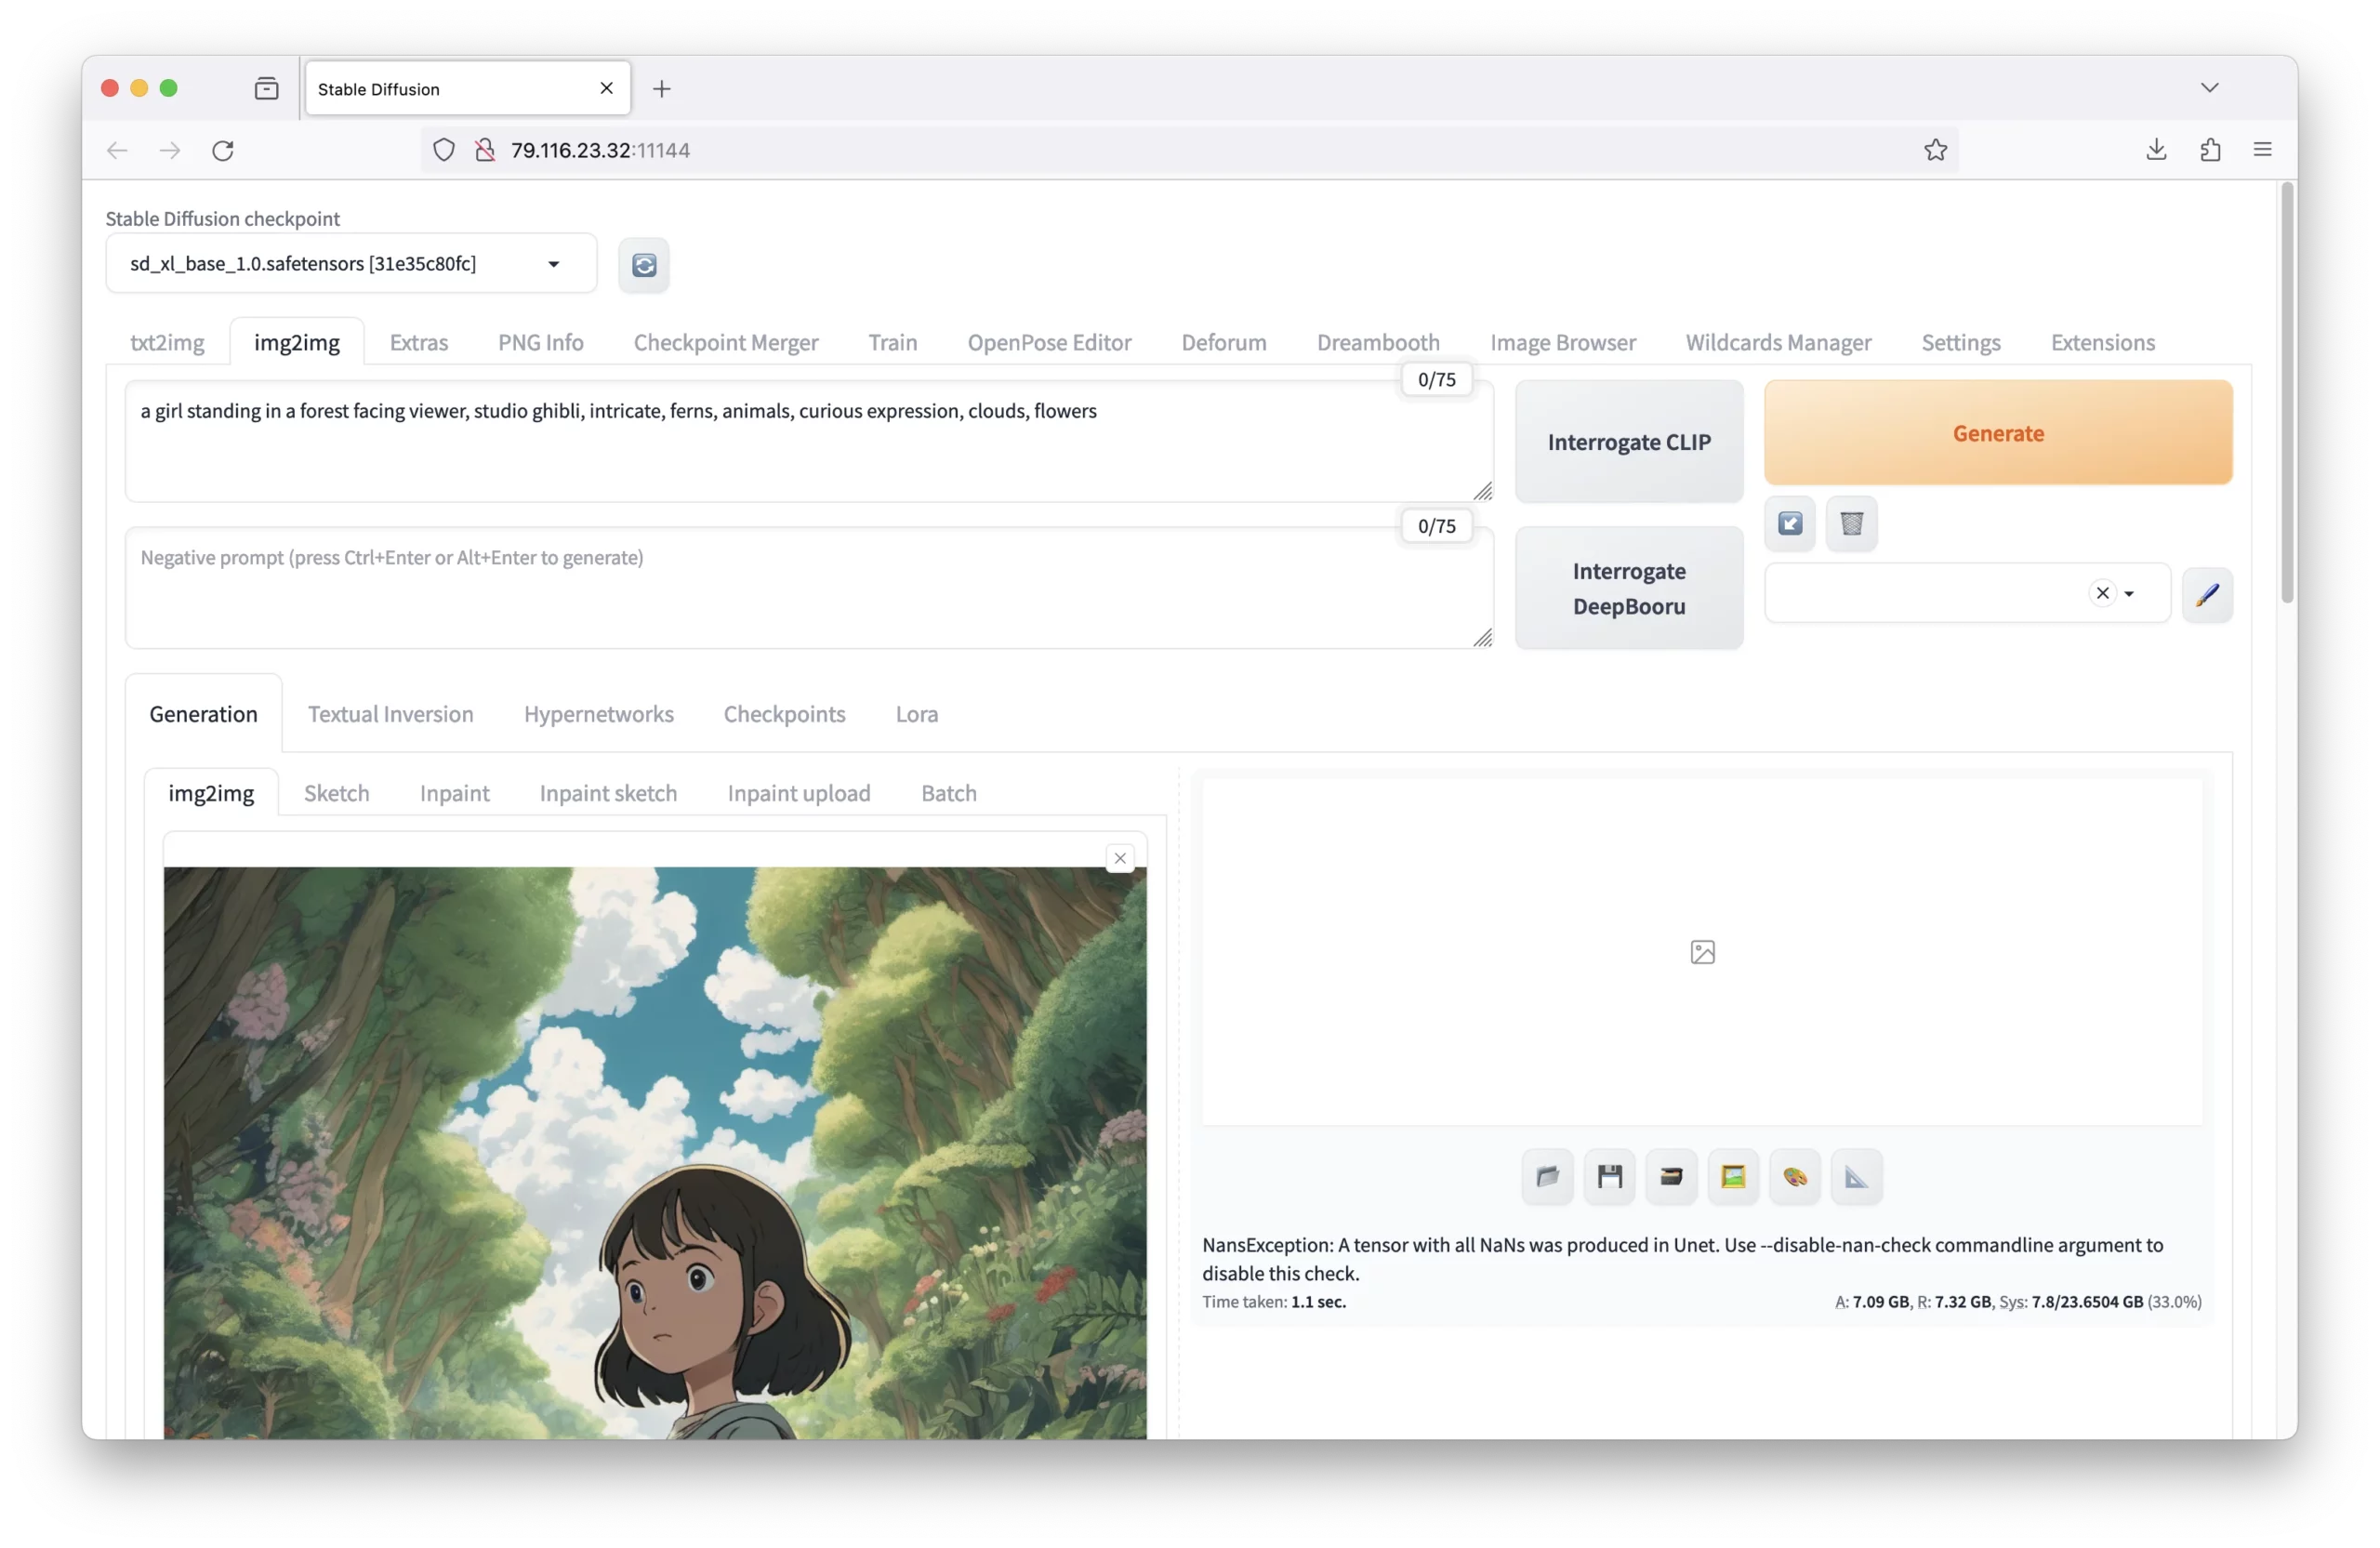
- Lastly, you can upload any other type of image (generated, family photo, drawing, etc.) to the img2img generation sub-tab:
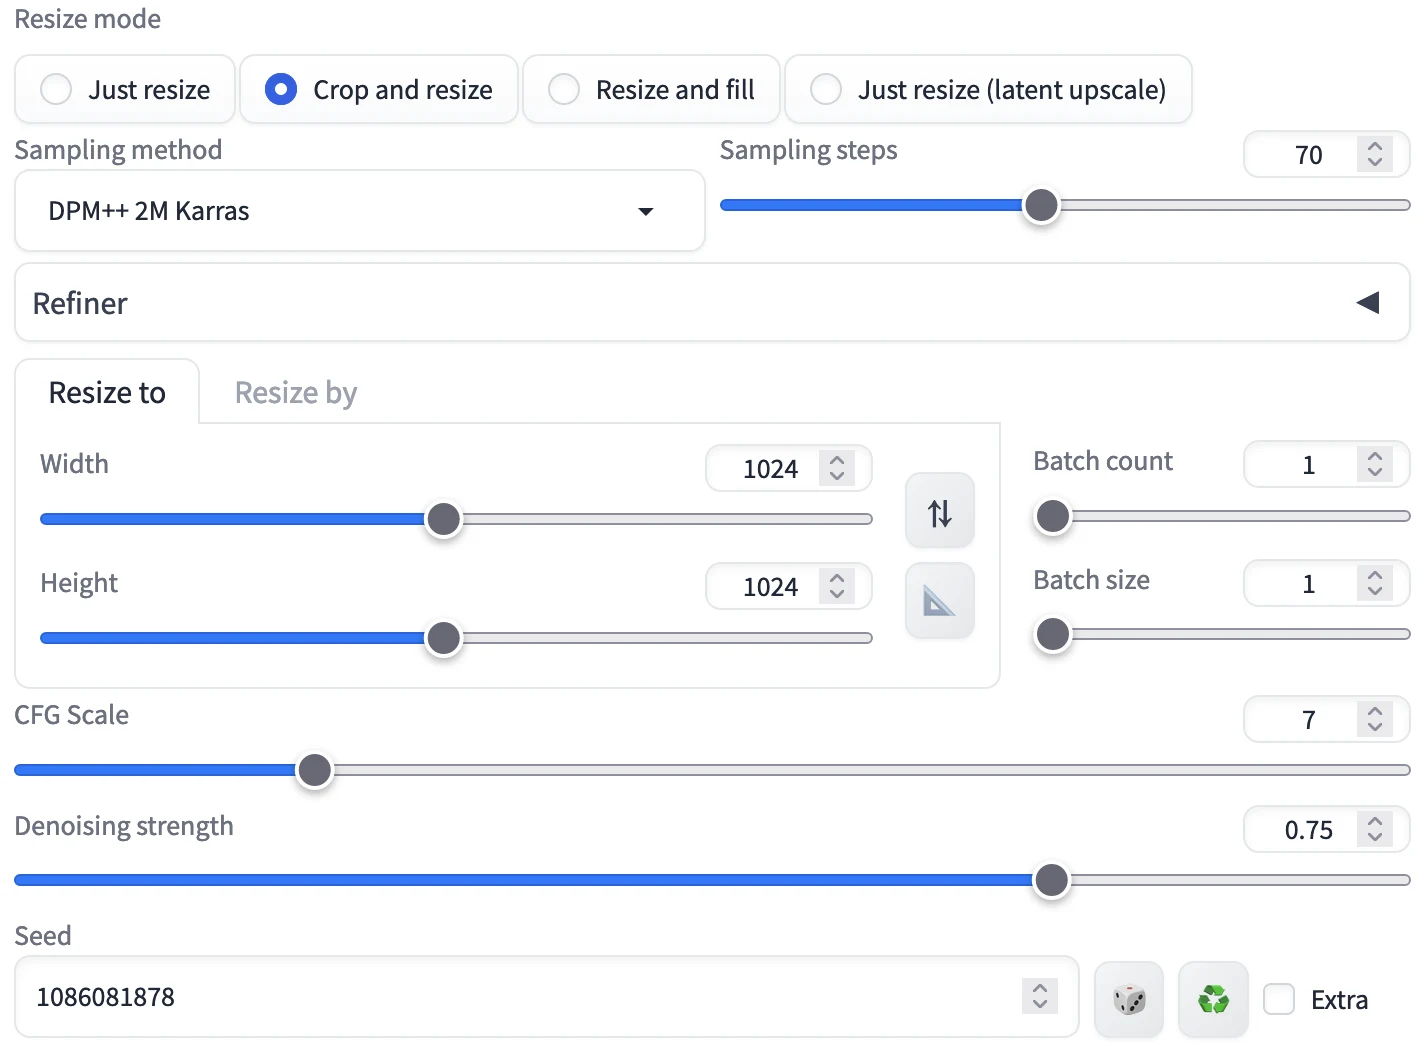
Parameters You Should Set Before Outpainting
Here are some general guidelines for setting parameters for outpainting:
- Prompt: The prompt that best describes the image—this way, when outpainting, the model will generally know what the image is about and how it should expand.
- Resize Mode: Set to ‘Crop and Resize’ to ensure that any parts sticking out from the image will be cropped.
- Dimensions: Both width and height.
- Seed value: Use the existing value if you are expanding an AI image; if not, set to -1.
- Sampling Method: Use the same sampler for the AI image. Otherwise, Euler A provides good results for other images.
- Sampling Steps: Set between 50 and 100 to reduce blur and noise in the image.
- Denoising Strength: Set to 0.8. A higher value (1.0) will not respect the image, whereas a lower value will not expand it enough.
For our example, it will look like this:
 Additionally, the outpainting script will have its own parameters. Including pixels to expand, edge, and mask blur. Set the following:
- Pixels to expand: 128
- Mask blur: 4 – 8
- Edge: Left, Right, Up, Down (pick only one)
Generating the Outpainting
Once all parameters are set, simply click ‘Generate’ to see the results.
As you generate, you’ll notice that the image expands in the direction you chose. This may take a few tries to get the style you are looking for.
If you notice blurring during the expansion, increase the denoising or sampling steps. Lines on the edge of the outpainting are normal—we’ll share how to fix these later.
Once you are happy with the expansion, send it back to the img2img tab by clicking the 🖼️ icon:
 The parameters should remain the same except for the dimensions, which should be set to the new dimensions of the image. Effectively you will be expanding on the newly expanded image.
You can click ‘Generate’ again to keep expanding along the same edge or change the outpainting direction to expand along a different edge.
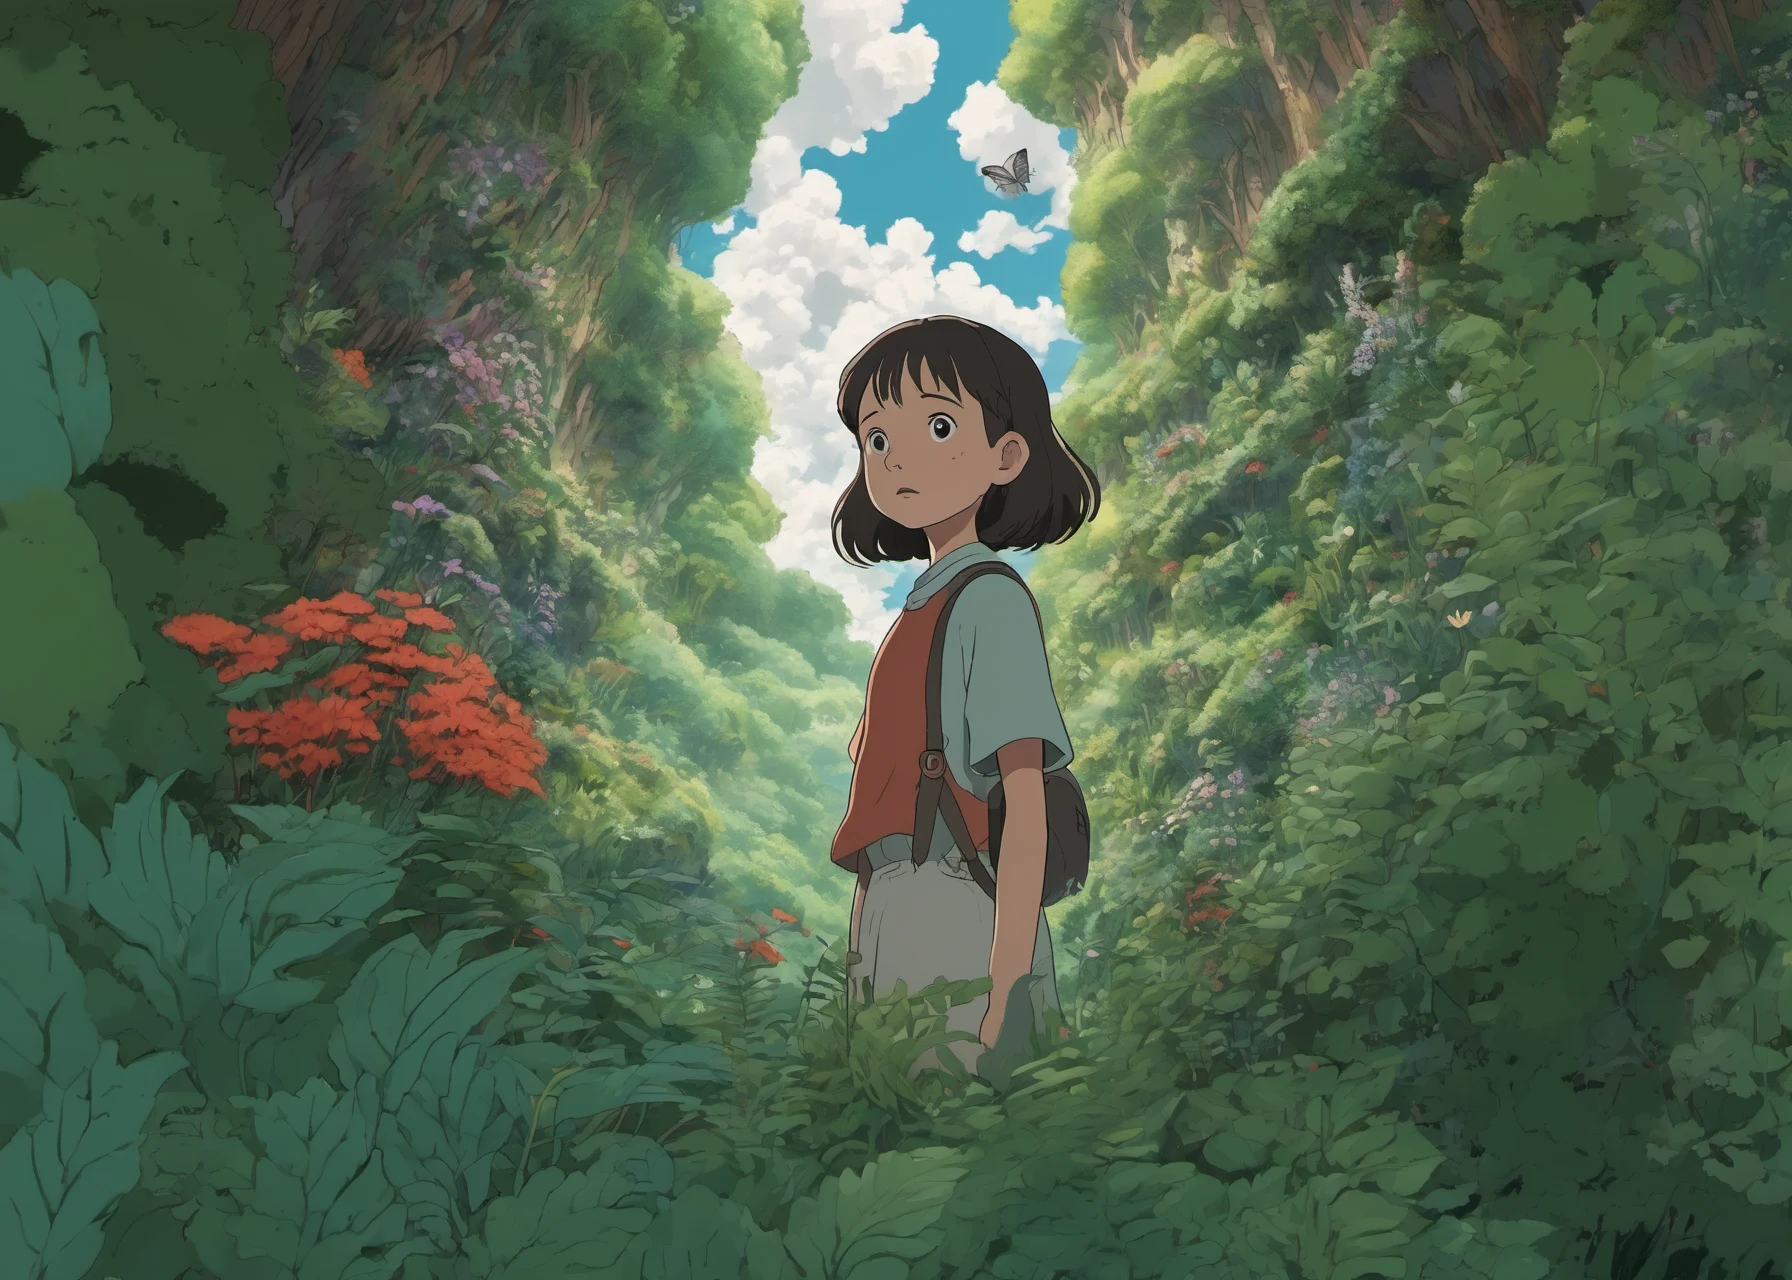
Here’s our rough composition of our outpainted image:
 As you can see, there are some rough edges and lines that need to be cleaned up.
Quality Note: We are only looking to extend the image and get the general feel. We are leading the model in the correct direction. Do not expect perfect results.
Performance Note: The more you expand the image, the longer the model will take, so keep this in mind when working with larger images.
Cleaning Up an Outpainting
Now that we have a rough composition, there are a few ways to clean it up.
- Generate a new image via img2img, keeping the same parameters but adjusting the denoising strength and sampling steps. This will clean up everything but may alter details in the image.
- Send the image to the inpainting tab and brush just the edges that need to be cleaned up. This will preserve the original subject while fixing any edges with noise, lines, or other artifacts.
Quickly Cleaning an Outpainted Image via img2img
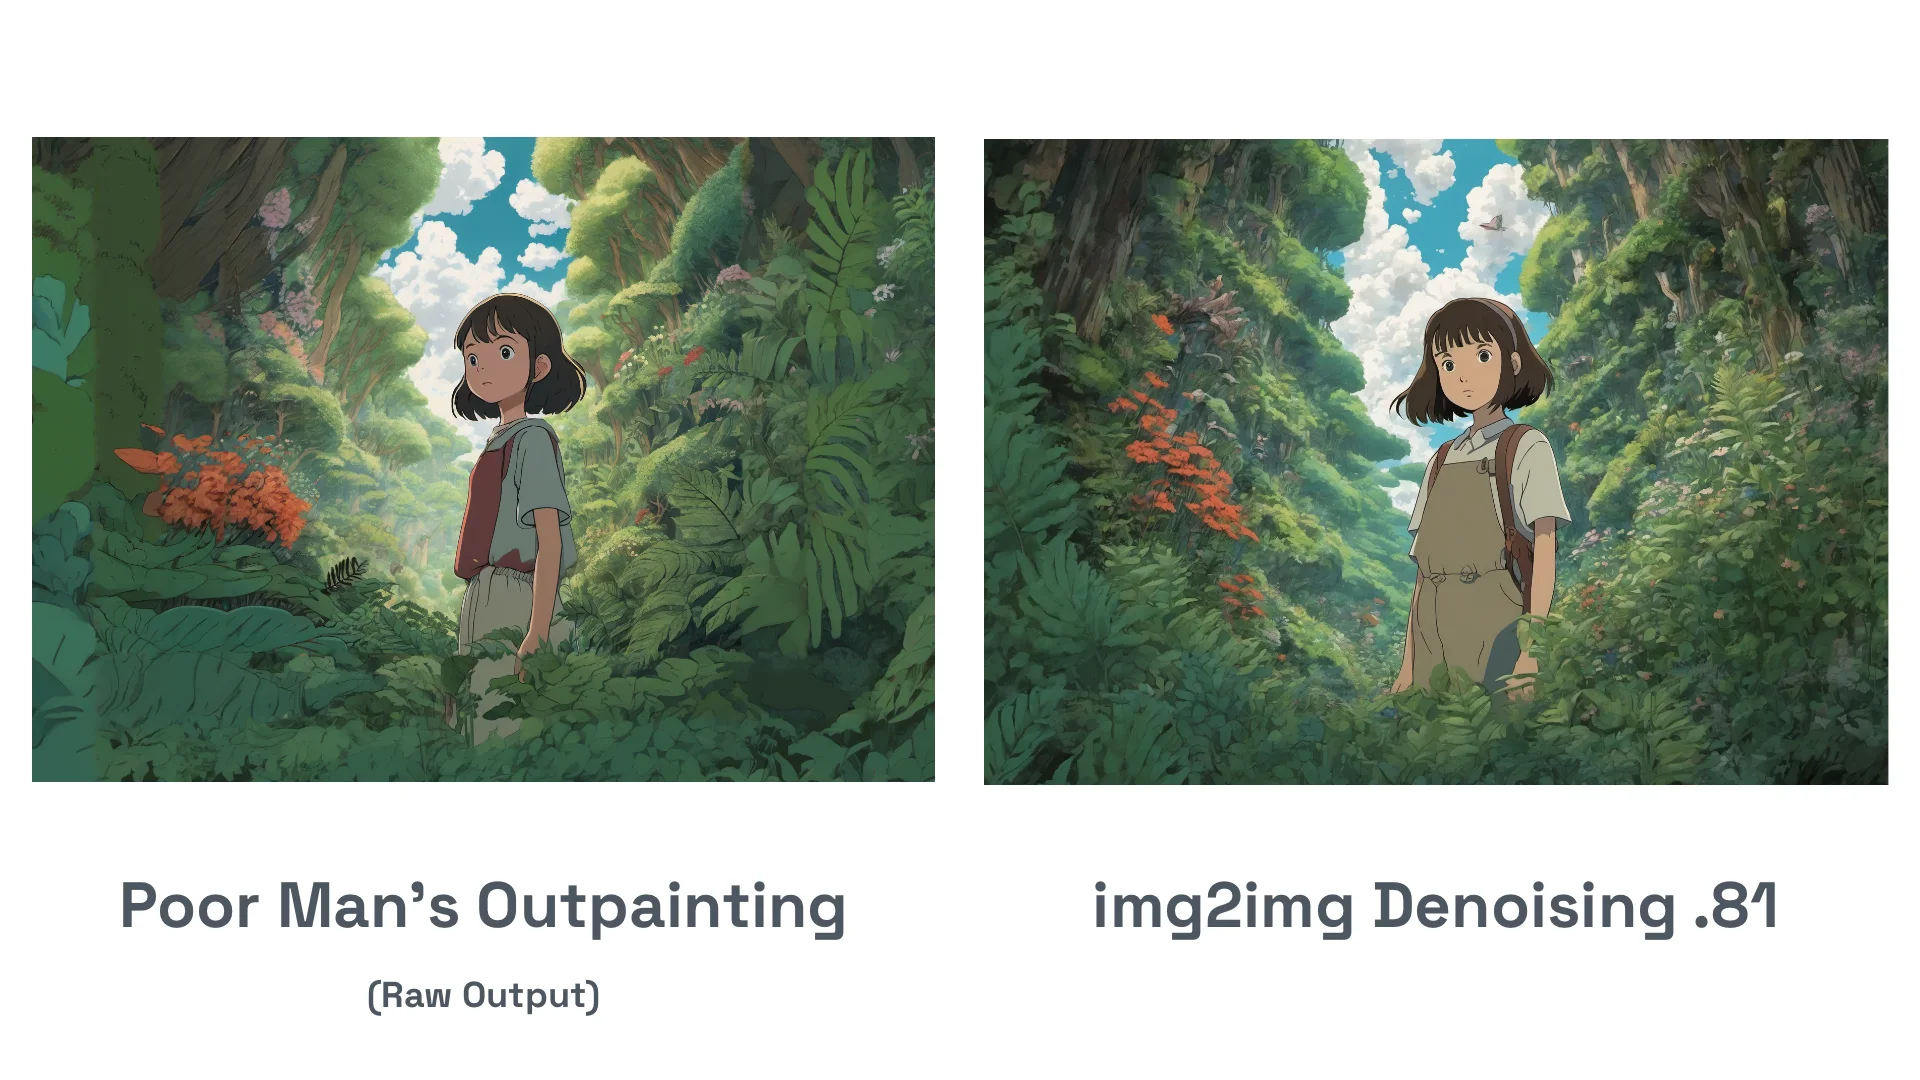
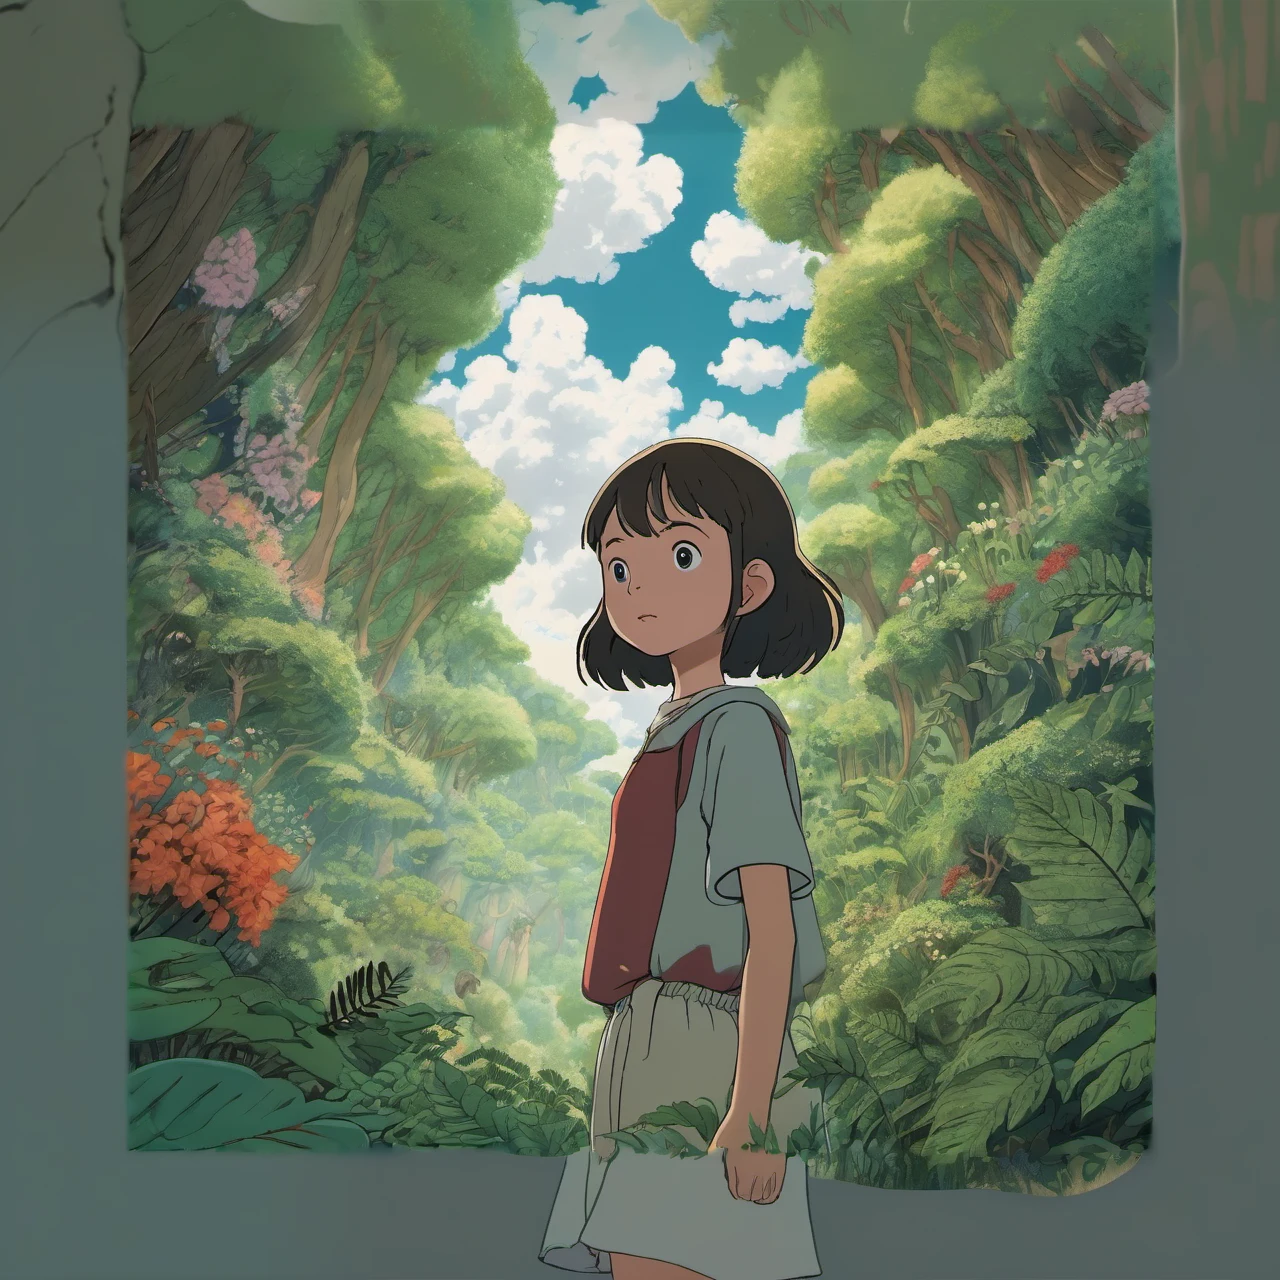
Here our automatically enhanced image generated via the img2img tab with a denoising strength of 0.81:
 The image is cleaner, but many details have changed from the original composition.
Here’s a side-by-side comparison:
 Clothing, focal point of subject, clothing, etc. all subtly changed.
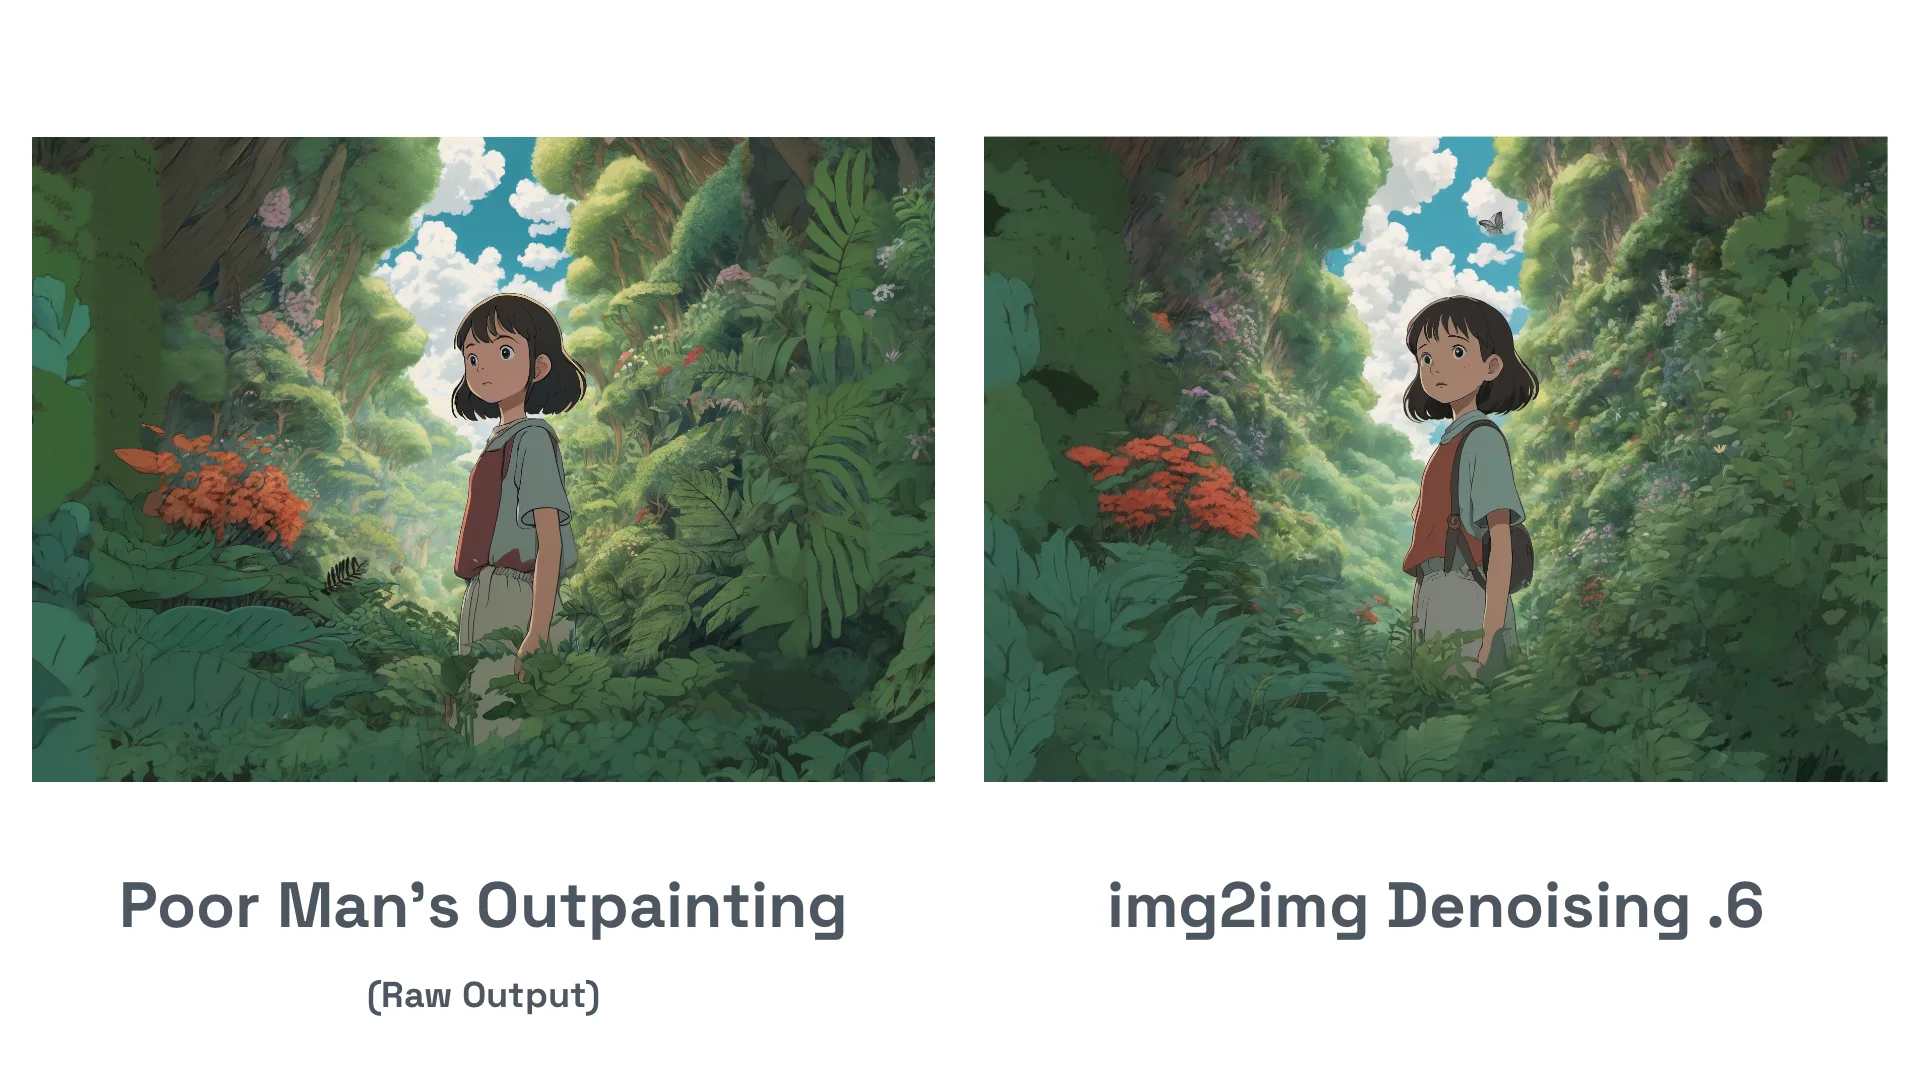
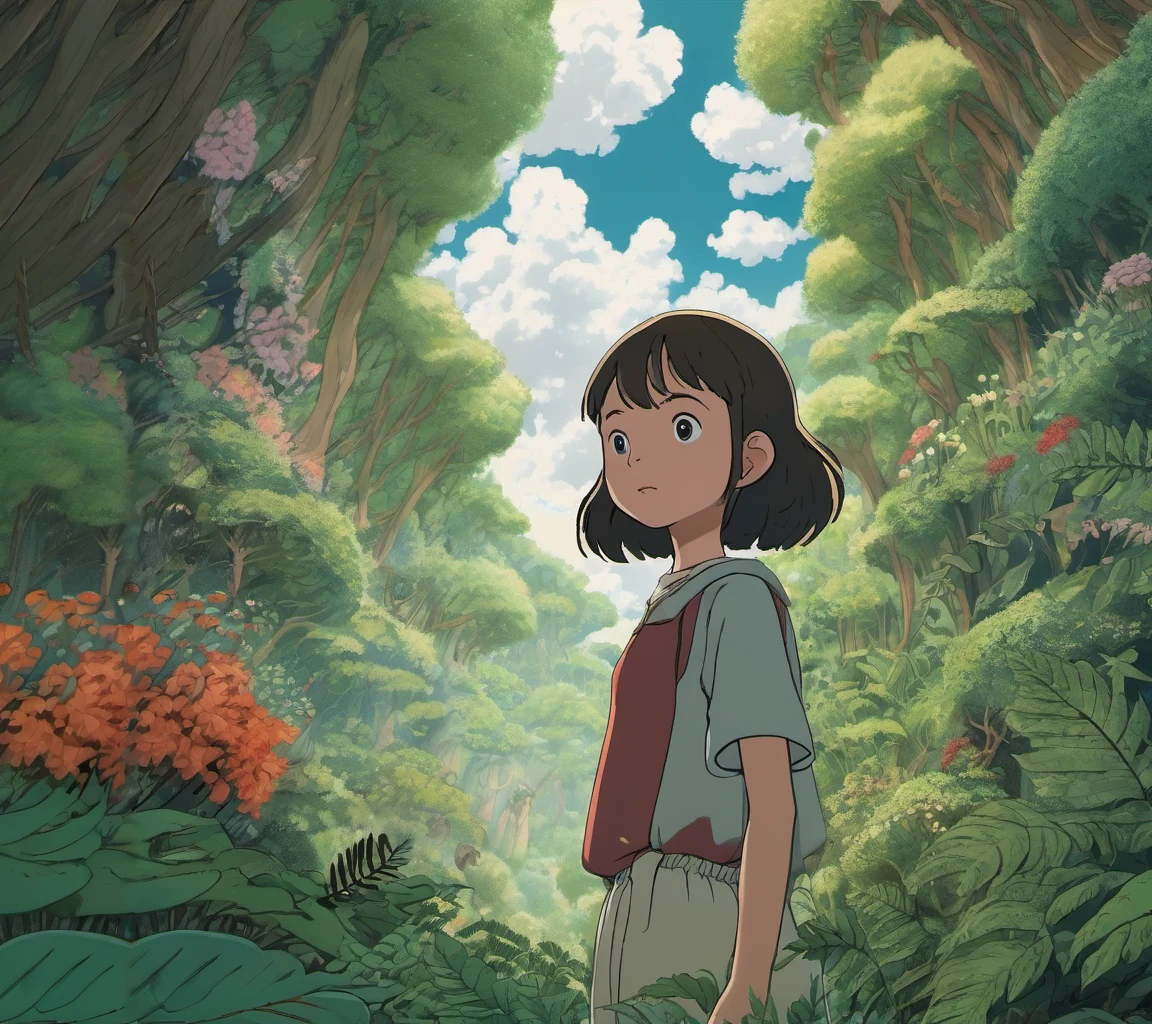
Now, if we lower the denoising strength to 0.6, we get a more similar image to the original composition, with some subtle changes:
 The subject is nearly identical, but the facial expression, outfit, and accessories have slightly changed.
Here’s a side-by-side comparison:
Cleaning Up With Inpainting
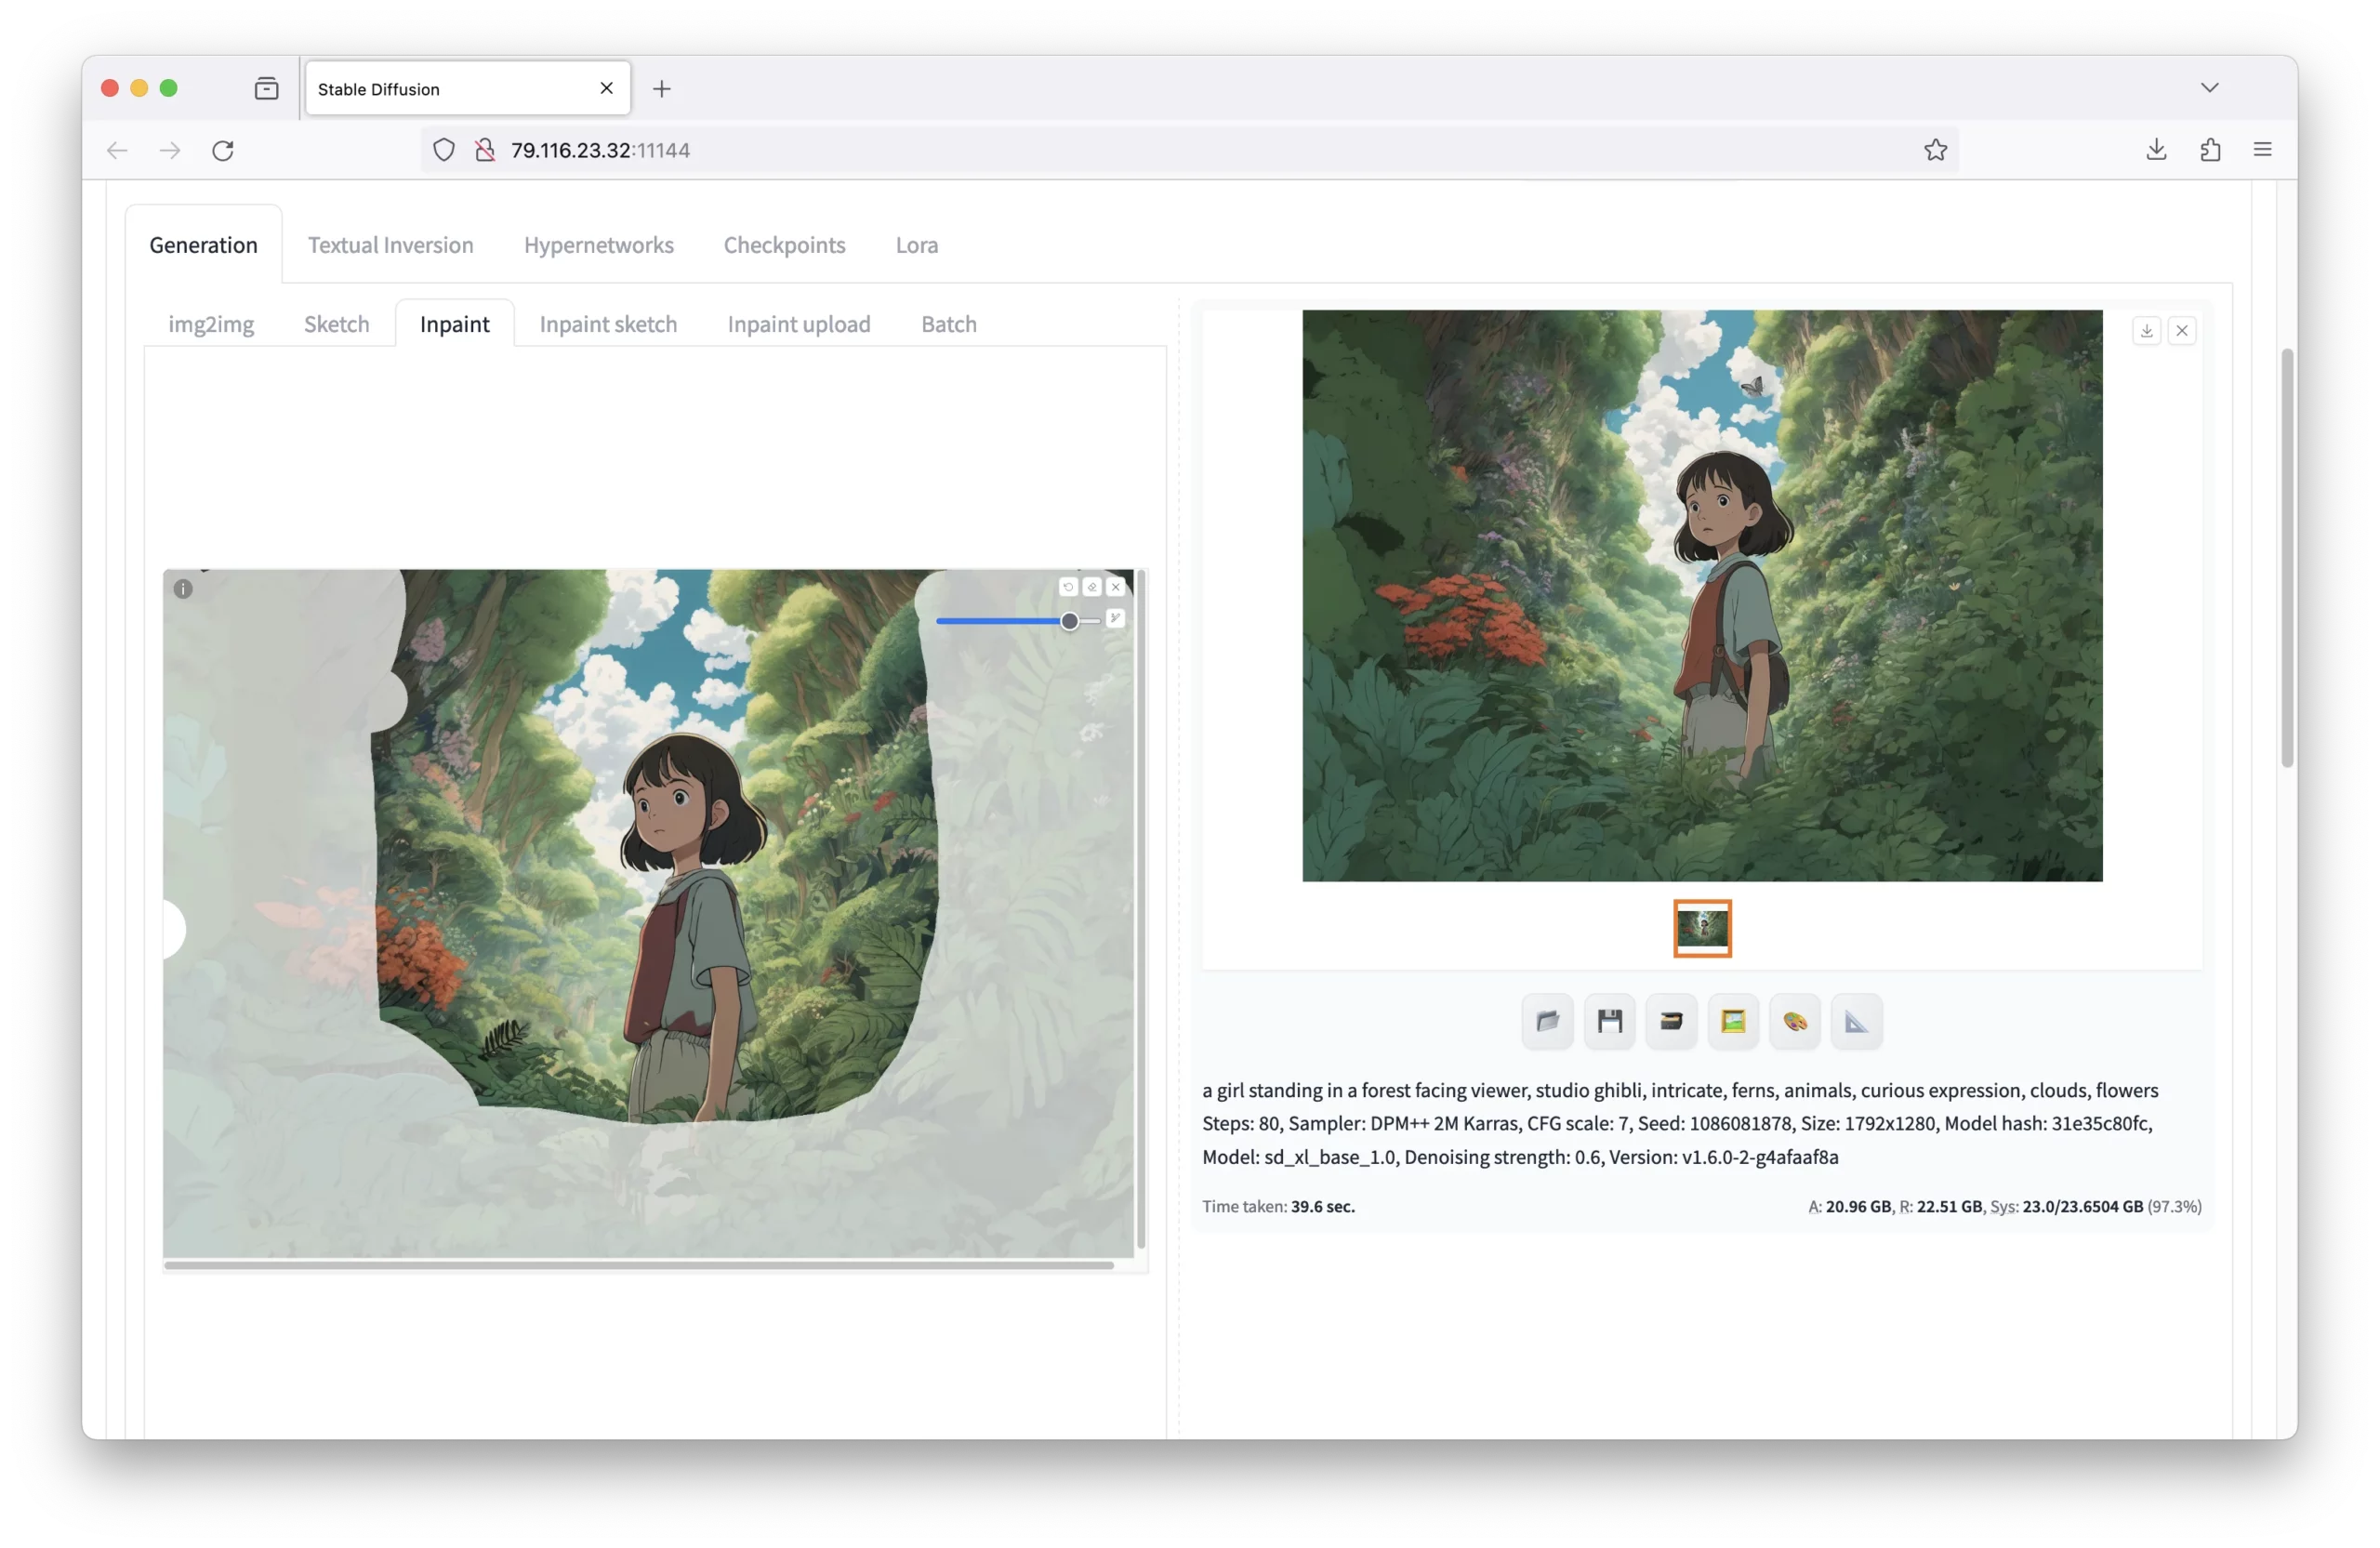
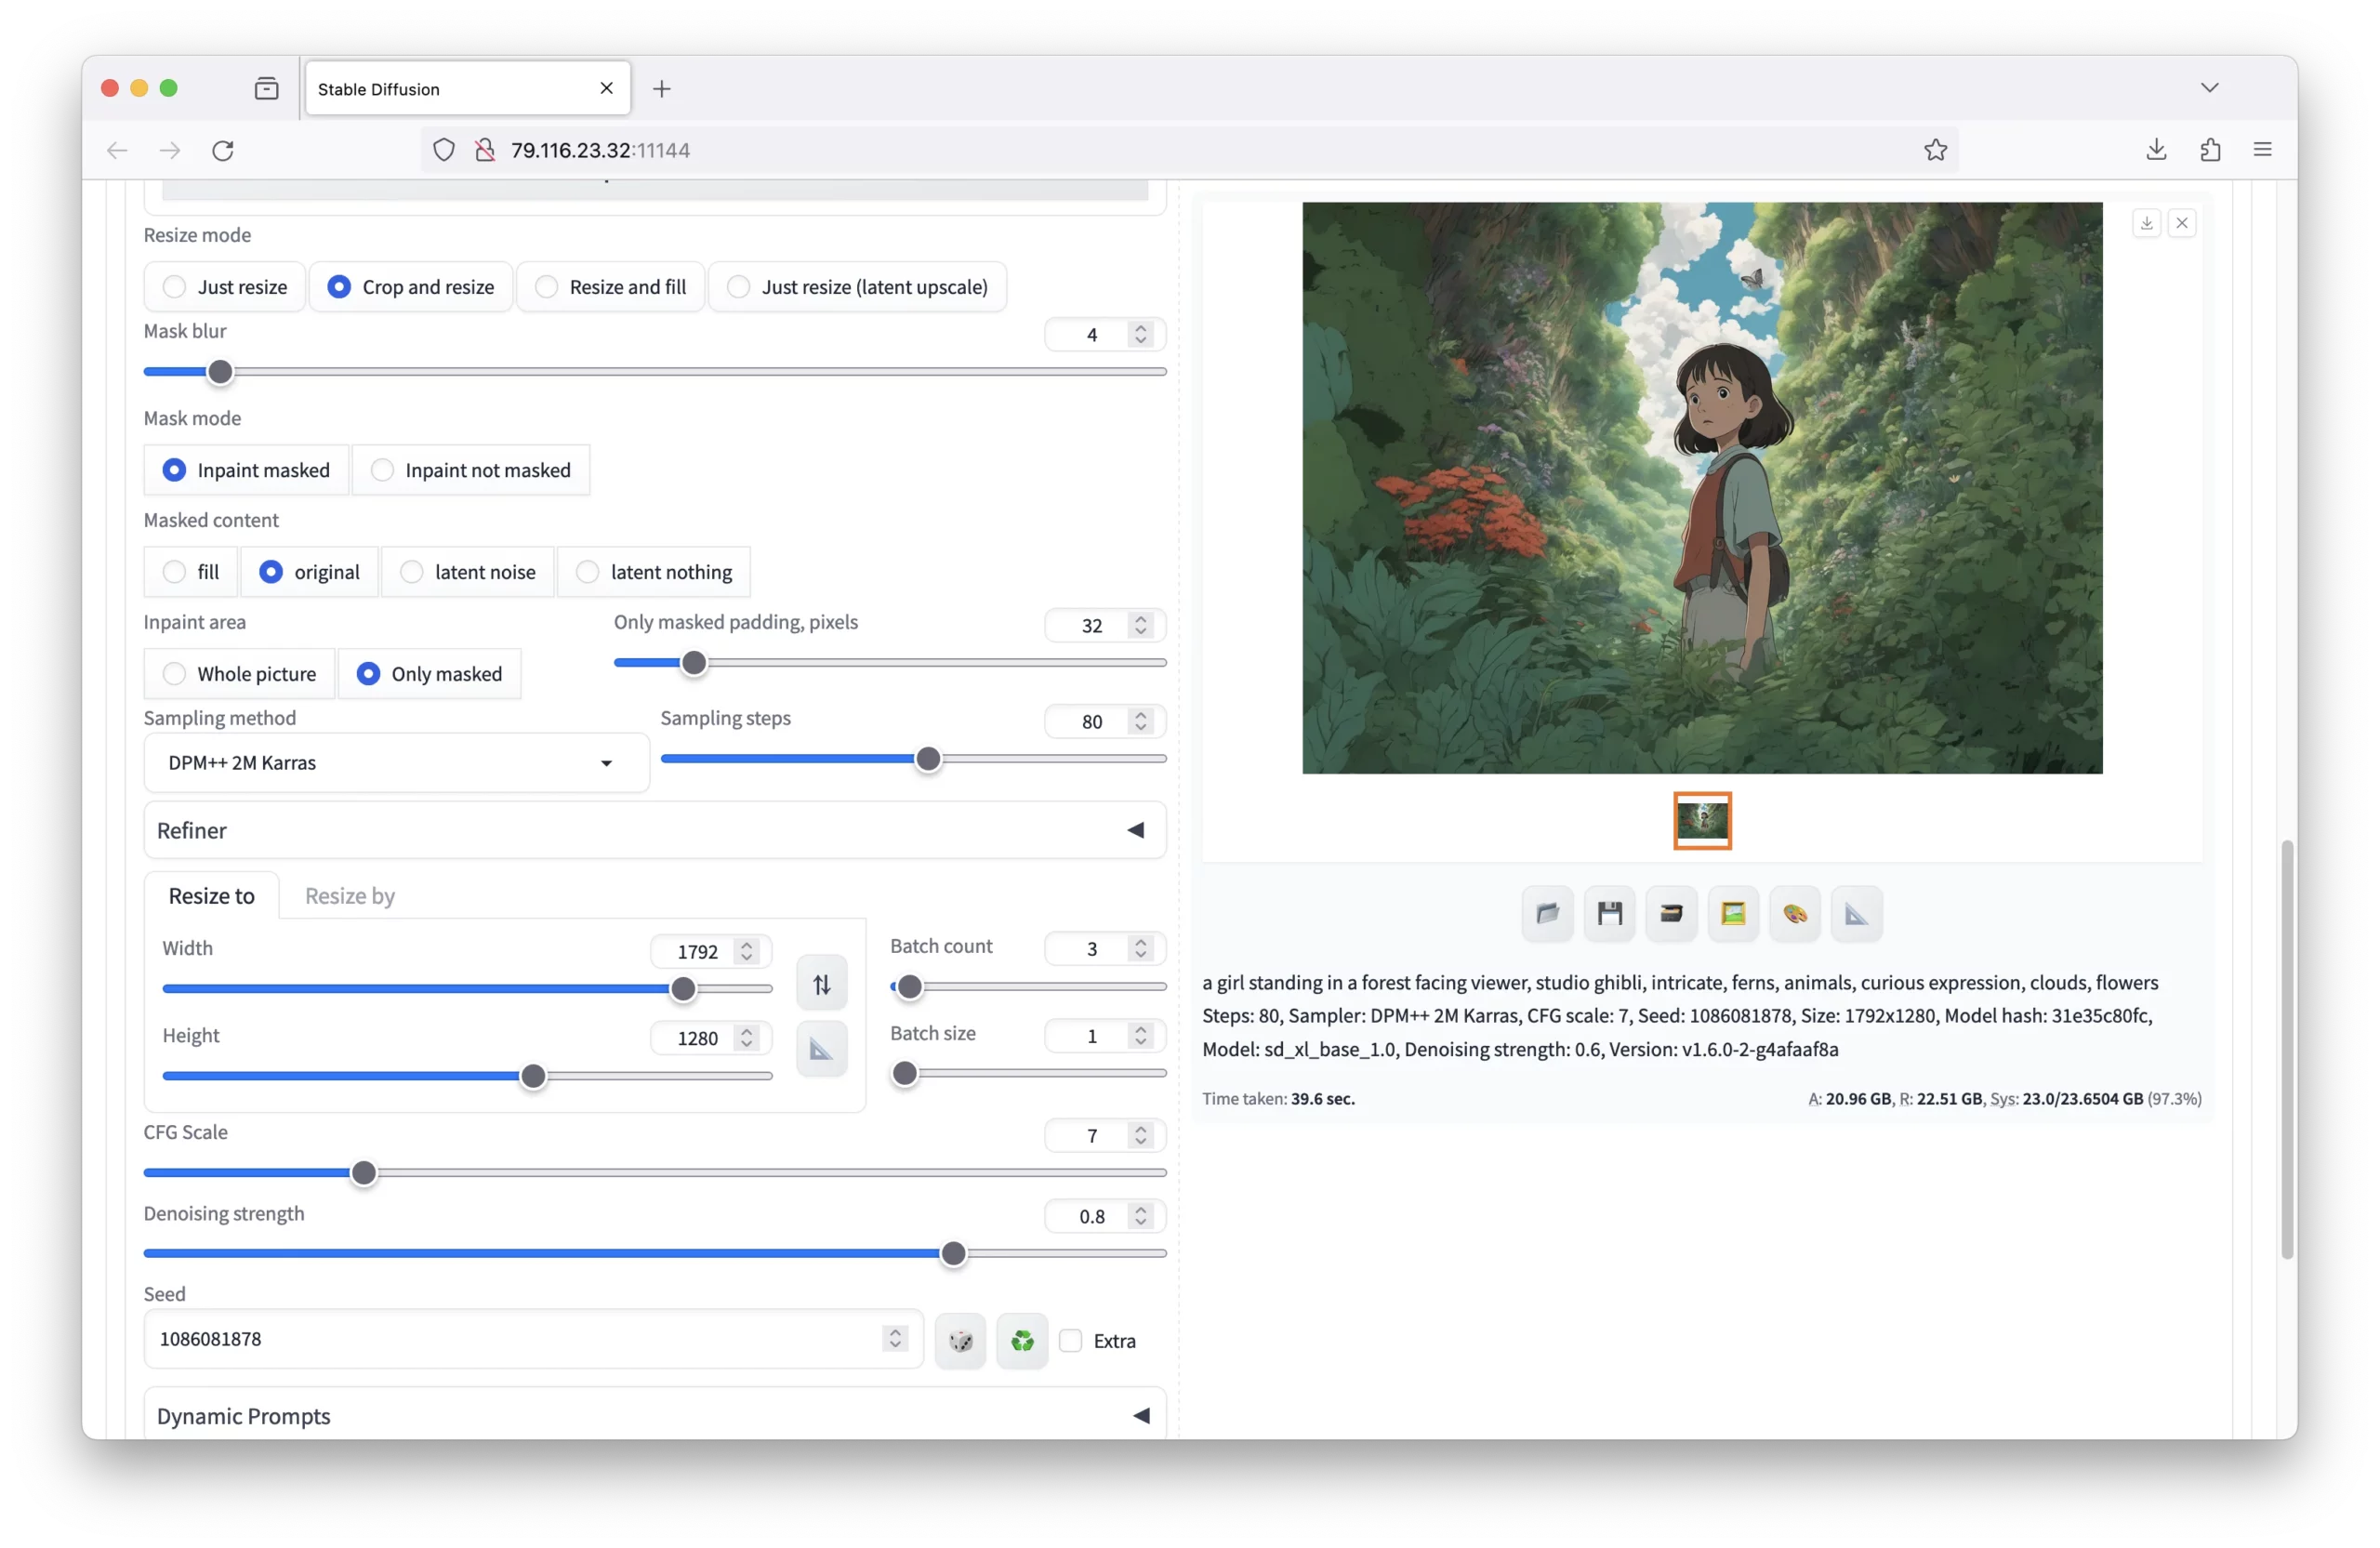
To begin inpainting, click the brush icon and highlight the area that needs adjustment:
 Additionally, you’ll need to set the following parameters:
- Inpaint Area: Set to ‘Only Masked’.
- Batch Count: Generates several images at once. Set to 3 or 4 for quick but manageable results.
- Denoising Strength: Set to 0.8 to ensure some compliance without strictly following the original composition’s errors.
Here’s an example of the inpainting parameters:
 Once you are happy with the inpainting, click ‘Generate’ to see the results.
Here are the results of our inpainting for three different images:
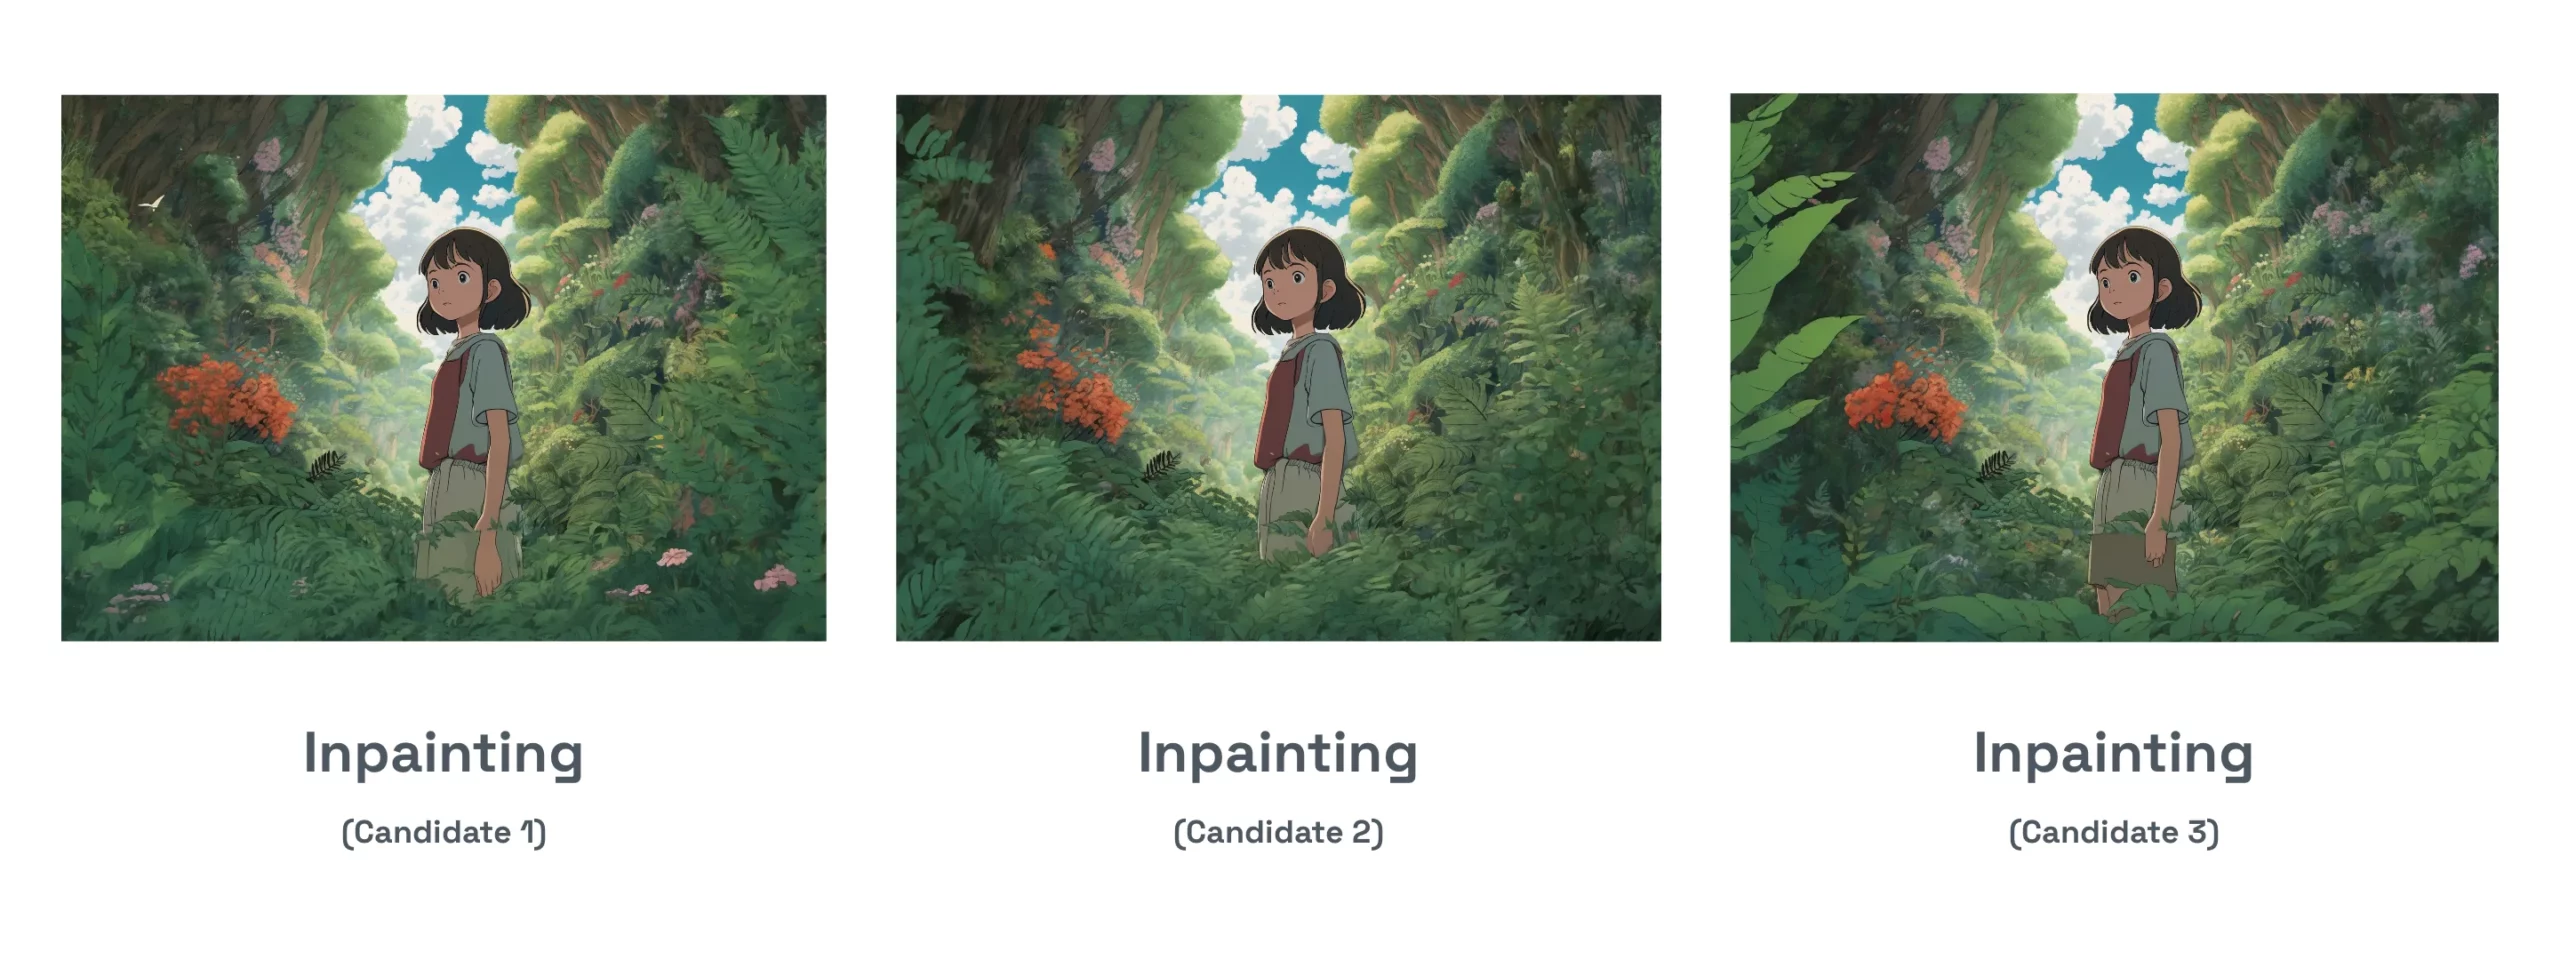 Click to view full resolution.
The images are different and still have areas that could be cleaned up. However, the edges no longer look out of place, resulting in a more natural composition. Our original subject that was not masked in the center remains unchanged.
Common Problems and How to Fix Them
Outpainting can be tricky, and two of the most common problems are blurry edges and lines on the edge of the outpainting. Here’s how to fix them:
Blurry Edges
 Blurry outputs are often due to low denoising, a different sampling method from the original image, or too few sampling steps.
The example above had the denoising set to 0.17. However, increasing it to 0.8 produced a much better image:
 Note: Sampling steps = 80, Sampling method was DPM++ 2M Karras
Expanding in All Directions
 Expanding in all directions at once can cause mistakes in one area to carry over to others. To fix this, outpaint one edge at a time or set the denoising strength higher (e.g., 0.8+).
Expanding Too Much in One Direction
 Expanding too much in one go can lead to repetition. To fix this, outpaint in smaller increments (ideally 128px).
Harsh Lines With Each Extension
To reduce harsh lines during generation, adjust the mask blur option available in both Poor Man’s Outpainting and mk2.
Here’s an example of images with a mask blur of 0, 8, 32, and 64:
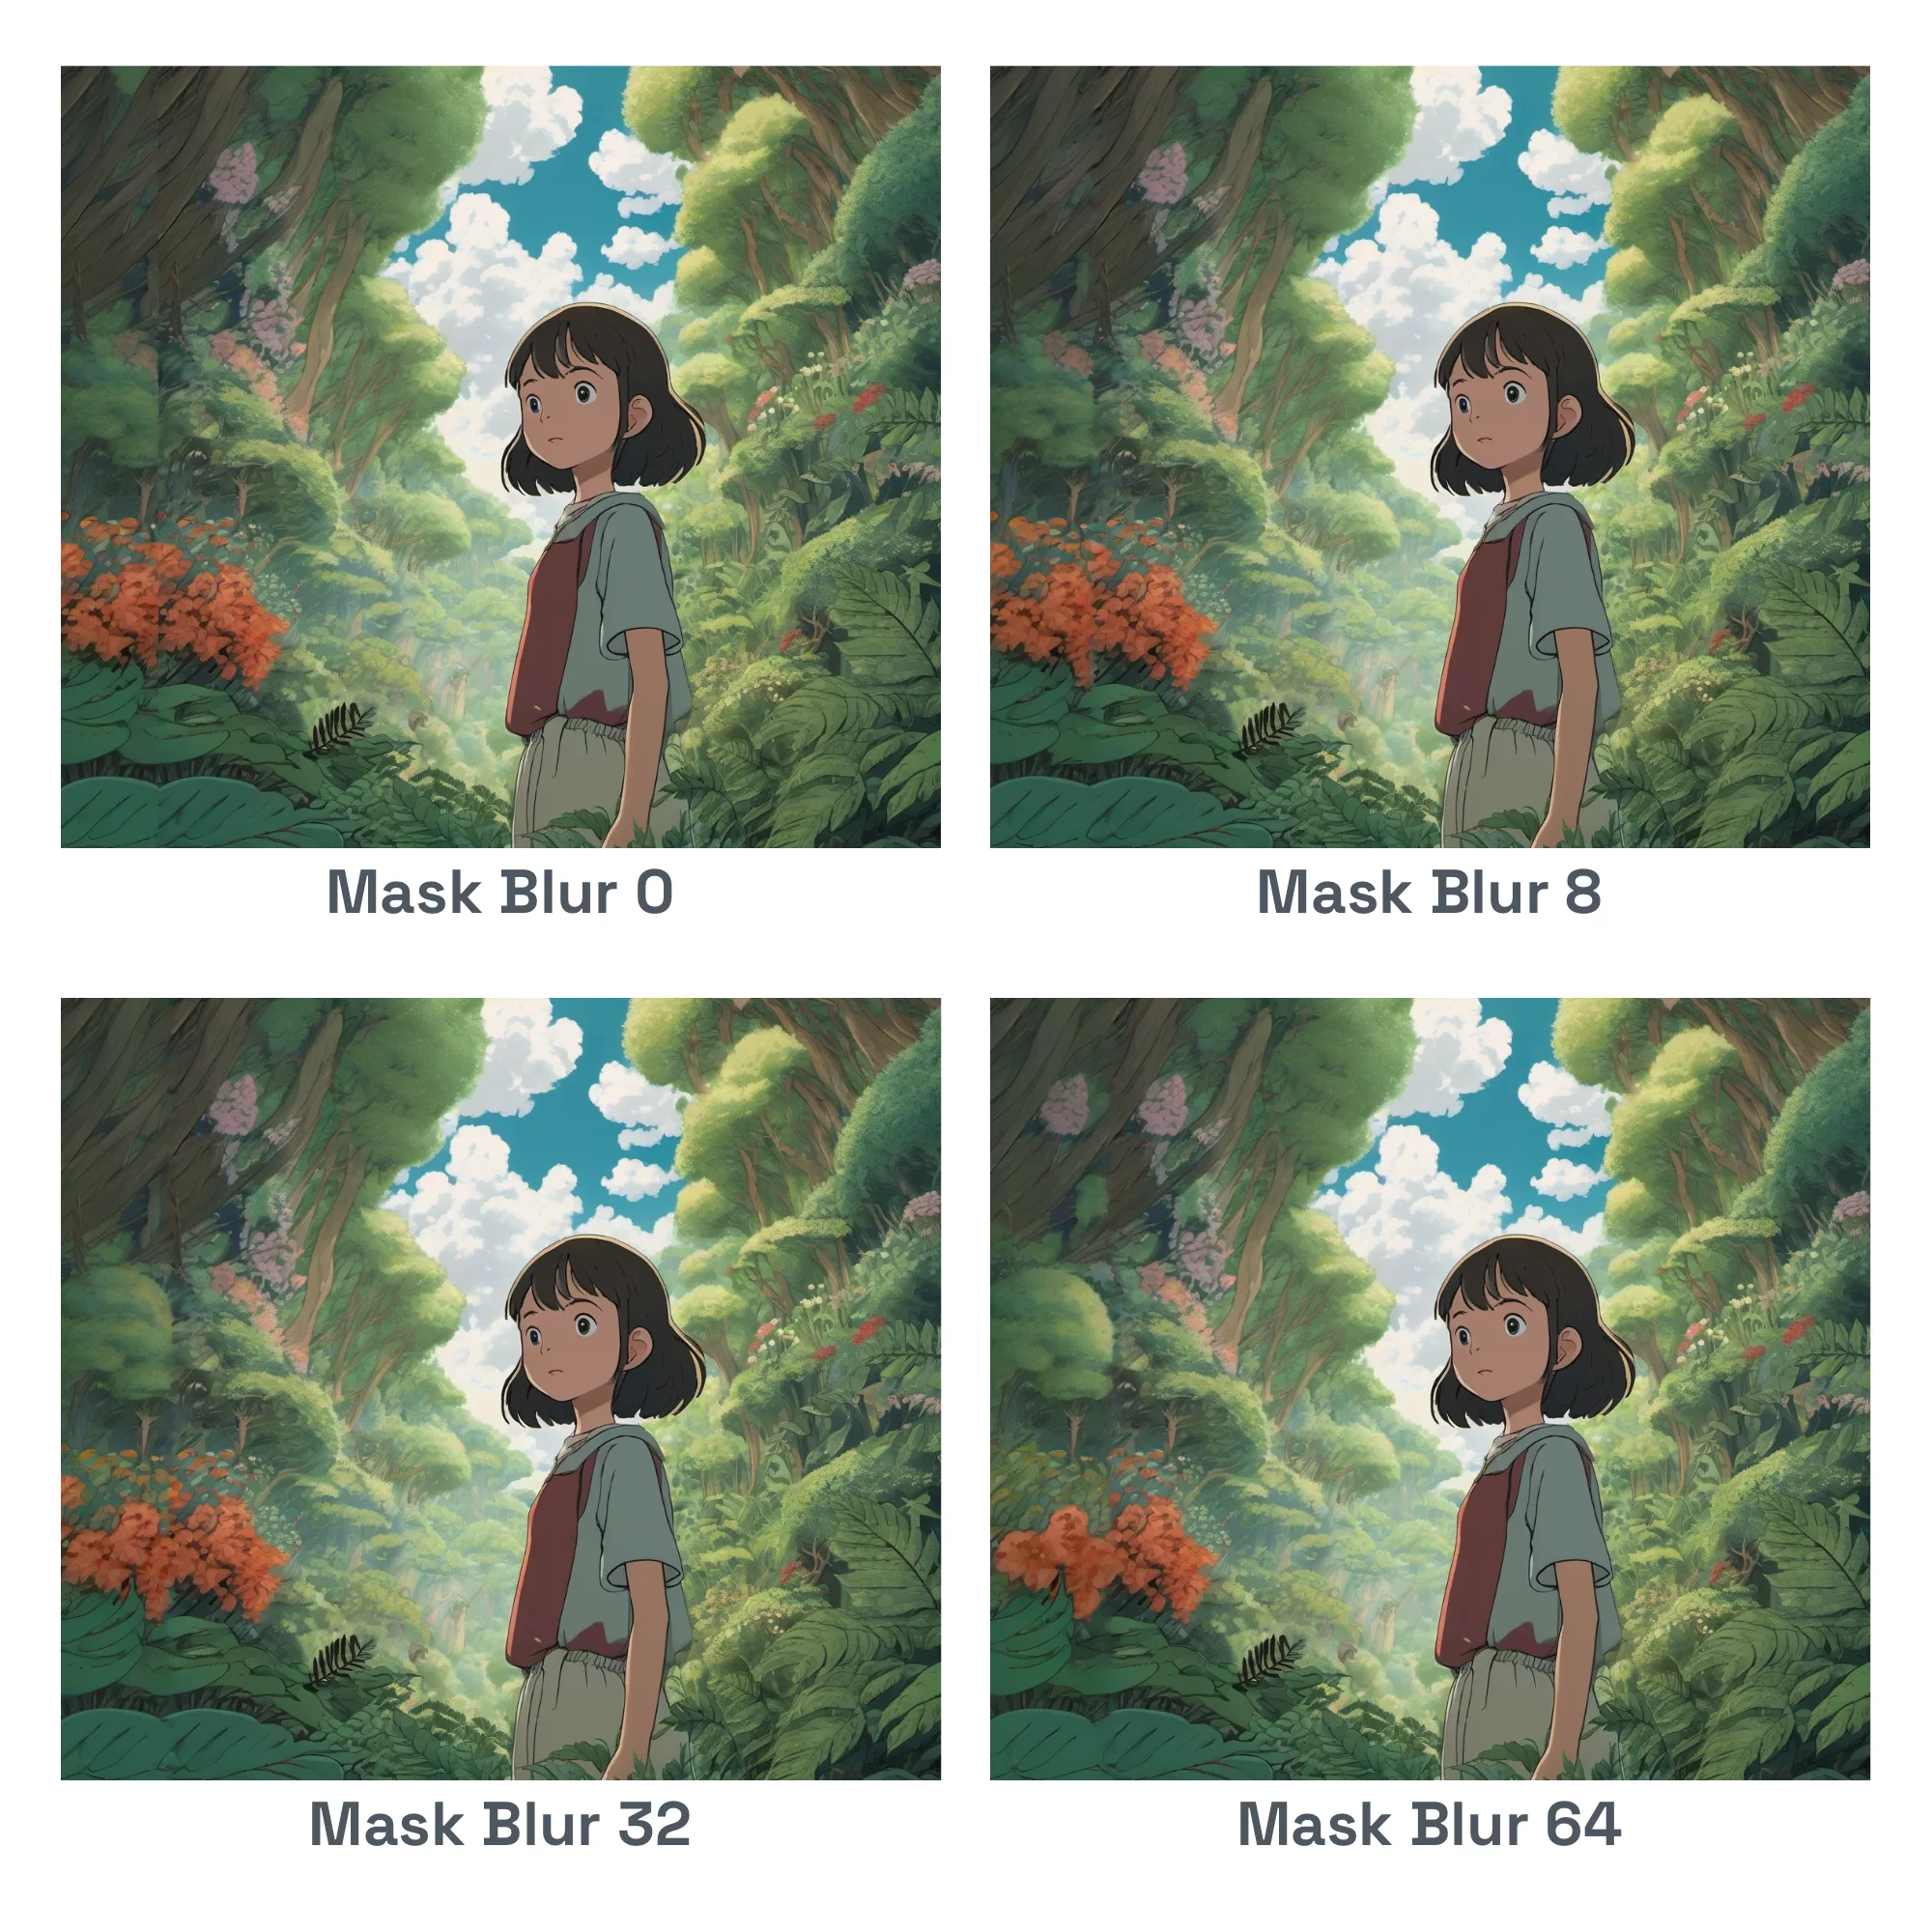 A mask blur of 8 to 32 is ideal, while 0 is too sharp and 64 introduces repetition.
Want More AI Image Tutorials?
Get the best AI image tutorials and tool reviews—no spam, just 1 or 2 helpful emails a month.
Continue Learning
More Outpainting Tutorials
Explore additional tutorials in the Outpainting category.
View All Tutorials